Although there are many benefits of assigning static IP address to a machine, it really helps me to stay organized and can monitor my machines with more convenience. Besides, it became a habit that whenever I have to access machines from Vmware or VirtualBox, I like to SSH to it from my host machine. So, in this article I will share how to set a static IP address to your machine without using any Graphical Tools (because 99.9% of the servers which I had worked have no GUI, moreover I enjoy the power it caters).
Task:
Assign a Static IP address using following information (you can alter it based on your Host-only Network IP address)
IP address: 192.168.56.11
Default Gateway: 192.168.56.1
DNS: 192.168.56.1
Netmask: 255:255:255:0
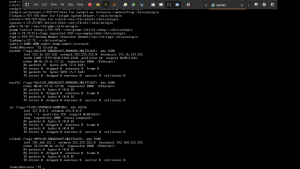
I ran a ifconfig on my machine. You can clearly see that I have two Network Interface (ifname) slots and one is empty (i.e. ens192) (By the way, you can click on the image to magnify the view)
Command:
First, let’s run
nmcli c s
nmcli is the networking management tool or the package we are going to use (although nmtui is a great option but it may not be available on all the server)
c is the shorthand of connection
s is to show
To know the interface name and other details…
Yes. the above command did help us to confirm our understanding which we inferred from the ifconfig result.
Here we go
nmcli connection add con-name lab ifname ens192 type ethernet autoconnect yes ipv4.addresses 192.168.56.11/24 ipv4.dns 192.168.56.1 ipv4.method manual
Narration:
Although you can understand what each flag does by simple doing a man nmcli , let me do a little explanation just to have a grab of the concept for myself.
We are adding (add) a new connection name (con-name) called lab on the network interface (ifname) ens192, which connects automatically with IP address 192.168.56.11/24 (and netmask 255.255.255.0) using nmcli package.
Method manual means it is a static IP assignment. Until we explicitly change the IP address, it won’t get like how we experience with our home devices (which are on DHCP).
nmcli connection lab up
It appears that the new connection is ready despite we don’t run the aforementioned command, however, I like to run it (because I am afraid it may not be the case in an exam environment or real server that you will have to manage).
To verify the result…
ifconfig
We got IP address and Netmask correct
cat /etc/resolv.conf
We got DNS correct
However, we did get the Gateway configured.
route -n
It is indeed bless in disguise because we got the opportunity to learn how to edit the value in case we need in the future. I know the command is something to do with edit so, let me know quickly run a man nmcli

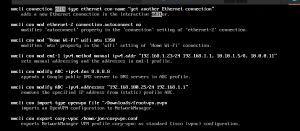
The above screenshot is nothing but the output of man command.
Method 1
nmcli connection edit type ethernet con-name lab
It will prompt you an interactive shell. You have to choose set option
ipv4.gateway 192.168.56.1
then press q to exit and save.
Method 2 (Referred from this site)
I really like this command more. It’s simple and easy to get the jobs done
nmcli connection modify lab ipv4.gateway 192.168.56.1
To verify:
route -n
Combined output result is in the screenshot
Finally we have to reboot the machine and check whether it is working fine or not.
Yes, everything is working perfect and just to confirm you about the Gateway, I enclosed the result in here.
route -n


Leave a Reply